The Epicflow team has developed an iOS-based app to ensure users can access their task lists anytime, anywhere, from their smartphones. The app is available exclusively to Epicflow system users.
Mobile App Installation
To download the application to your device, simply follow this link – App Store.
Register your Mobile
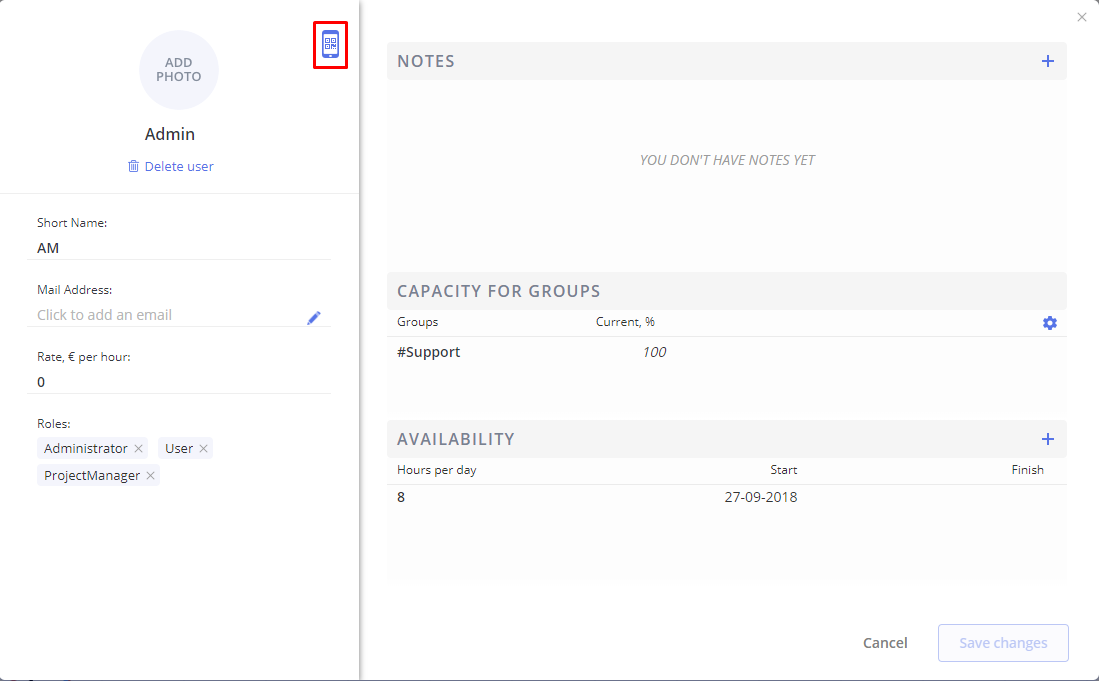
Screen #1– User-card
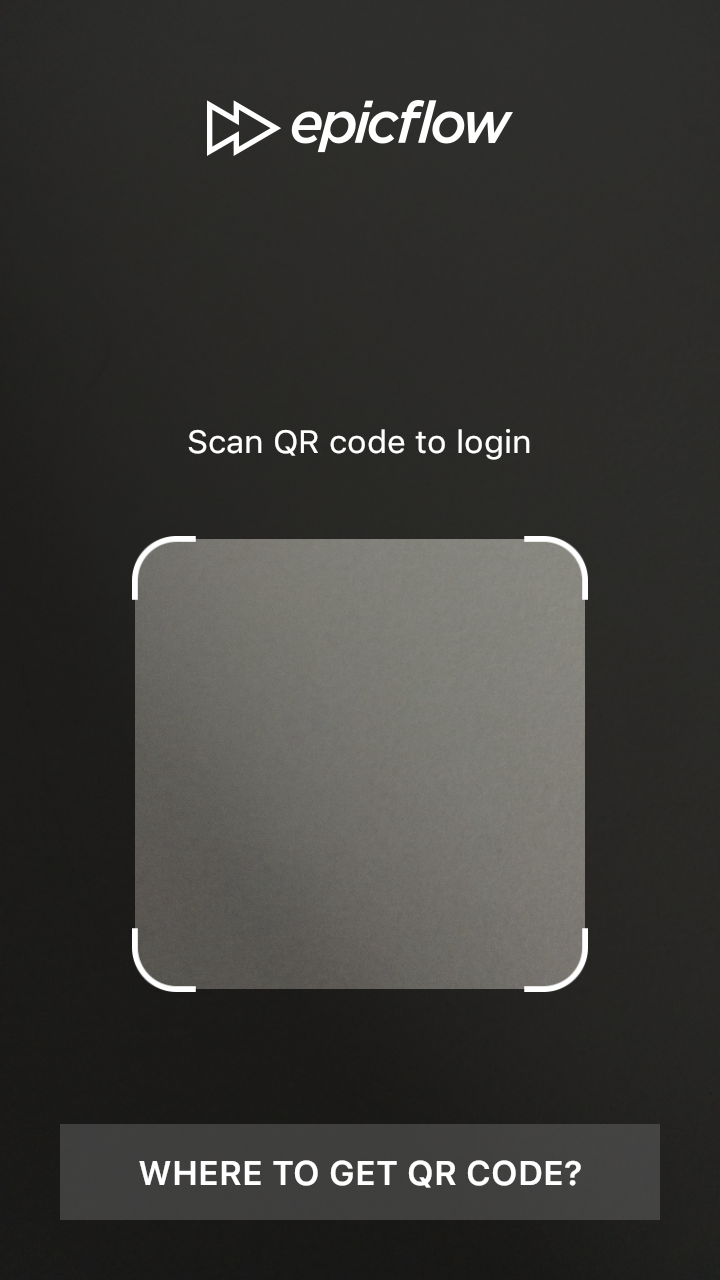
Screen #2– QR-authorization
To login to the Epicflow mobile application, you’ll have to scan your personal QR code from your user card in the system and continue to the task list.
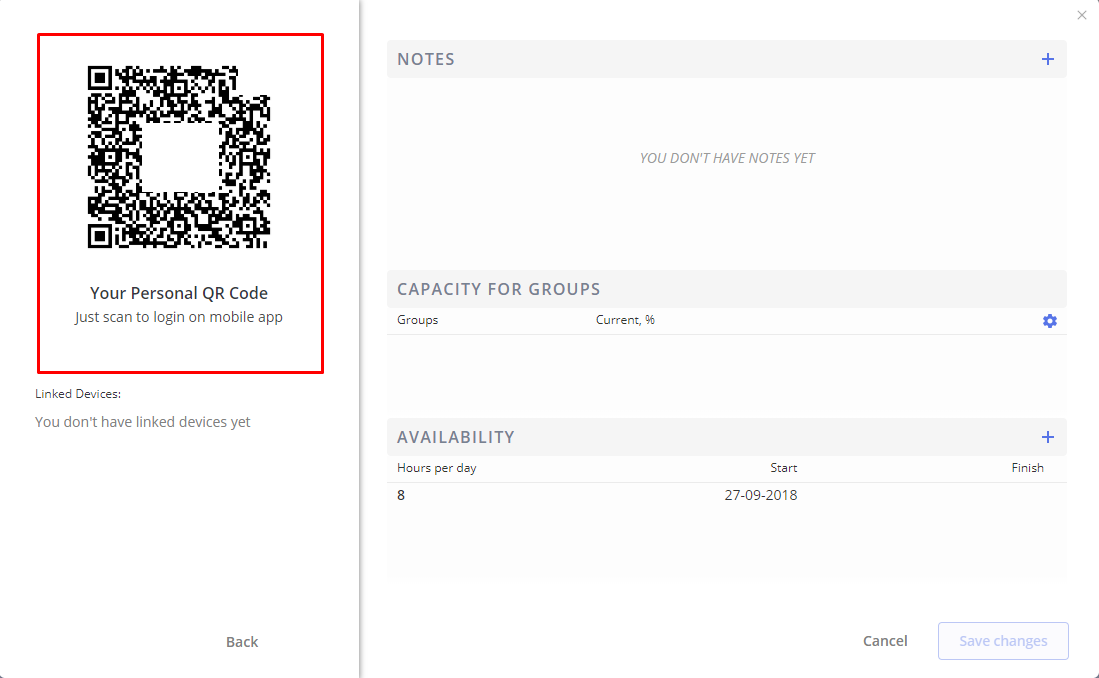
Screen #3.1– Personal QR-code
Also on the QR code page there is a record of all connected devices to the account
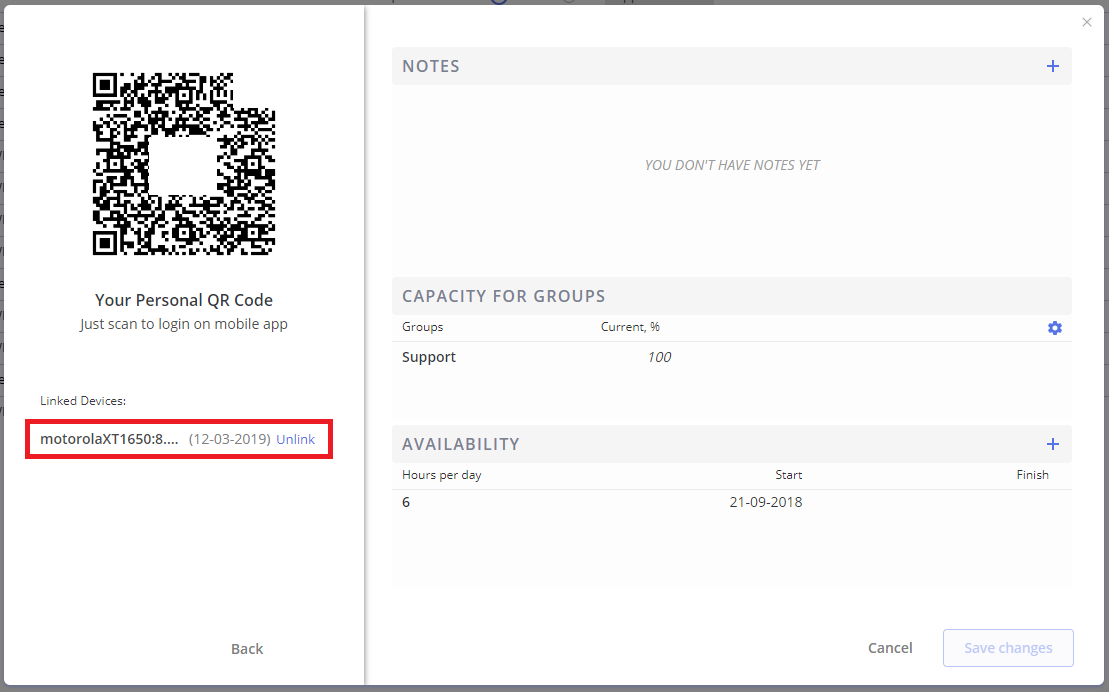
Screen #3.2– Personal QR-code
Screen #4– Scanning QR (mobile)
When the application considers your personal QR code, the application will begin the authorization process. In case of success, you will see the message shown below
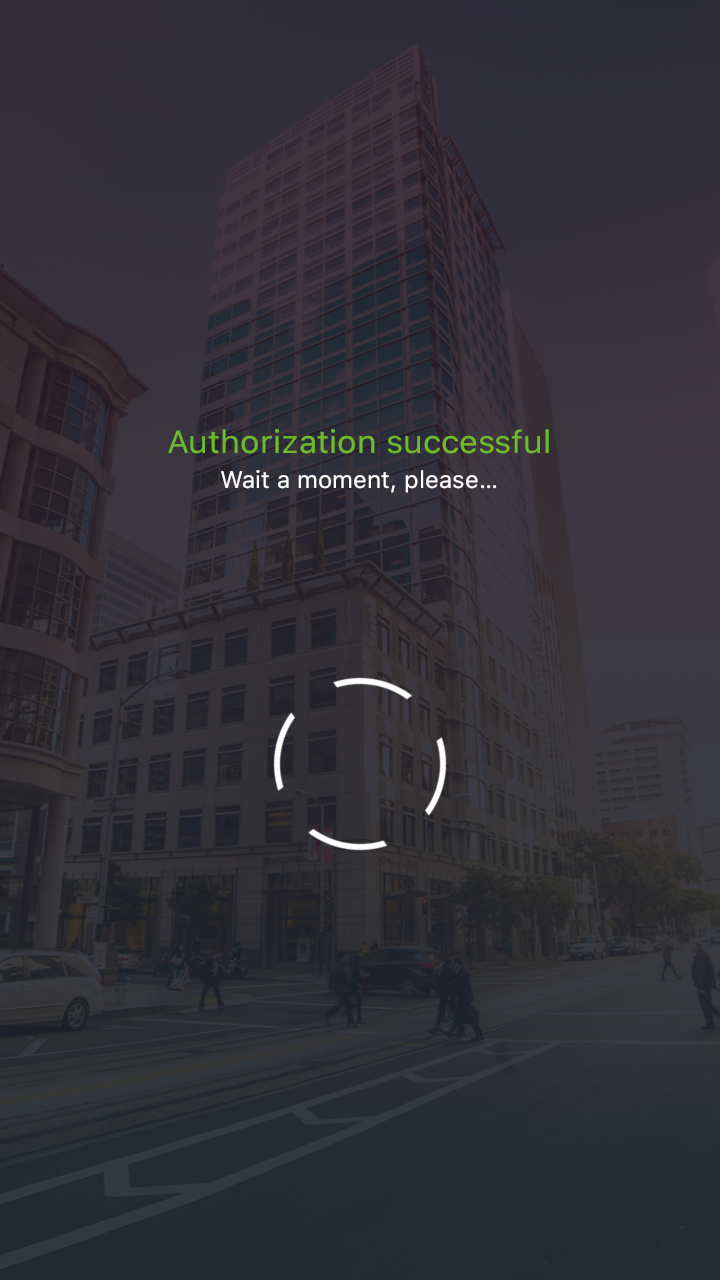
Screen #5– Successful authorization (mobile)
Functionality
After you login to the system, you’ll be able to navigate to two tabs: Task List and User Card (a simpler version than you see on web).
User сard
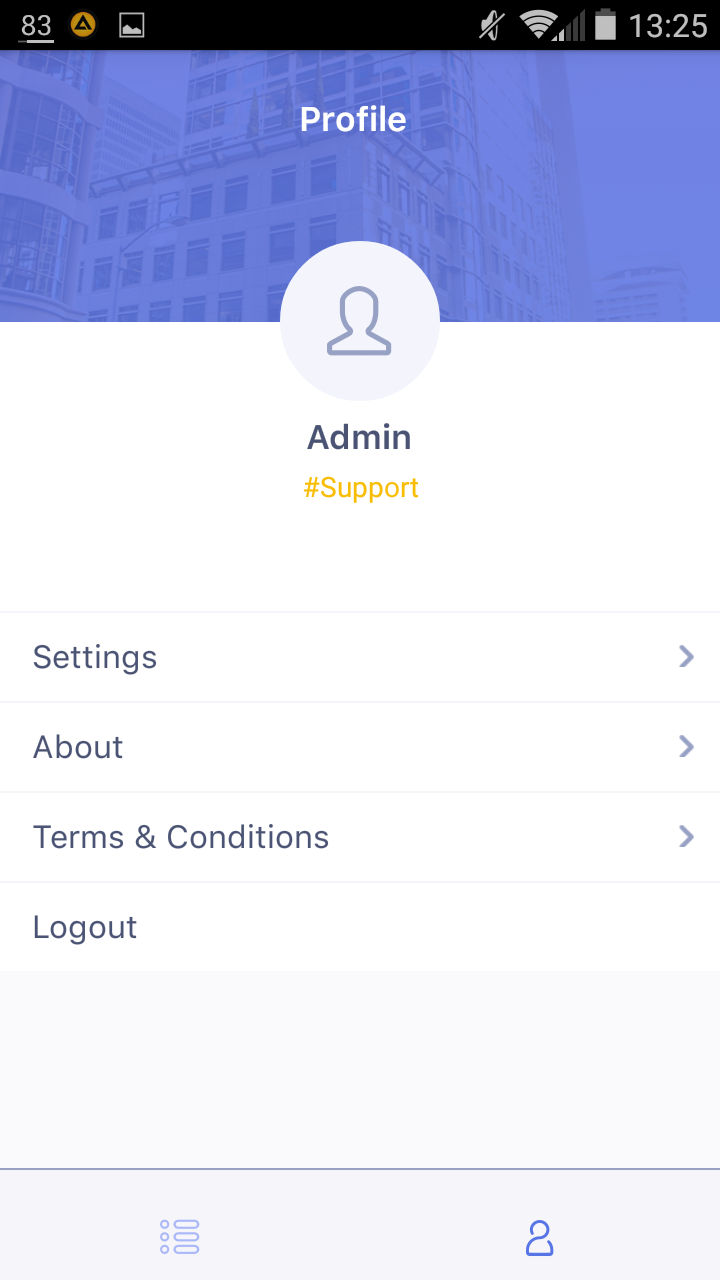
Screen #6– User Card (mobile)
The user card will show you the icon, your short name, email address, and the group(s) you belong to. From there, you can directly go to Settings and Terms & Conditions or log out. In the settings, it’s possible to enable passcode to ensure that no one else except you can reach your app. You can also use Touch ID to login if you enable the passcode. Apart from this, you are allowed to switch on/off “Adjust spent hours” and “Fine-tuning for minutes,” using the small slider in the settings. Find what it means later in the article.
Task list
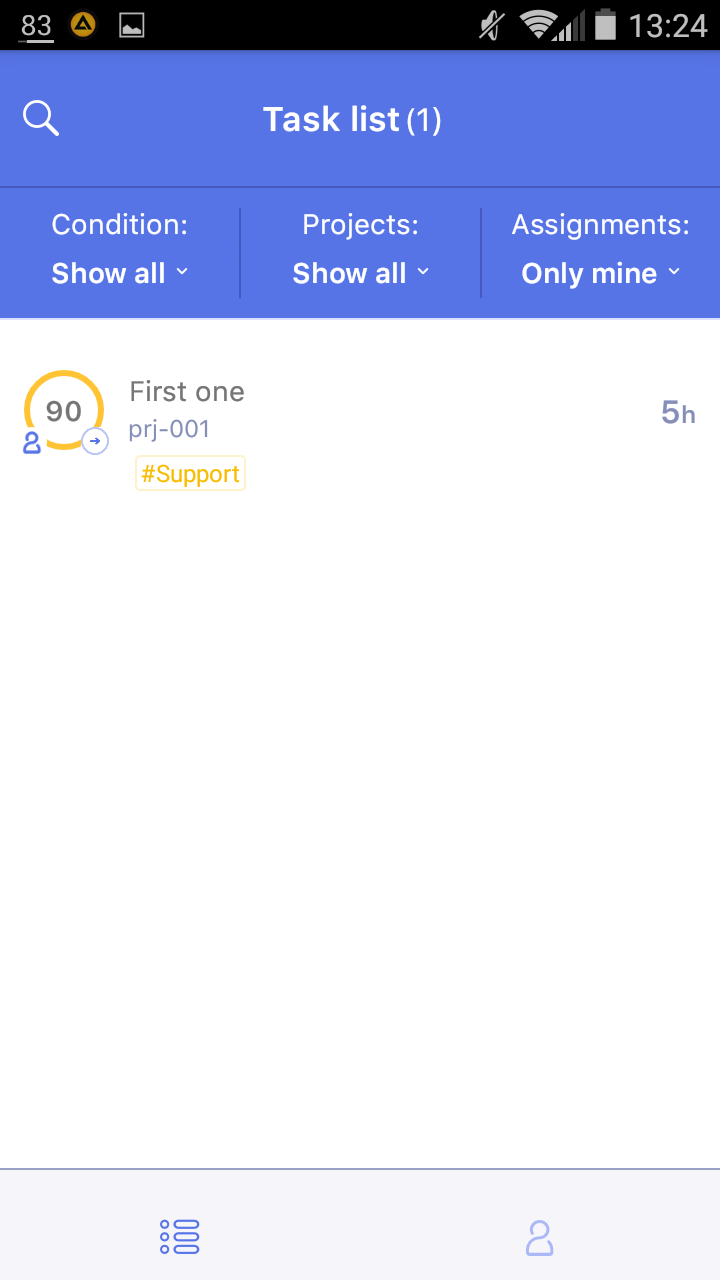
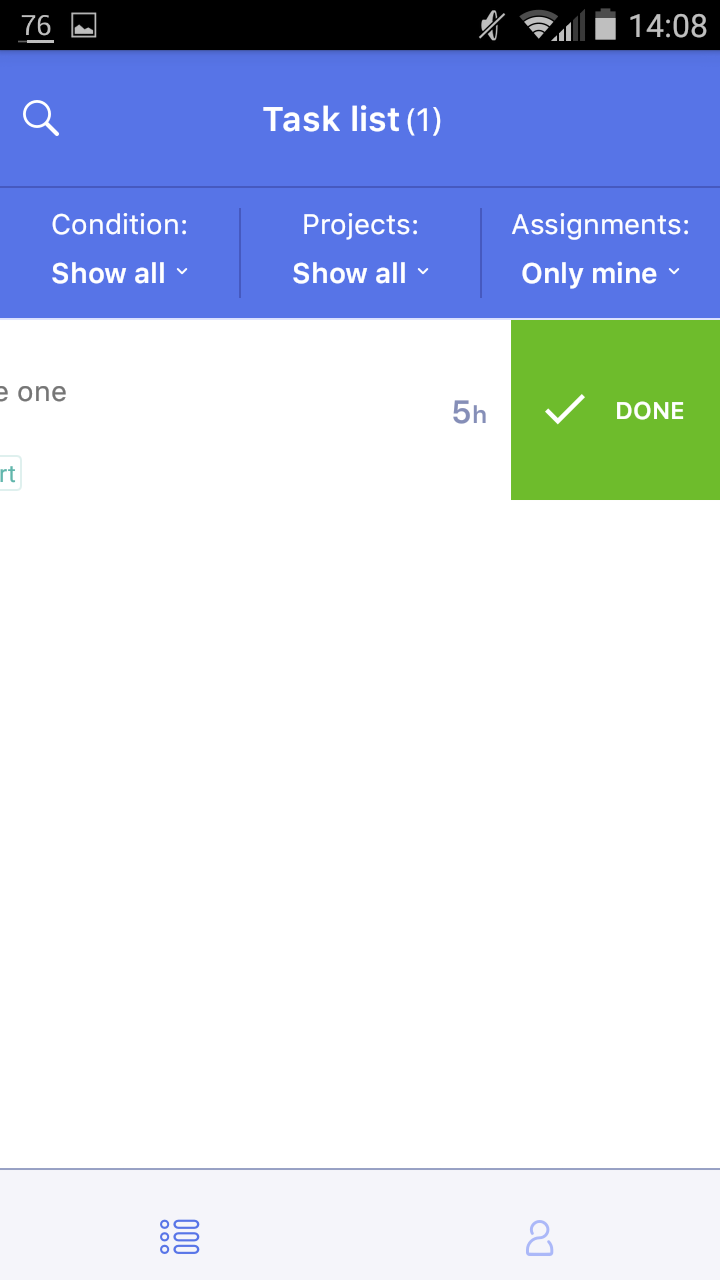
Screen #7– Task list (mobile)
Task list is a feature of Epicflow that guides the user to work faster and smarter across multiple projects by suggesting the best possible combinations of project priorities. It brings high priority tasks to the top, indicating project delays by the amount of days.
Priority is the first column and it is visualized with the help of numbers. The value of the element starts with 0 and goes up to any positive value. Starting from 100, however, each additional point indicates days of project delay in a chain of tasks. We recommend to accomplish the task with the highest priority at the first place. If there’s an icon near the task, it means that you’re assigned to this task.
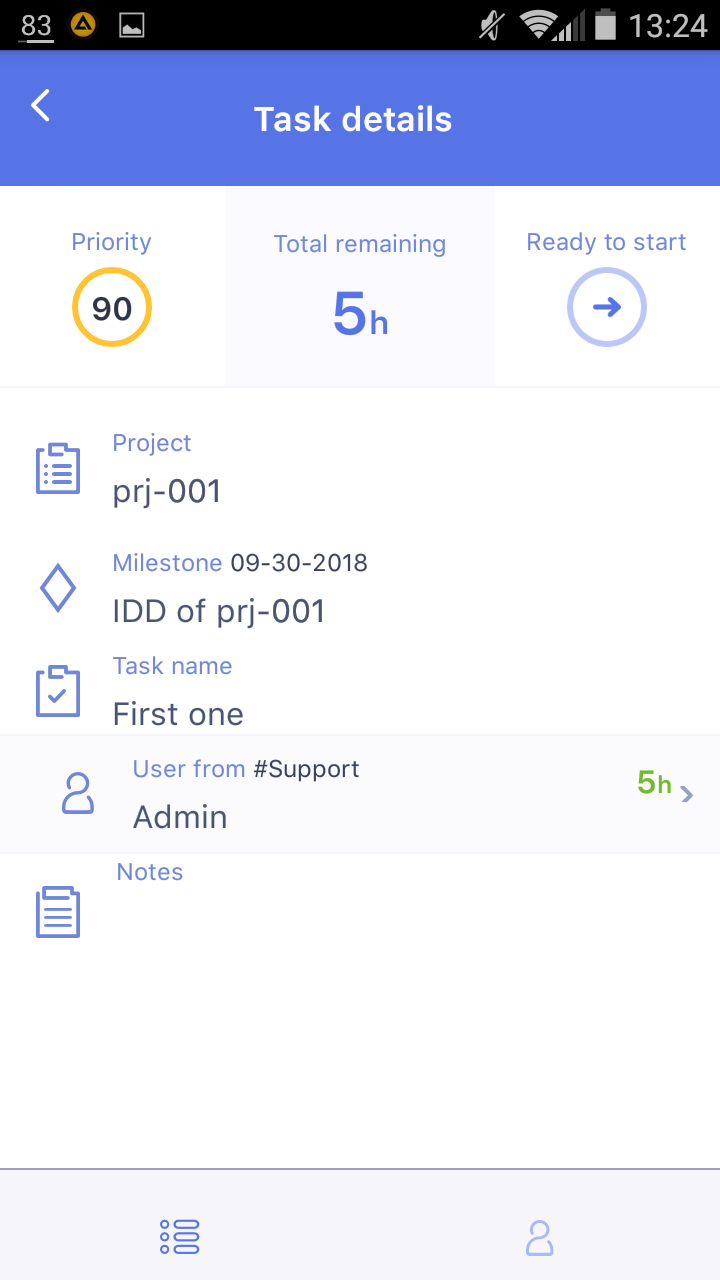
Screen #8– Task-card (mobile)
The Task List consists of three pages – Condition, Project, Assignment. They will help you to filter your tasks accordingly. You can choose what to visualize up to your convenience and preferences. In fact, you might want to sort your tasks according to the projects – and you can do it in the app, or choose a view for your Apple watch – this is also possible in the task list’s project section. To reset all the filters, just shake your smartphone or press “Reset filters.”
Trivial Usage
The user’s actions in the mobile application are reflected in the main system.The user can write off the hours from assigned tasks gradually.
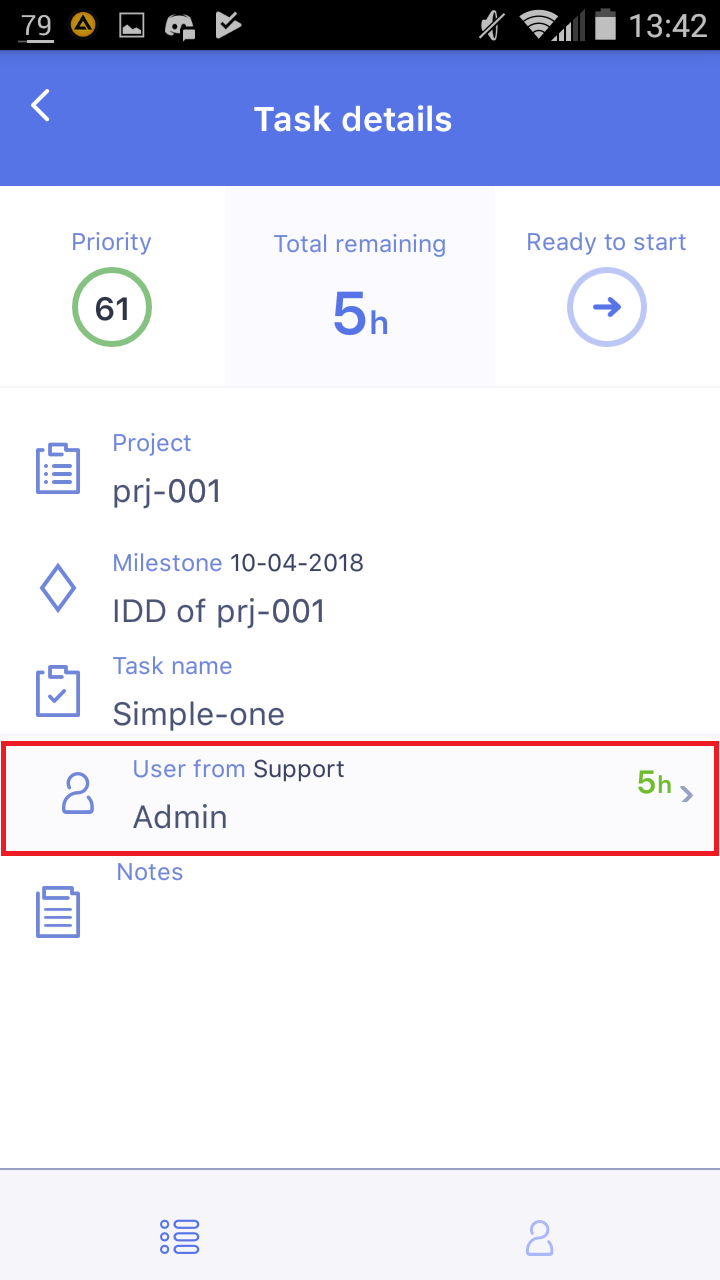
Screen #9– Task-card hours write-off hours (mobile)
Pressing this button the user will enter the menu with a time-wheel, with which user can increase the remaining hours assigned to the task. After clicking the “Apply” button, the changes will take effect for the entire system.
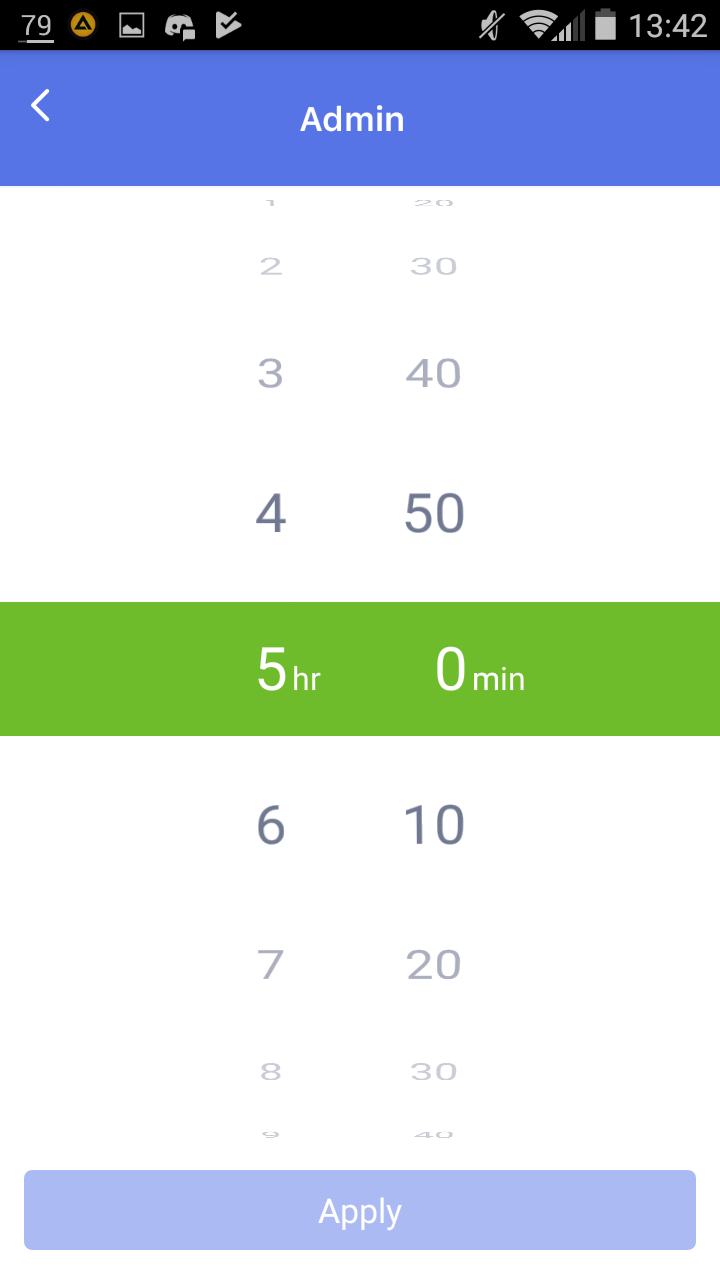
Screen #10– Time-wheels Total Hours (mobile)
When the users decreases the total hours for a task, they are simply reporting the spent hours. For example, if a task originally has 4 total hours and the user reduces it to 2 hours, it means that 2 hours has been reported as spent.
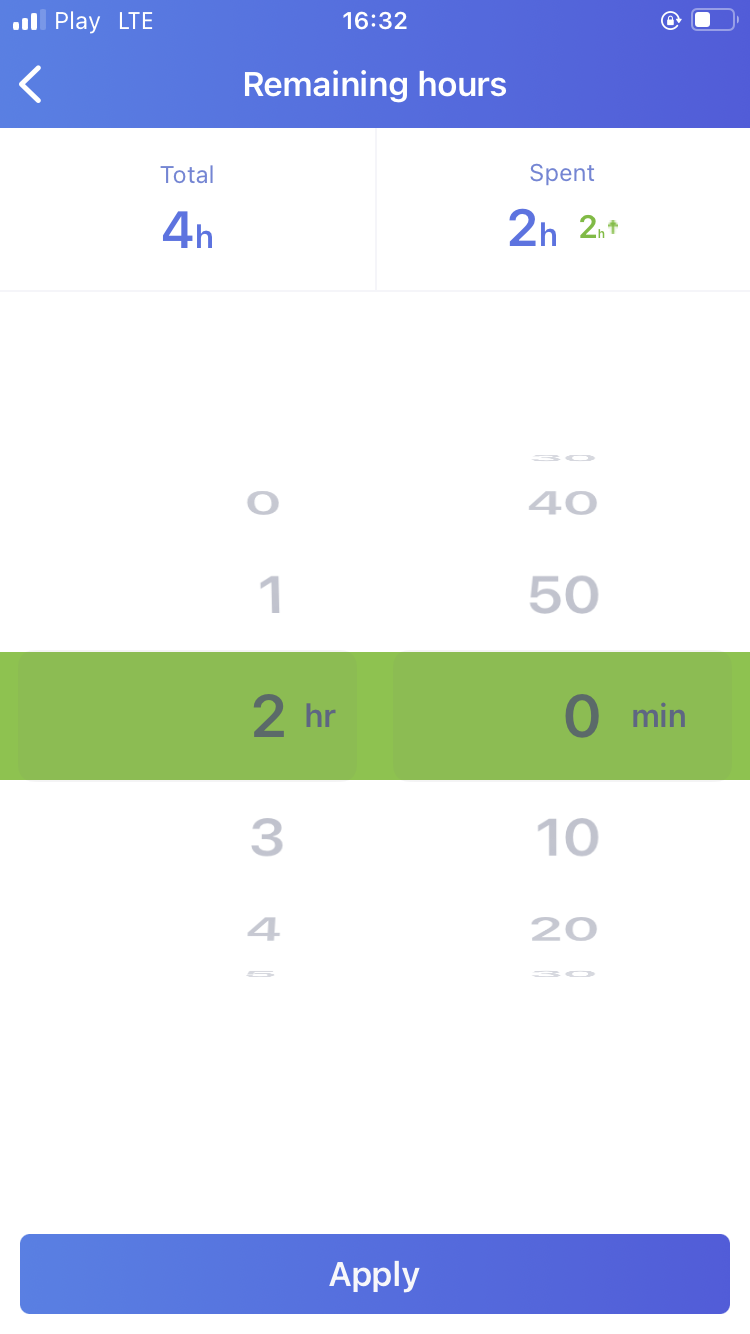
Screen #11– Time-wheels Spent Hours (mobile)
Or use the system of quick gestures:
- To unassign a task to the group, you can swipe the task to the right.

Screen #12– Unassign task (mobile gesture)
- To mark it done, you can swipe the task to the left.
Screen #13– Quick done (mobile gesture)