Epicflow allows users to export all kinds of management data that can be used in the 3rd party tools like Qlikview, Power BI, or Excel. The data can be exported automatically for a specified time frame or manually. In this article, we discuss the manual option. To know more about automatic export, contact our support team.
Export Permissions
For the different set of Reports, appropriate permissions must be granted. To set the permissions, go to the “Admin” page and within the selected group go to “Export reports” permission.
- None – User is only allowed to download his or her Timesheet.
- Basic – User is allowed to download only basic reports.
- Advanced – User is allowed to download basic and advanced reports.
Note that the reports show only the data that you are entitled to see based on other permissions, e.g. if you don’t have the right to see the financial information, these columns remain empty.
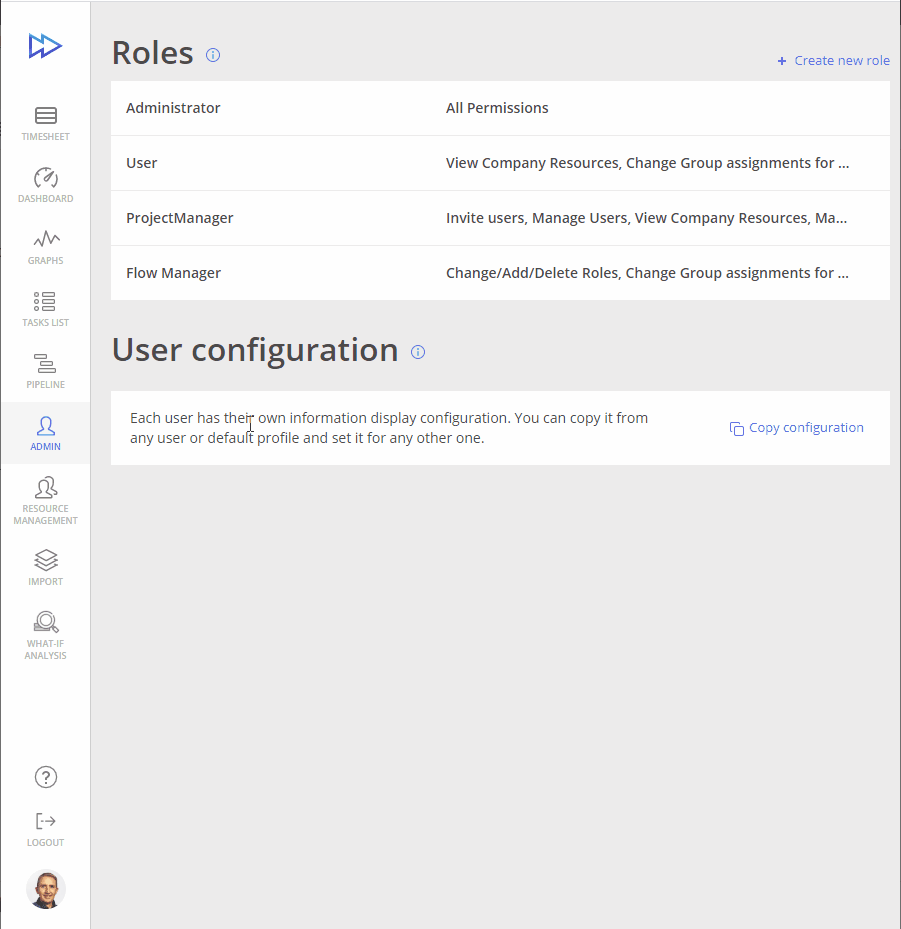
Screen #1 – Report Export – Permission granting
Below, you’ll find a description of each Report Export type and a more detailed description of each report.
Basic vs Advanced
When you have permission to export advanced reports you get the option to download basic or advanced reports as shown below.
The basic reports contain the most important data and can be used as a stand-alone table. The tasklist, timesheet, and resource tables are examples of basic outputs. In the case of large data sets, these tables can be less efficient because of their structure.
The advanced option provides a set of tables similar to a database setup. E.g., a task assignment contains only the resource id and if you’re looking for the resource name, you have to check the resource table. As a user, you can select the tables of interest. Advanced reports are available only on Pipeline and Gantt chart in the Quick Edit mode.
Screen #2 – Advanced and Basic Reports Export
Report Types
Timesheet Report
Navigate to the Timesheet page and select the “Export report” icon. In the newly appeared frame you can define:
- the range for which a report must be generated;
- file format CSV(zip) or Excel;
- whether it should be for All users or for Selected one*
If your permission is “None” then this option is hidden and you are allowed to export your personal timesheet data only. There is no advanced mode for timesheets.
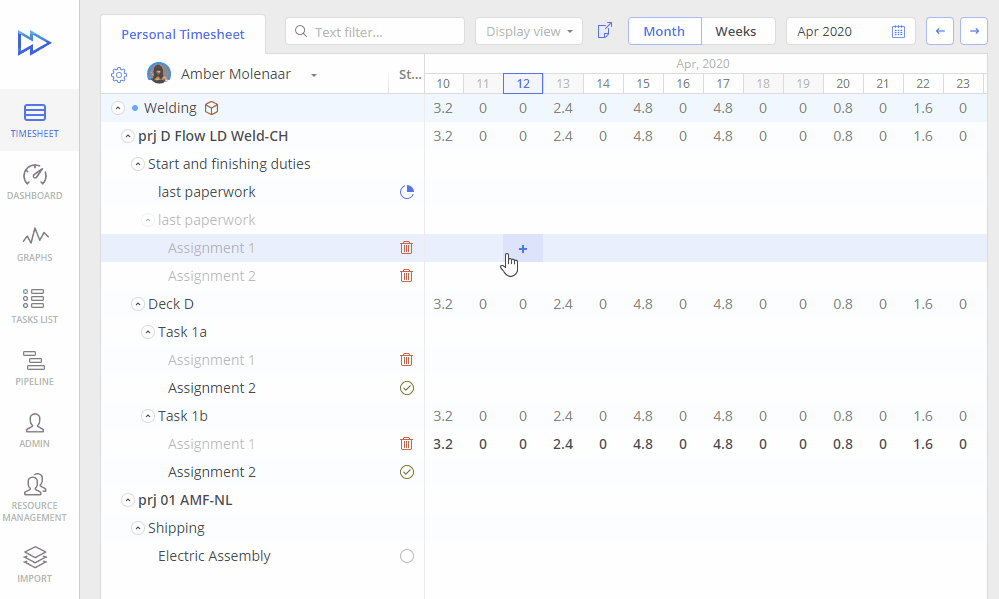
Screen #3 – Basic Reports Export – Timesheet
User Data Report
Navigate to the Resource Management page and select “Export user data”. In the newly appeared frame you can define:
- file format CSV(zip) or Excel. (-> UPDATE)
To export the advanced resource table, go to the Pipeline page.
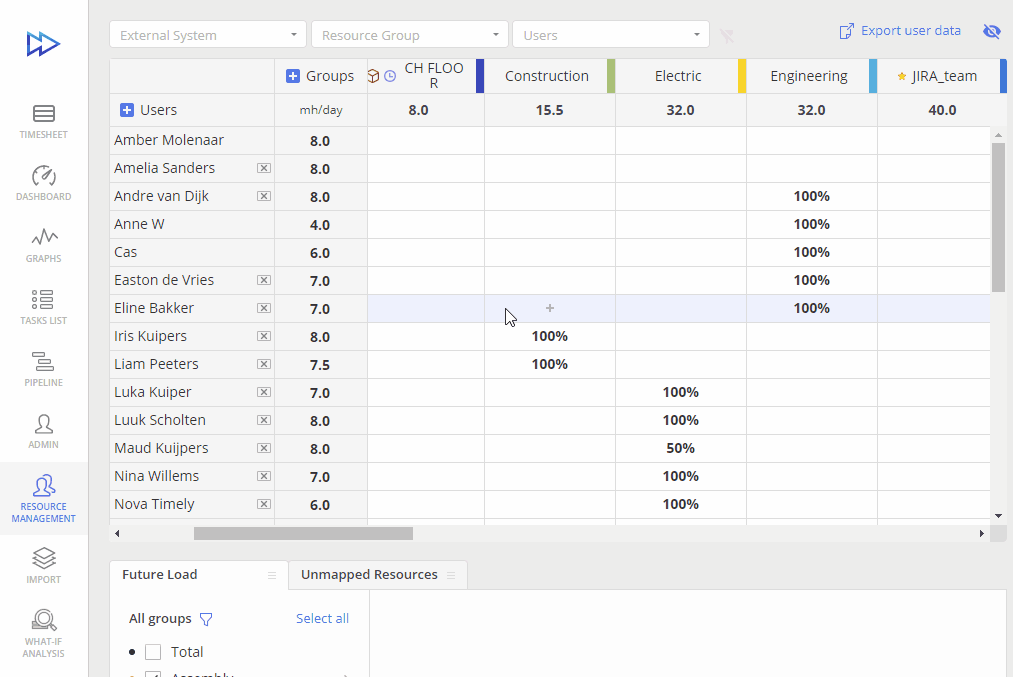
Screen #4 – Reports Export – Resource Management
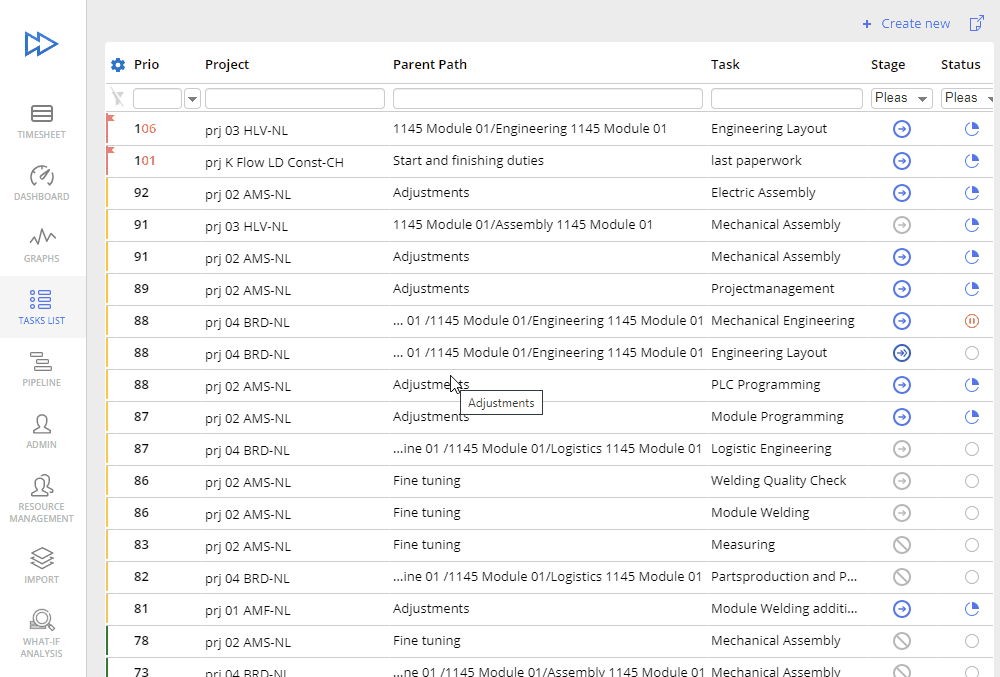
Task List Report
Navigate to the Task List page and select the “Export report” icon. In the newly appeared frame you can define:
- file format CSV(zip) or Excel;
- whether it should be for All items or for Filtered only.
If you select the “Filtered only” option, the report will contain the tasks based on the filters set on the Task List page. To export advanced task list data, go to the Pipeline page.
Screen #5 – Reports Export – Task List
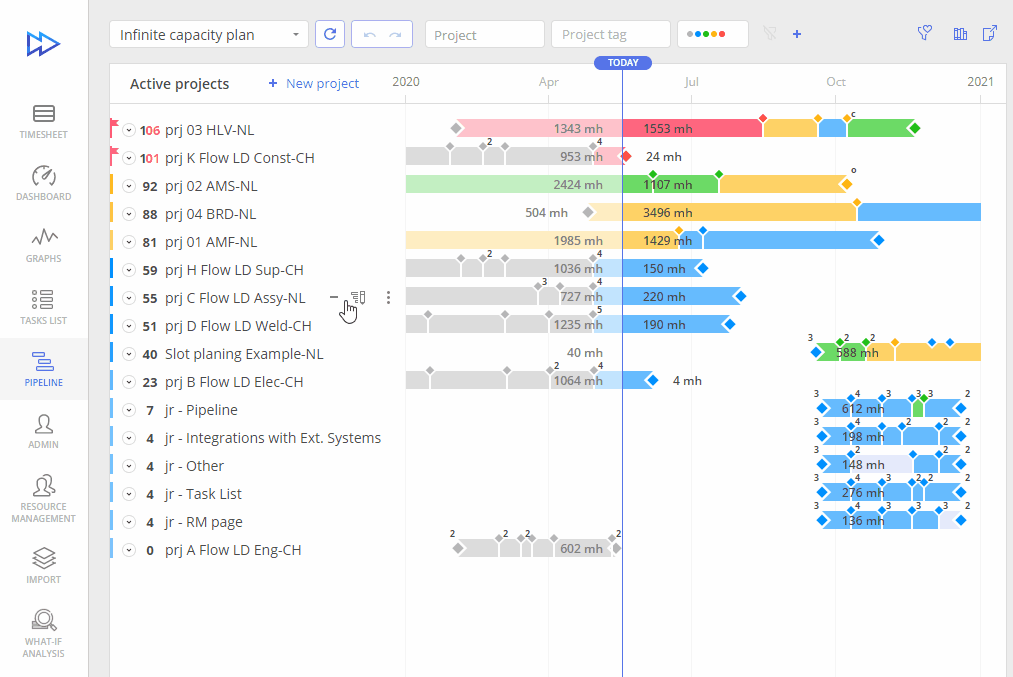
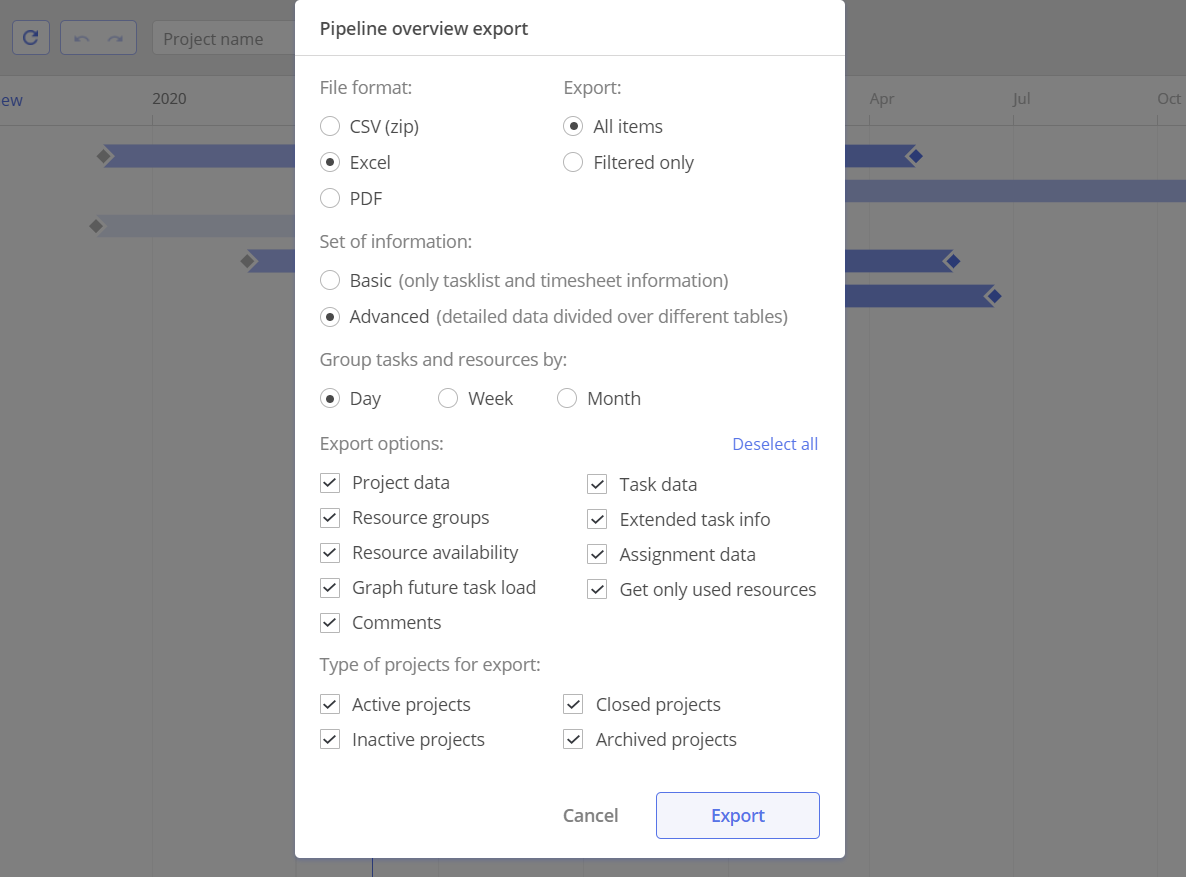
Pipeline Report
Go to the Pipeline page and select the “Export report” icon. In the newly appeared frame, you can define:
- file format CSV(zip), Excel or PDF;
- whether it should be for All items or for Filtered only; If a user selects the “Filtered only” option, the report will contain the projects based on the filters set on the Pipeline page.
- whether you want to group tasks and resources by: day, week or month.
If you run it per “Day”, then data will be exported per Day.
For a “Week” it will be exported per Week and date will show you first date of the week.
For a “Month” it will be executed per month and date will show you first date of the month and Week number will show you first week of the Month.
- When having “basic” export permission the user can download the basic tasklist report only.
- If the user has advanced export permission he or she can select what data to download and what type of projects to export.
Export options
- Project data – Information related to the overall project, such as timeframe, created by and many more.
- Resources groups – Categorization of resources based on their roles, competences and many more within the project.
- Resources availability – Status of resources’ capacity and availability for allocation to tasks.
- Graph future task load – data illustrating the anticipated workload distribution over time.
- Comments – Annotations or remarks added to tasks.
- Task data – Detailed information regarding individual tasks, including deadlines, dependencies, stages and many more.
- Extended task info – additional details beyond basic task data, such as f.e task descriptions.
- assignment data – Data specifying the allocation of resources to tasks such assignments.
- Get only used resources – Specific data focusing solely on resources that have been actively utilized or assigned within the active project.
Type of project to export
- Active projects – Project that are in active area.
- Inactive project – Projects that are in inactive area.
- Closed project – Project that have been closed.
- Archived project – Project that have been archived.
More details about type of project you will find in this article.
Screen #6 – Reports Export – Pipeline
Date Format Verification
- Verify your local date format
- It’s crucial to ensure that the same date format is selected during Project Export in Epicflow to avoid possible errors during the edit.

Screen #7 – Date Format Adjustment
Adjust File Parameters
- Decimal separator – Symbol used to separate the integer part from the fractional part of a number (e.g., . in 3.14 or , in 3,14).
- Thousands separator – Symbol used to group digits in large numbers for readability (e.g., 1,000,000 or 1.000.000).
- Date format – The structure in which a date is displayed, varying by region (e.g., YYYY-MM-DD, DD/MM/YYYY).
Quick Edit Gantt Report
This type of report is similar to the Pipeline one but contains only the data of the selected project.
Navigate to the Pipeline page and select “Quick Edit mode” for any of the projects. Click on the “Export report” icon and in the newly appeared frame define:
- file format CSV(zip) or Excel;
- whether it should be for All items or for Filtered only;
- When having “basic” export permission the user can download onlythe basic tasklist report. When having advanced export permission the user can select what data tables to download.
If a user selects the “Filtered only” option, the report will contain Project’s tasks according to the set filters.

Screen #8 – Reports Export – Quick Edit Gantt Mode