Welcome to the Epicflow system. This guide simplifies the process of inviting new users, activating their accounts, and tracking user invitation statuses. For a visual guide, check our Youtube tutorial.
While inviting or managing users, you may occasionally encounter cases where someone needs to reset or restore their password. Epicflow supports multiple password recovery methods depending on your system configuration:
If an Email Server Is Configured
Users can reset their password directly via the “Forgot Password?” option on the login screen. They will receive a password reset link via email.
If No Email Server Is Configured
In systems without an email server, users cannot use the automated password reset. Instead, they must contact the system administrator, who can manually generate and share a reset link.
If Single Sign-On (SSO) Is Used
For SSO-based systems, password recovery must follow your organization’s internal access renewal process, typically handled by the system administrator.
For step-by-step guidance on each method, please refer to the Restore your password article.
Setting Permissions for User Management
To get started, ensure your account has the required permissions. You can verify or modify these permissions through the settings page.
Permissions Inviting and Creating New User
- Navigate to the Settings page from the left pane.
- Access the Roles & Permissions tab.
- Select your role, typically ‘administrator’.
- In the ‘user permissions’ section:
- Make sure “Invite user” is active.
- For creating users, “Create and delete user” should also be enabled.
Configuring User Detail Permissions
Control how users can modify their details:
- Go to the Settings page.
- Access the Roles & Permissions tab.
- Choose the desired user role, e.g., ‘user’.
- Under ‘user permissions’:
- Visit the ‘User card field’ section.
- Set ‘User name and Initials’ and ‘Email address’ to “Manage” or “View” based on requirements.
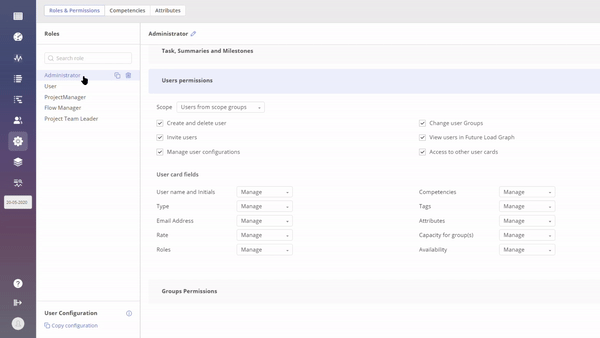
#Screen 1 Configuring Administrator and User Detail Permissions
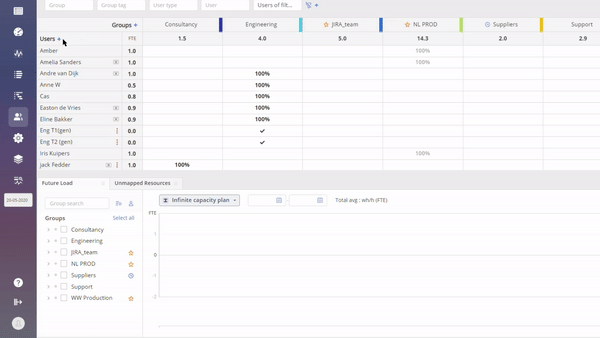
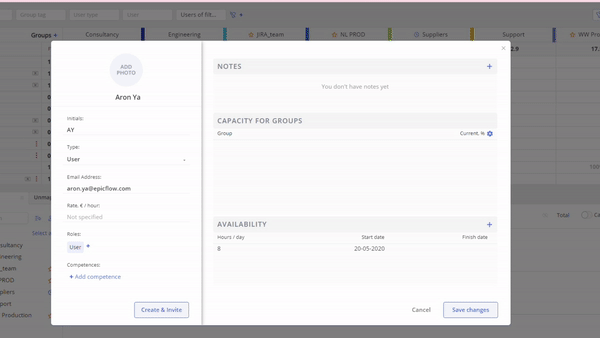
Adding a New User
- Direct yourself to the Resource Management Page.
- If you have the rights, you’ll spot a ‘+’ icon at the top.
- Clicking this icon reveals the user card.
- Fill in user details such as name, initials, user type, email, and roles.
#Screen 2 Adding a new user
User Invitations
This section applies to both current and new users.
User settings Configuration
- After entering the user’s details, click ‘invite’.
- Ensure you’ve entered a valid email address.
- You’ll encounter configuration prompts that define what the user sees. Consider using a default or copying an existing profile for ease.
#Screen 3 Inviting a new user
Sending the Invitation
- Once configured, press ‘apply’.
- The system will then dispatch an invitation email, indicating you as the inviter.
If you would like to know how looks invitation email for the user please read this article.
Overseeing User Invitations
Understanding Invitation Statuses
On the Resource Management section:
- A username without an envelope icon signifies a complete invitation.
- Sealed envelopes mark invited users awaiting activation.
- Crossed-out envelopes denote users pending an invitation.
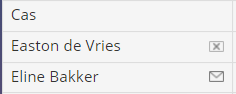
#Screen 4 Overseeing User Invitations
Sending Reminder Emails
For delayed responses:
- Access the user’s card.
- View the previous invite’s date.
- Select ‘re-invite’.
#Screen 5 Sending Reminder Emails
Monitoring Invitations
- Use the ‘user status’ filter on the Resource Management page.
- Segregate by invited, pending, or active users.
#Screen 6 Monitoring Invitations
Exporting Invitation Data
- Adjust filters on the Resource Management page for specific user data.
- Head to the top-right corner.
- Choose the desired export format: CSV or Excel.
- Select either a comprehensive list or a filtered one.
#Screen 7 Exporting Invitations Data