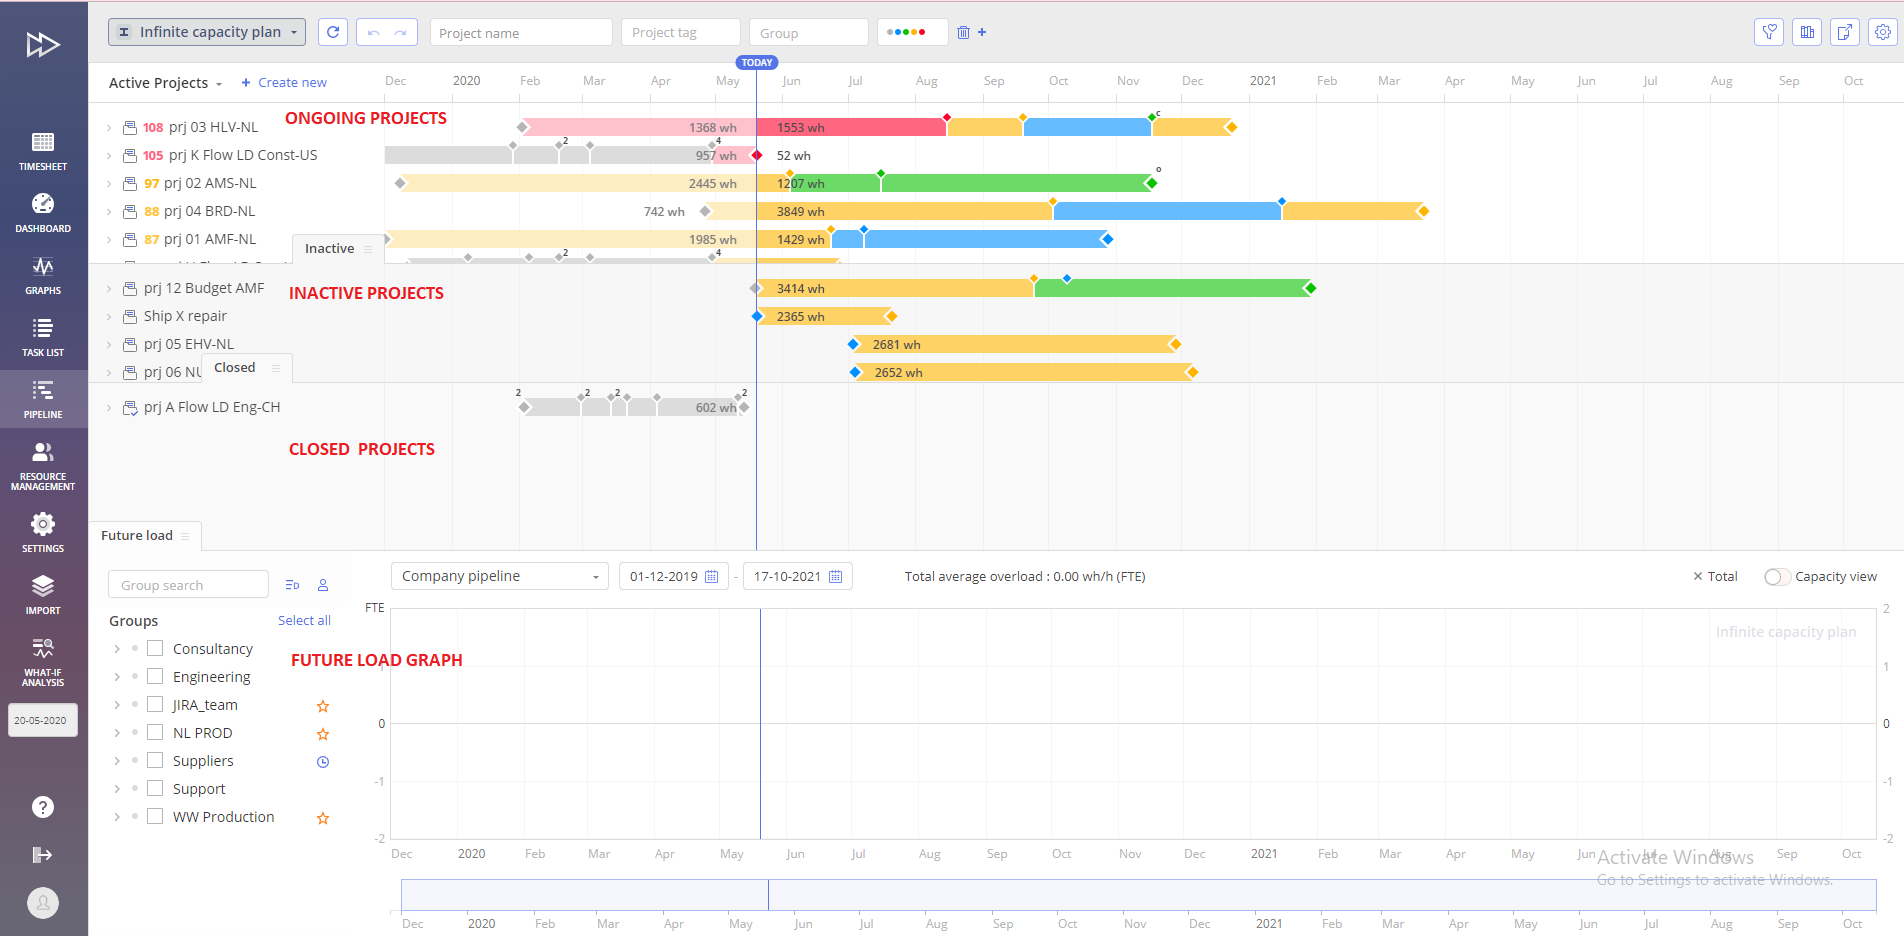
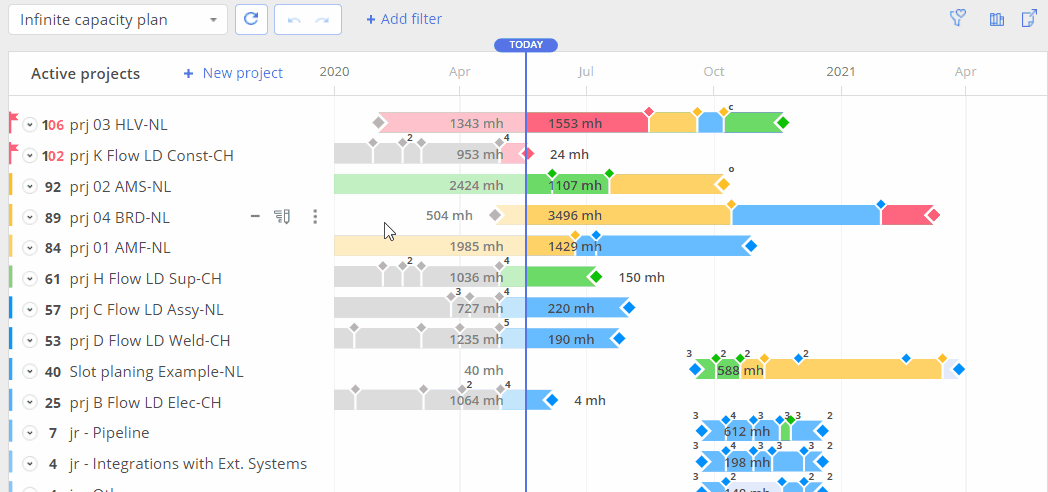
Screen #1– Pipeline
Pipeline gives you a centralized view of multiple projects and their milestones in the system, including ongoing and inactive. Main features are projects prioritization, visualization of unfeasible planning, future load control and prediction of impacts on new changes of projects flow conditions.
There are 4 sections at Pipeline layout:
- Ongoing projects are those which you and your team are currently working on.
- Inactive projects are those which you have imported into the system but they are not taken in work. That could be new projects, a start of which we are waiting for, or projects which are currently frozen.
- Closed projects are those which have been closed.
- Future load graph The objective of the future load graph is telling the user if one or more resources are over- or under-loaded in the future. If someone gets overloaded, you have an assumed bottleneck that will not be able to create the flow of work that is demanded. Projects in “Inactive Projects” area do not create a load for Resources and treated by the system as paused and which are not put in work.
Project priority
Project priority is defined by the highest task’s priority of such and it tells you about feasibility(delivery) of the project by achieving its most constrained milestone.
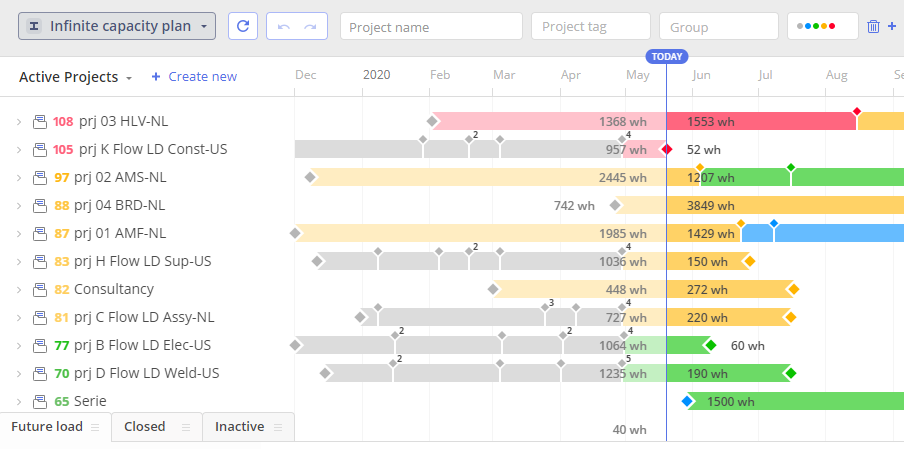
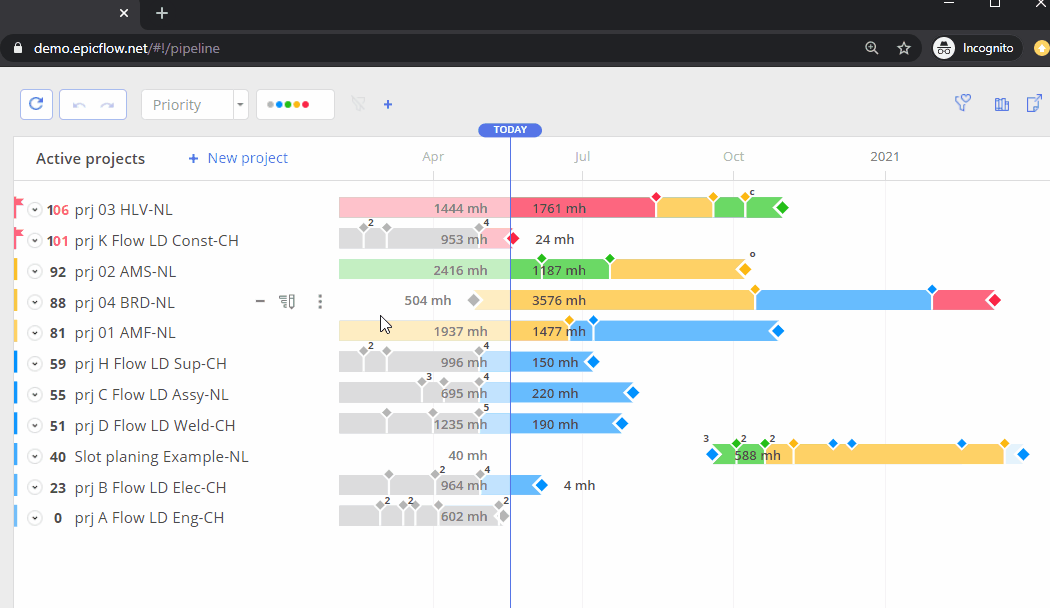
Screen #2– Projects Priorities
Priorities are visualized by means of numbers from zero to one hundred and more. The following numbers will help you instantly get information on which projects are badly in need of closer attention.
0 – 50 indicate that you’ll most likely deliver the project on time according to your plan
80 implies that your project still has a 20% buffer, so you’ll most likely make to the deadline
100 shows that you will deliver the project on time, but you don’t have a buffer for it, so on-time delivery is possible only in case you don’t depart from the plan
101 means there’s one day delay, so you won’t be able to deliver the project on time even if you follow the plan
> 100 will warn you for how many days your project gets delayed. Each additional point indicates a day in project delay.
Please note that two projects of different length with the same buffer configuration may have a different priority. This is due to the fact that, according to our calculations, a small project requires more attention, since the time to complete it is shorter.
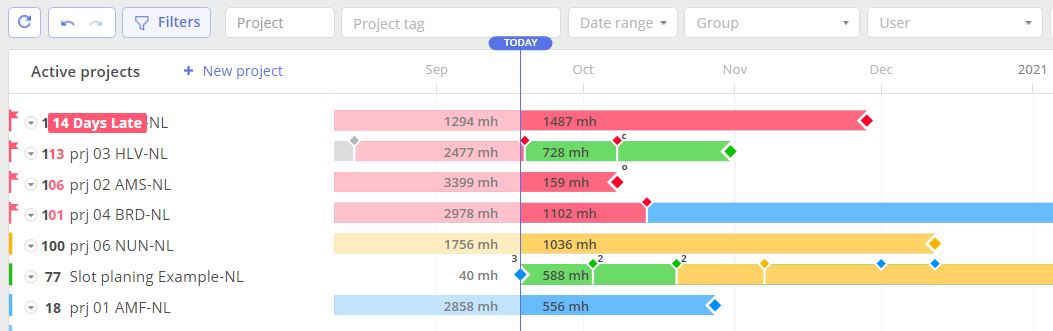
Screen #3– Delays for the Project’s delivery
Buffer monitoring
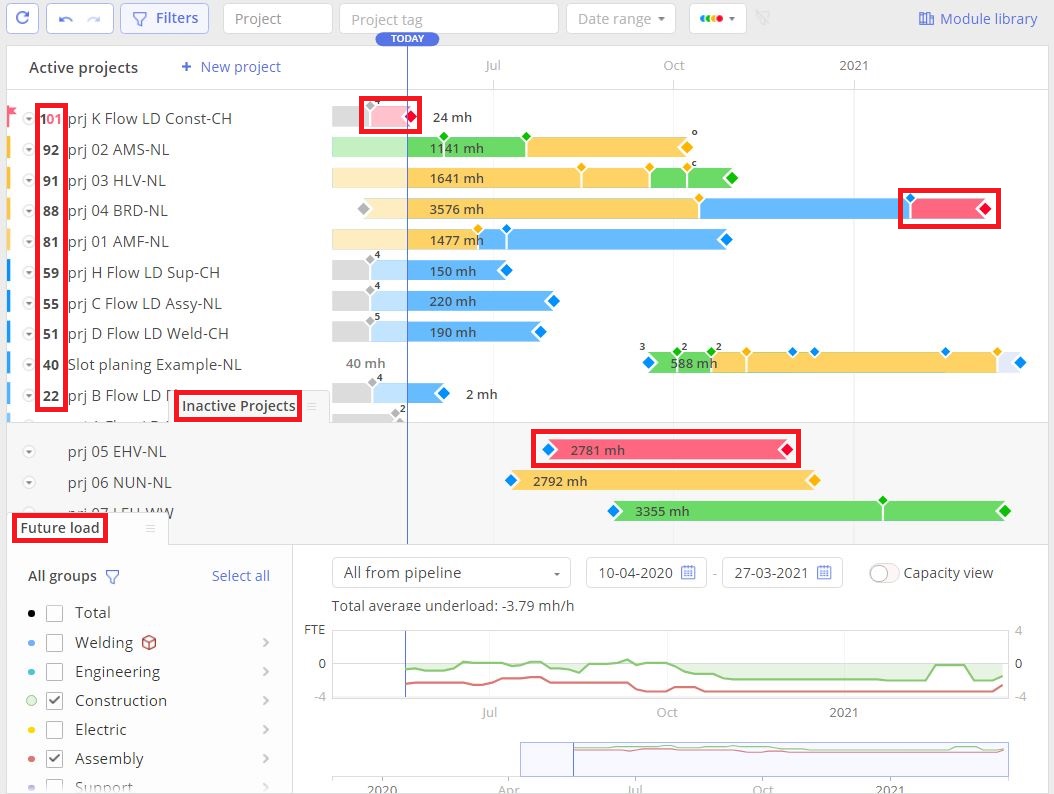
Screen #4– Monitoring pipeline
Epicflow introduced a buffer to fight the uncertainty. Along with planning certain projects and tasks uncertainty can be taken into account: monitor how much of the buffer is already consumed.
To the right from project name at Pipeline page you’ll see the rainbow of lines with past and current milestones and chains of tasks colored in red, yellow, green, and blue that correspond to the colors of the task with the highest priority for the selected chain.
- Red signals unfeasible milestones
- Yellow warns about buffer reduction
- Green and blue show you’re on the right track
Top Critical Path
Critical Path is the longest chain of dependent tasks, between two milestones, which must be completed in order to deliver the project in time.
Top Critical Path is the Critical Path with the Highest Priority.
By left mouse click on any range of the project, at Pipeline page, new “Top Critical Path” window will be opened. It contains all Critical Path chains between two defined milestones and Top Critical Path chain is displayed at the top of the window.
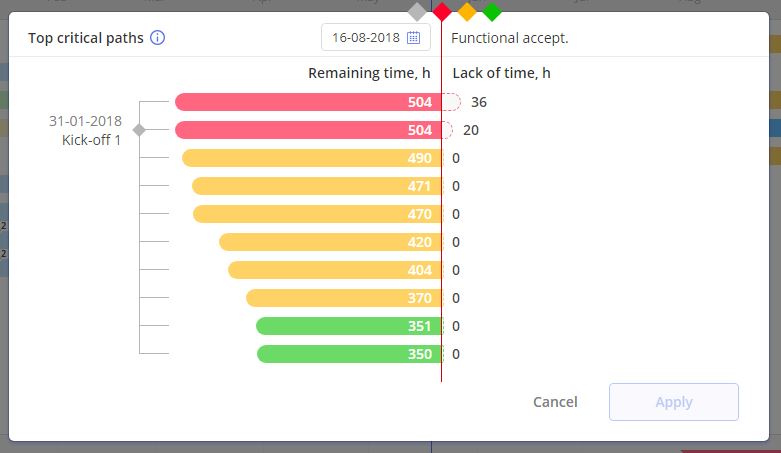
Similar to other parts of the system each Critical Path line is colored in one of four colors: red, yellow, green, and blue. That corresponds to the color of the task with the highest priority in the chain.
- Red signals unfeasible milestones\ lack of time to accomplish such in time
- Yellow warns about buffer reduction
- Green and blue show you’re on the right track
With help of “Top Critical Chain”, you can
- Change date for the selected milestone – define one in the date picker located above the displayed chains.
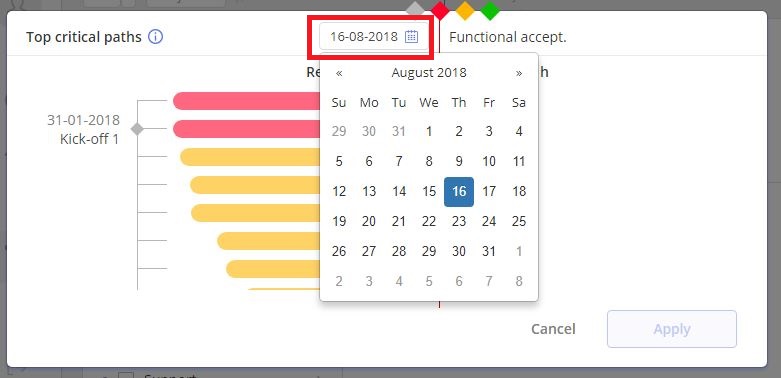
Screen #5– Top Critical Path – Milestone Date Change
- Navigate between different milestone – press left mouse button right on the rhombus icon, located at the top of the displayed screen, and where applicable select an appropriate one from the appeared drop-down list.
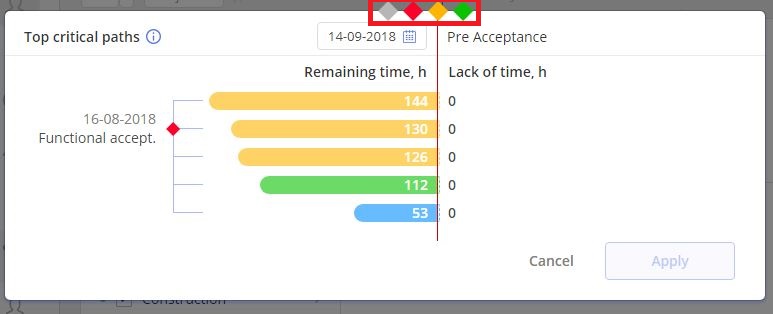
Screen #6 – Top Critical Path – Navigation
- Review list of tasks from the chain – press left mouse button on the line and you’ll be redirected to the “Task list” page with the tasks from the chain.
Screen #7 – Top Critical Path – Review List of tasks from the chain
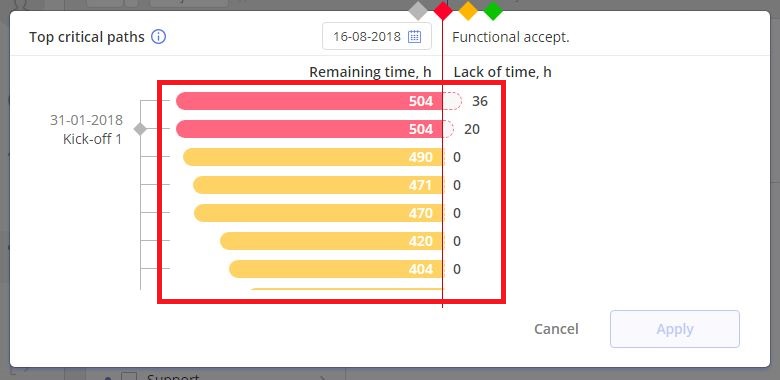
For the colored in red Critical Path, lacking time to accomplish such chain will be displayed to the right from it, in “Lack of time, h” section. As an example on “Screenshot 8” we have lack of “36” working hours for the Top Critical Chain.
Screen #8 – Top Critical Path
Left mouse click on the selected Critical Path will display you a list of tasks from the chain with the most constrained task at the top of the list. This approach should be used as one of many to work out delays in chains of tasks on tasks accomplishment level.

Screen #9 – Top Critical Path Tasks List
Selection of the “Back to Pipeline” element will bring you back to the “Top Critical Path” window.
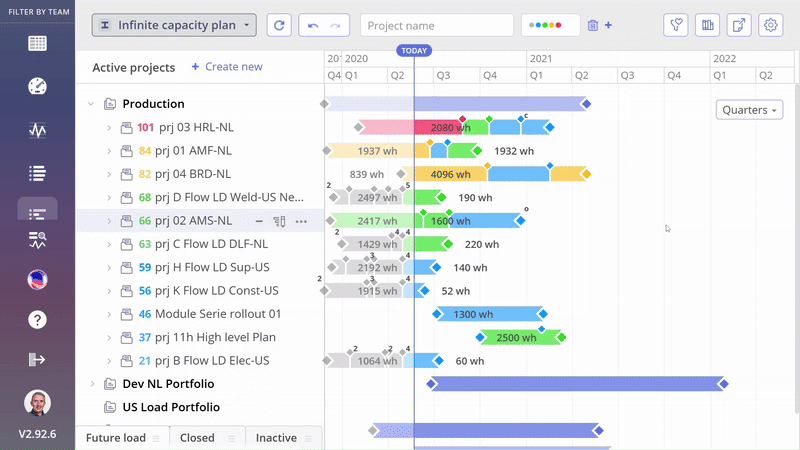
Time Scale Adjustment
Located in the top left, users can switch between viewing projects by days, weeks, months, quarters, or years.
The selected parameter will also determine the scale displayed on the Future Load Graph. For example, if you choose ‘Quarters,’ the slider on the Future Load Graph will display quarters. The same principle applies to days, weeks, months and years.
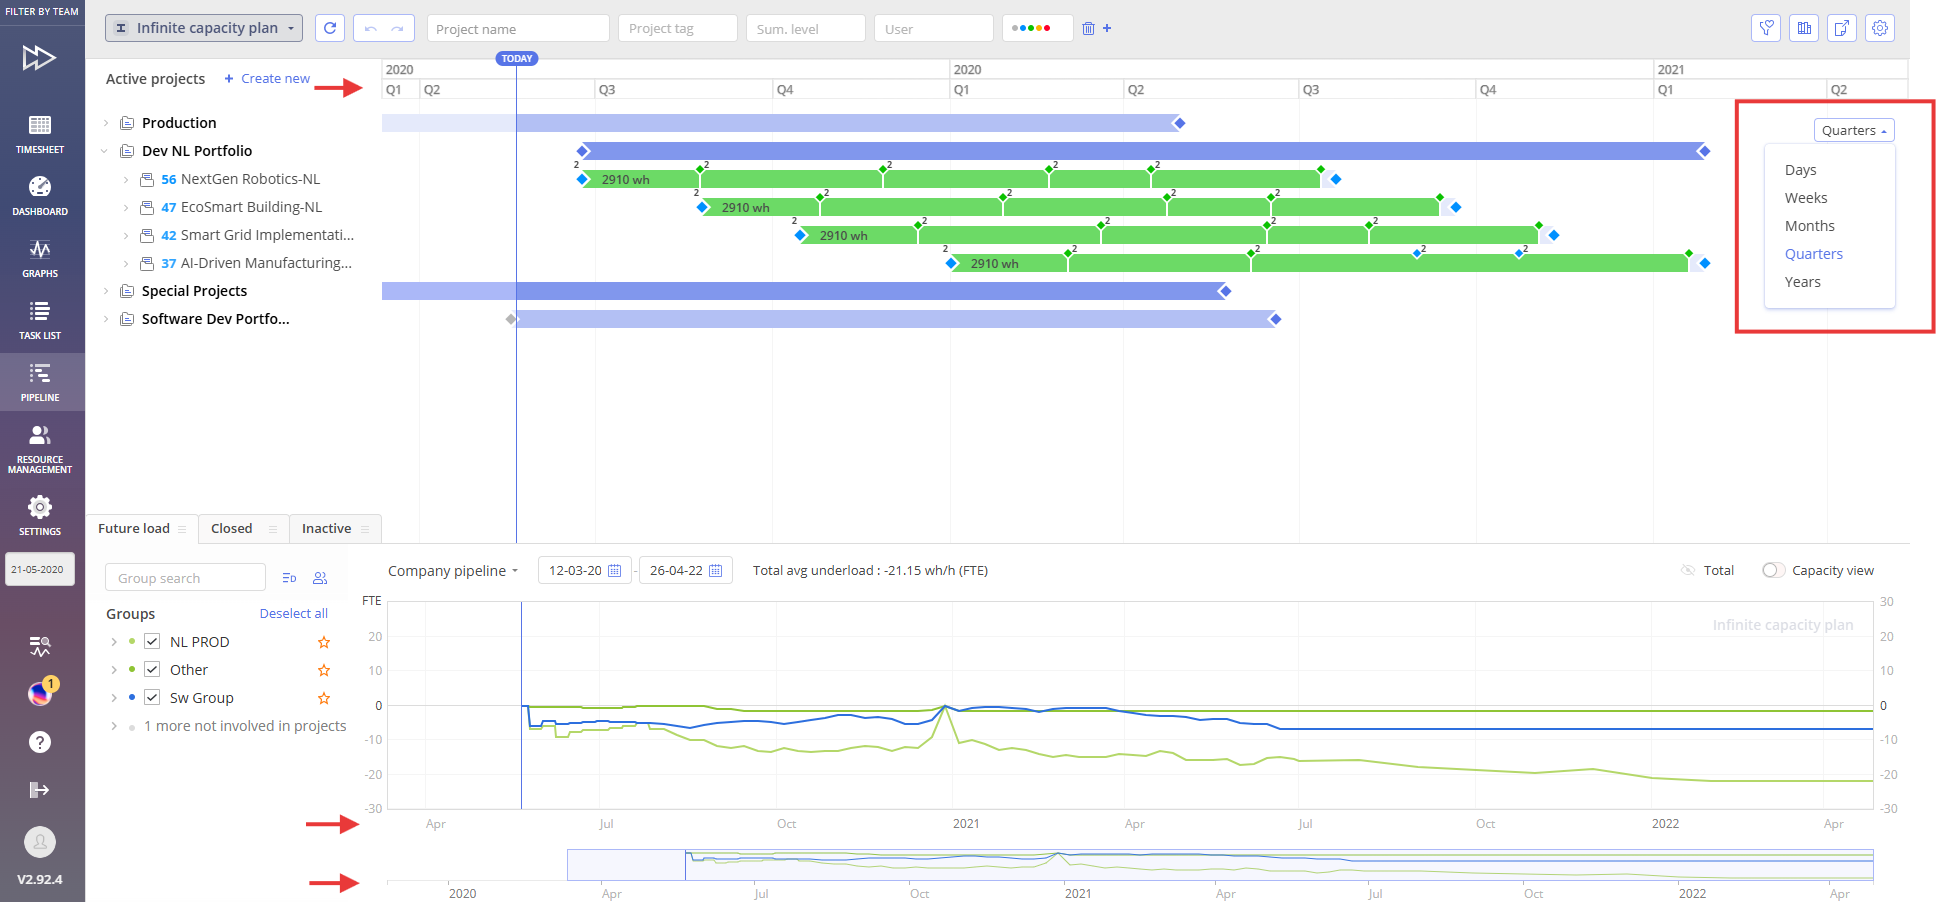
Screen #10 – Timeline Adjuster
Filtering
This feature allows to narrow down depicted information to set and keep focus over the required items.
For this moment filtering is available by next parameters:
- Project filters
- Priority
- Name
- Manager
- Tag
- Attribute
- Business Value
- Item filters
- Date range
- Summary level
- Status
- Name
- Stage
- Competence
- Attribute
- Tag
- Resources
- User
- User tag
- User attribute
- Group
- Group tag
- Group attribute
- General filters
- Color
Set of filters to be displayed on page is configurable. To change it “Add Filter” button must be used.
Screen #11 – Filters usage at Pipeline
Set filter can be also applied for the Future Load frame at Pipeline page. That helps to define which type of resources are required for which projects and analyze how different project groups utilize resources.
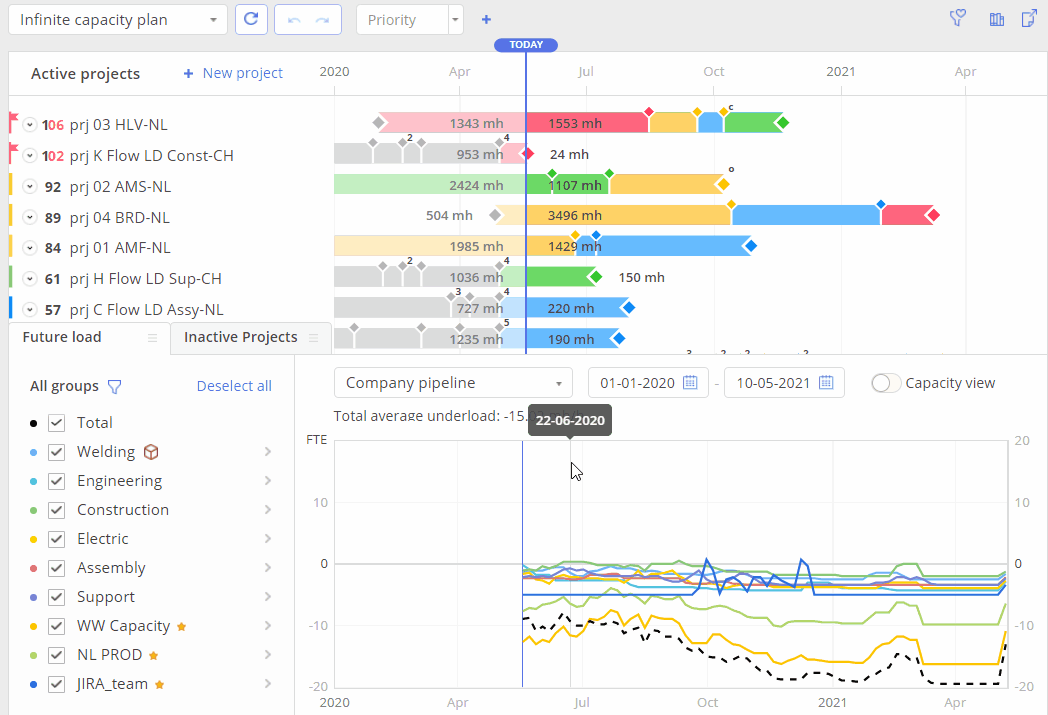
Screen #12– Future Load on Filtered Projects
Now you can see the load of your resources on filtered projects only.
Filters Management
For more productive and focused work Epicflow provides functionality to crete, store, edit and share filters.
- Enter required Filter parameters
- Click on “Filters List” icon located at the left top part of the screen and select “Save new” option
Screen #13 – New Filter Creation
Any selected filter can be adjusted accordingly to your needs and such adjustment can be saved either in new Filter or the current one. 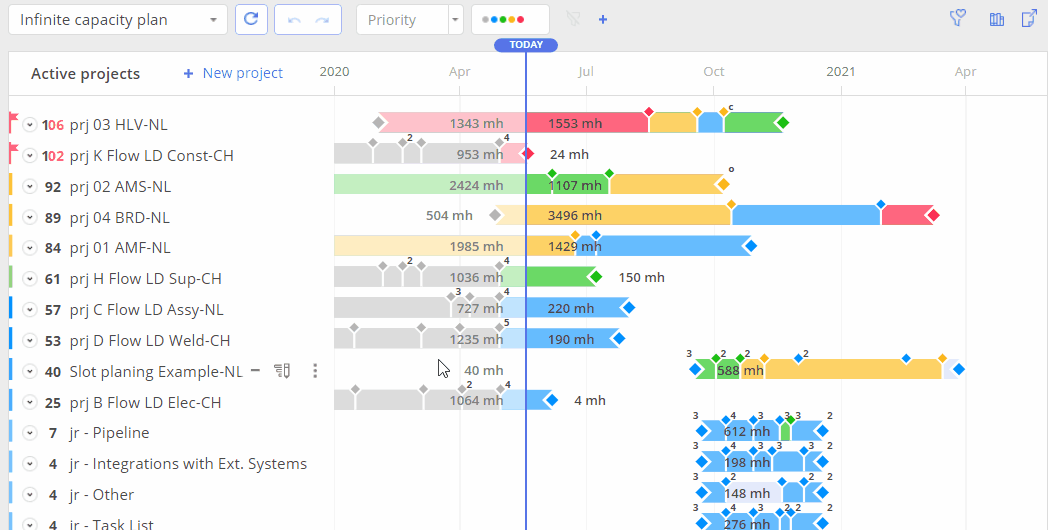
Screen #14 – Saving Filter’s Adjustment
Any stored filter can be renamed , removed or shared with the team.
Screen #15 – Filter Renaming, Removing and Sharing
Now you can see the load of your resources on filtered projects only.
View Customization
By clicking on the settings wheel in the top right corner, you can enable or disable the visibility of certain data.
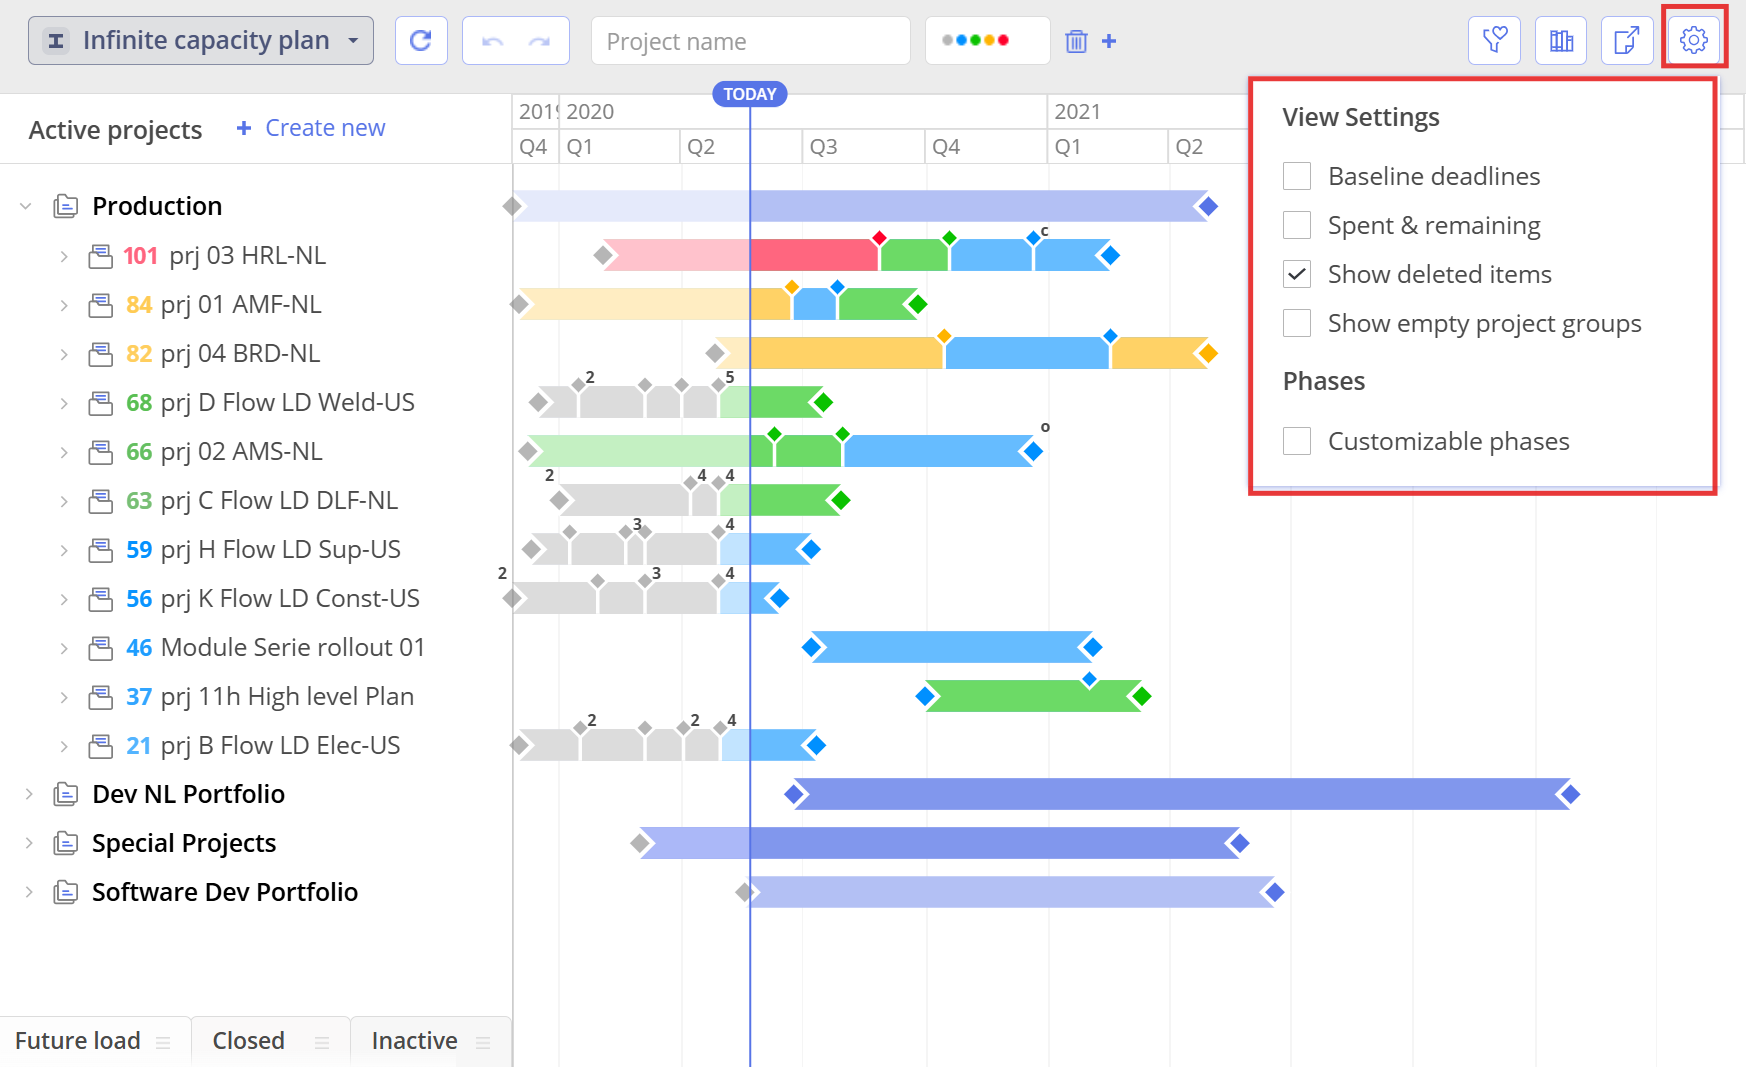
#Screen #16 Pipeline View Settings
View Settings
- Baseline deadlines – Show or hide baseline deadlines.
- Spent & Remaining – Show or hide the ‘Spent’ or ‘Remaining’ Hours on the Gantt Chart.
- Show deleted items – Show or hide deleted items with Spent Hours.
- Show empty project groups – Show or hide empty project groups.
Phase settings
- Customizable phases – Show or hide customizable phases
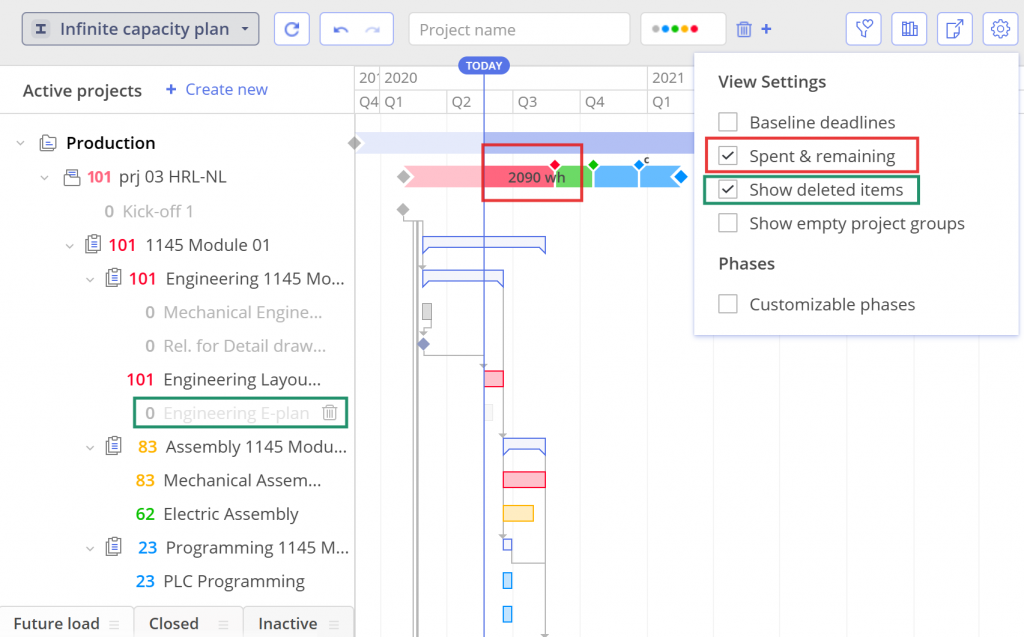
#Screen #16 Pipeline View Settings: Show deleted items, Spent & remaining
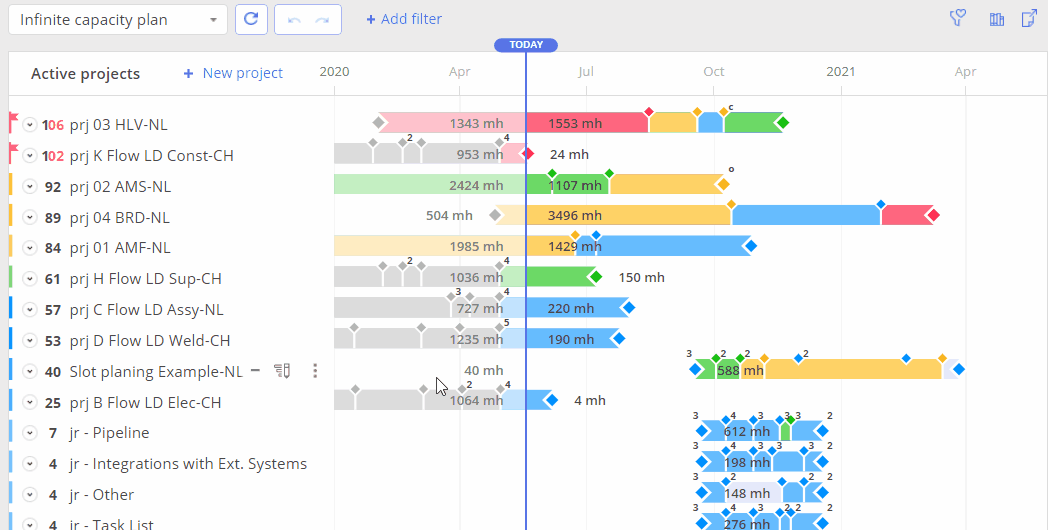
Active Projects Column
You can adjust the column width by simply dragging it to your desired size. This is especially useful for long project names.
#Screen #16 Active Projects Column