This part of the wiki is created as a short guide how to start with your first MS Project and Resource Pool to have them uploaded into Epicflow
Resource Pool
- As a first step we would need to configure Resource Pool. If such was created previously open it. Otherwise:
- Open Ms project and select blank Project.
- Save it with the name “Resource Pool”.
- Select tab “View” -> “Resource Sheet” View
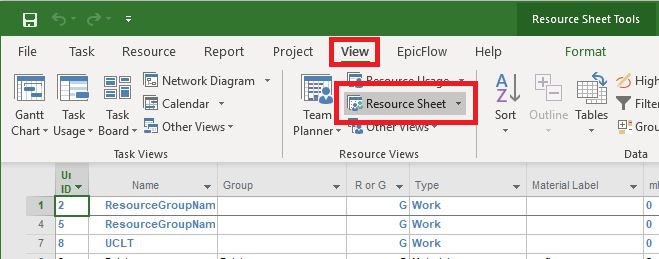
Screen #1 – Resource Pool – Resource Sheet view
- Lets Add custom field “R or G (Text23)”. It is required to distinguish Resources and Groups to which they do belong
- To proceed with it press right mouse button over the column and select option “Custom Fields”
- In appeared window select radio-button “Resource” and navigate to the “Text 23” field and Rename it to “R or G (Text23)”
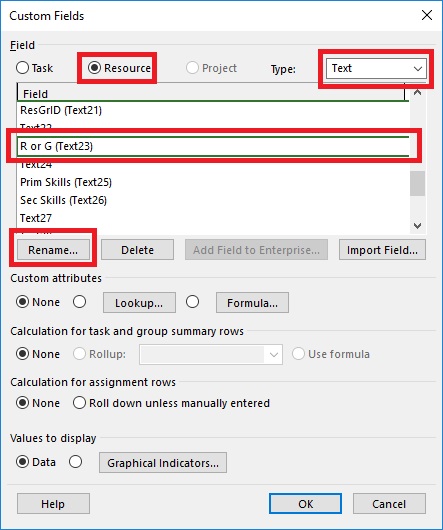
Screen #2 – Resource Pool – Adding Custom field “R or G (Text23)”
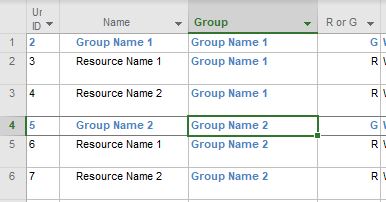
- Now you would need to specify Resource Groups. For that add new Resource and specify Name of the group, Group (must be the same as Name) and key “G” in field “R or G (Text23)”.

Screen #3 – Resource Pool – Creating Group
We have one specially called group “UCLT” (“Un-Compressible Lead Time”) which can be used as a resource in case of ordering time.
If task is assigned on UCLT group, on daily basis, Epicflow automatically subtracts Capacity of the group from the tasks’ Remaining Work. It’s important and useful for planing tasks which are based on duration.
- As you finished with specifying Resource groups as next step Resources must be specified. For that
- add new resource by calling context menu over right mouse click and selection “Insert Resource” option. Also name of the resource must be specified as well.
- to distinguish Resource from the Resource group key “R” must be set in field “R or G (Text23)”
- to specify affiliation of the Resource to a Resource group you need to set a correct name of the group in the field of “Group” column
Screen #4 – Resource Pool – Creating Resource and specifying Group for it
- As a last step Resource Pool is required to be saved to store all changes.
For more information please refer to the Resource Pool template which is available by next link MS Project Templates and to a different part of wiki.
MS Project file
After Resources and Resource Groups definition we need to proceed with the Project itself. You may use either a new one or any previously created.
Be aware that for the data consistency we need to have all Projects connected to Resource Pool.
Connecting Project to resource Pool
- Open your project file and open the resource pool. If it is not the first project connected to the resource pool you will get the following message:
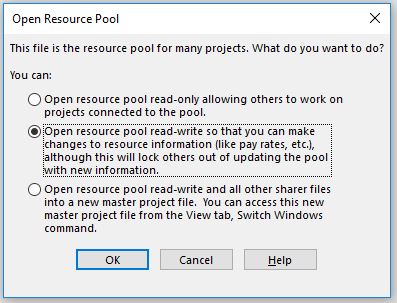
Screen #5 – Open Resource Pool
- Open the Resource pool in read-write mode.
- Open MS project file.
- Select in MS Project menu tab “Resource”-> “Resource pool” -> “Share resources” -> and from the appeared drop-down list choose appropriate Resource Pool.mpp file.
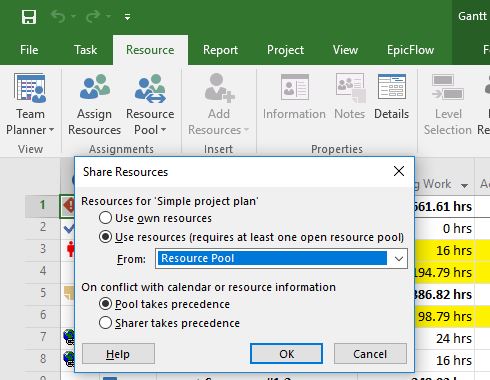
Screen #6 – Linking Resource Pool to the Project
As soon as you press “Ok” button and save Project and Resource Pool files they are defined as connected.
Projects which are not linked to the Resource Pool wont be uploaded.
Order of tasks
As we have linked Project and Resource Pool we can proceed with the planning itself.
- Fill in project with tasks one by one with specific order and structure as it required.
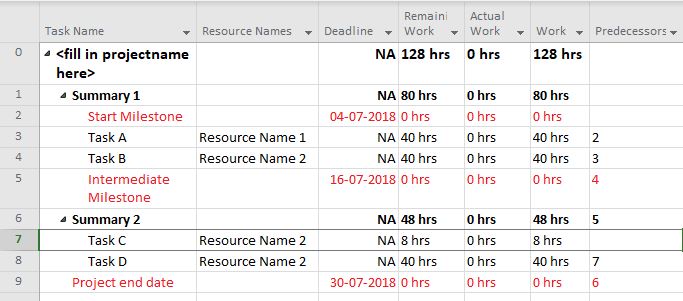
Screen #7 – Project File structure
Note that order of tasks is extremely important for priority calculation. There shouldn’t be any loose ends. If task or summary is without a successor it should be connected either to any summary\task or to milestone.
- To set an order of the tasks add column “Predecessor” for each task enter a number of task’s predecessor ID (which is specified by value in the most left column)
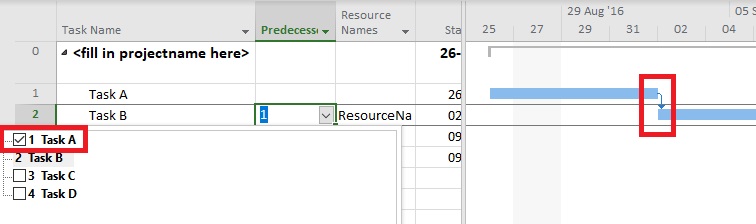
Screen #8 – Project File – Specifying Order of Tasks v2.
Rough work estimation
As we finished with the project structure next step is to add tasks work estimation. It’s also a crucial item for priority calculation algorithm since it driven by work and not by duration.
In case if duration is important UCLT(“Un-Compressible Lead Time”) group must be used
- Add column “Remaining work” and specify in it rough work estimation for each task.
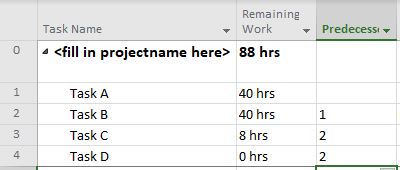
Screen #8 – Project File – Rough Work Estimation
Delivery date
If no delivery date is specified it will be automatically calculated by Epicflow and you can easily change it in the system. Nevertheless, if you would like to set End Project date from the start
- Add columns “Deadline”
- Create new task at the bottom of the project and name it like “End Project Milestone”
- Specify date in “Deadline” column
- Connect end of the previously specified chain of task order to the “End Project Milestone”
Any task with zero duration and no assigned resource but defined “Deadline” is treated by system as a milestone.

Screen #9 – Project File – Delivery Date
Assign Resource
- Each task can be assigned on a specific Resource or Resource Group. You can do it in Epicflow or it also can be defined in the Project file itself by selecting an appropriate one from the drop-down menu of “Resource” column.
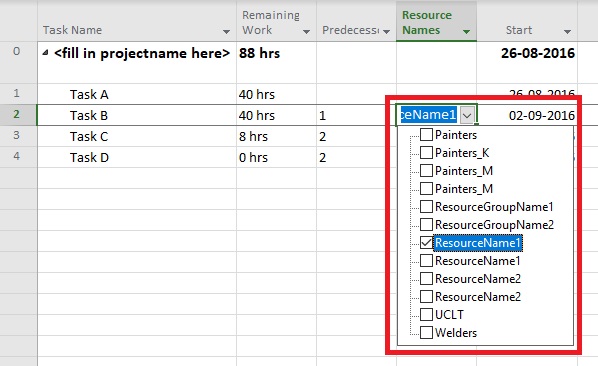
Screen #7 – Project File – Assign Resource
- As a last step Project must to be saved to store all changes.
For more information please refer to the Project File template which is available by next link MS Project Templates and to a different part of wiki.
Plugin installation
Now as we have finished Project and Resource Pool files preparation we need to install Epicflow plugin to proceed with uploading of such.
- Install prerequisite files if it’s not done yet.
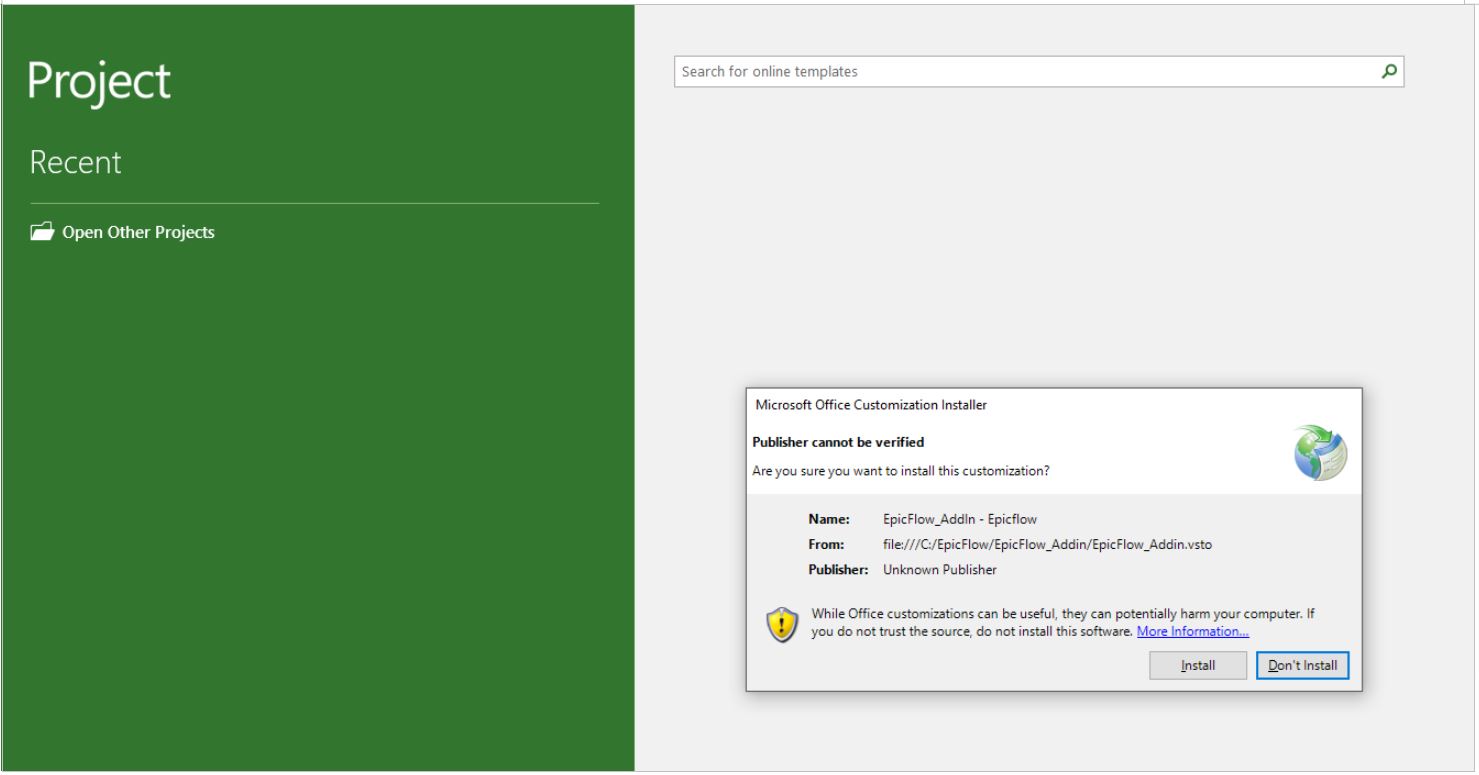
- Run provided installer and on appeared Security messages you will need to confirm that you would like to install it anyway.
By pressing “More info” Operation System will give you an option to proceed with installation.
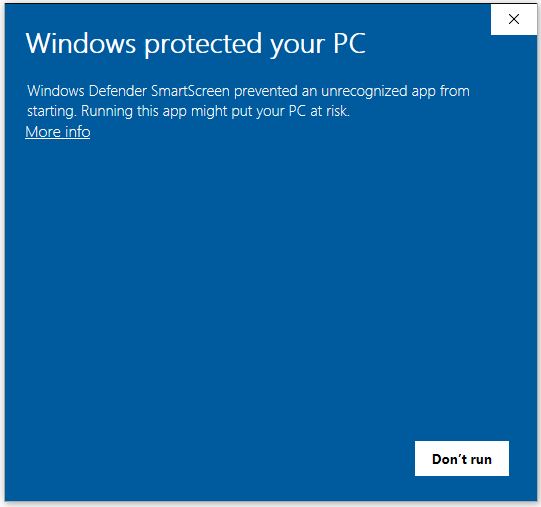
Screen #8 – Security Confirmation request
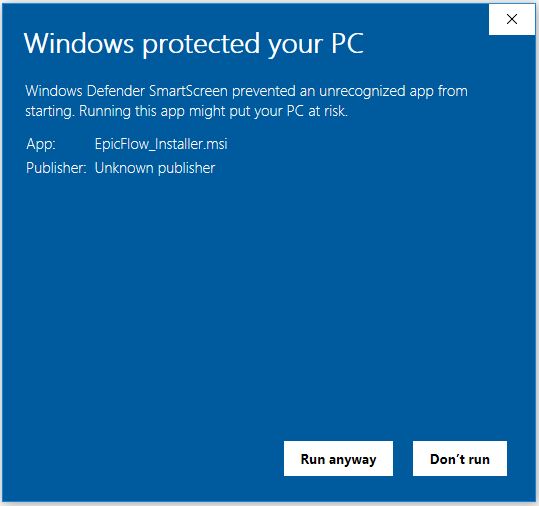
Screen #9 – Security Confirmation request
- On appeared installation window you will need to specify installation path. By default it’s set to “C:\Program Files (x86)\EpicFlow\”. Change it to “C:\EpicFlow\” by removing “Program Files (x86)” part.
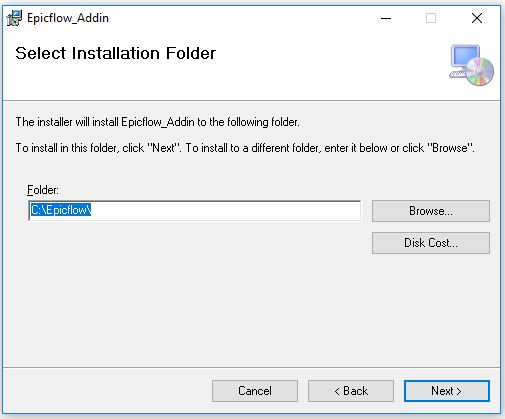
Screen #10 – Installation Path Specification
- As soon as you confirm installation and Operation System’s security request installation will be accomplished.
- Start MS project and confirm installation of the plugin by pressing “Install” button.
Screen #11 – Plugin installation in MS Project
Project Upload
Upload of Resource Pool
- Open the resource pool in read write mode ()
Screen #12 – Open Resource Pool
- In the menu list go to Epicflow tab -> choose Advanced-> Select add resource pool to Epicflow and Save
- At first run you would need to specify URL address of your system in accordance to the format [companyName].epicflow.net.
- Login to Epicflow with the same login/password from the previous step.
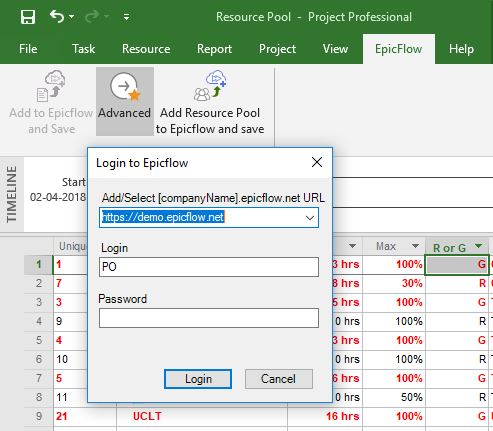
Screen #13 – Resource Pool upload
In result at Resource Management page at the tab “Unmapped resources”, you will see the groups and the resources listed from Resource Pool.
Upload of Project
- Open resource pool in read-write mode
- Open MS project file.
- Go to tab Epicflow and press save & push to Epicflow
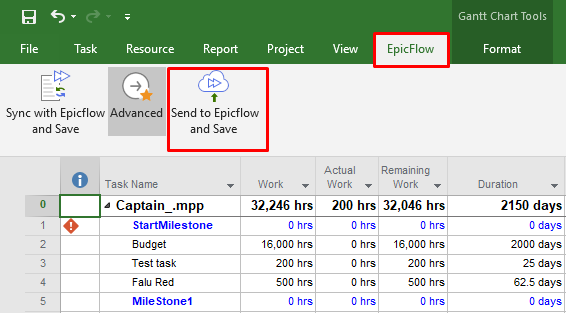
Screen #14 – Saving the Project to environment
The project is uploaded and you can find it on Pipeline page of the Epicflow system.