There are several types of Planning in Epicflow:
- Infinite Capacity Planning is the functionality that automatically calculates the best possible way of executing tasks taking into account their duration and relations.
- Manual Planning – provides a project manager with an opportunity to reposition items in the timeline as well as increase or reduce their duration manually for certain purposes. This functionality is created specifically for external communication. It has no effect on prioritization and load graphs.
- Single Project Leveling – identifies the sequence of accomplishing project tasks based on their priorities and/or business value and infinite capacity for this project.
- Prediction – is used to set up the sequence of tasks when running multiple projects depending on their priority, business value, and finite capacity of all projects.
To switch between these modes go to the Quick Edit More page of the project and select a necessary option from the drop-down menu.
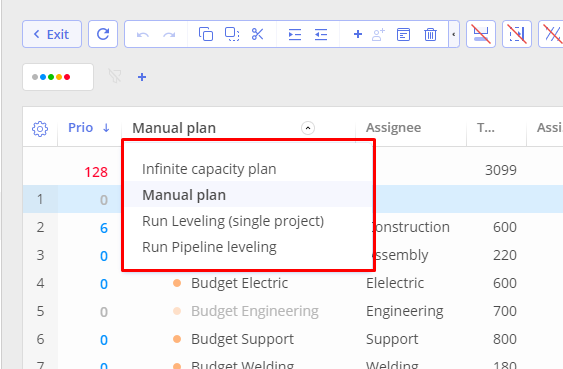
Screen #1 – Planning Mode – Mode Selection
Infinite Capacity Planning
In this mode, Epicflow automatically plans the completion of all tasks as soon as possible based on their duration and relations between tasks and milestones in the project network. It assumes infinite resource capacity. With this planning type, the resource load graphs show you possible bottlenecks.
Single Project Leveling and Prediction
Prediction is the setting up of task execution sequence depending on their priority and/or business value as well as the infinite capacity for the project. You as a project manager can set a prediction planning type based either on priority or business value. The system will automatically calculate the dates for the tasks and create a corresponding Gantt chart.
To set up or change project prediction, a user must have corresponding permission.
If you have a ‘manage prediction’ permission you can run or rerun it in the QE mode.
You can also run a prediction planning type in the Quick Edit mode for a non-leveled project. To this end, open the QE mode for this project and choose a corresponding option in the plan selection drop-down.
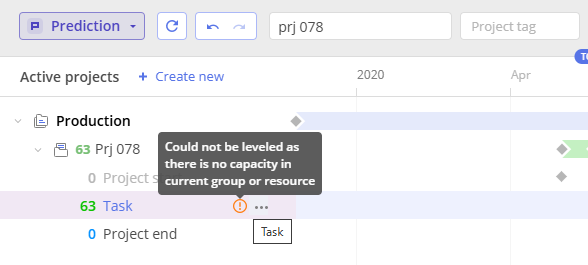
Screen #2 – 0% Capacity Notification
Prediction Planning Type
To set Prediction Planning Type for a project,
- Go to the Quick Edit mode of the project,
- Choose the ‘Run Prediction’ option in the plan selection drop-down.
There you can see the Planning Types menu with corresponding leveling explanation. Also, you’ll see the priority-based value slider and the description.
- Click the ‘cancel’ or ‘run’ button to skip or apply the changes.
Screen #3 – Prediction Planning Type
Using Planning Types in Epicflow
You can use planning types directly in the Pipeline View or the Task List Group View.
Running Prediction for Projects
- To run Prediction for a non-leveled active or inactive project, navigate to pipeline and run a single project leveling, and set a priority-based value slider to ‘value’.
If an active project is already predicted you can rerun its Prediction by changing its value.
If there are two projects one of which is active and another one is not, when you run Prediction in the QE mode for an active one, it gets Prediction as distinct from the inactive project.
Prediction-Driven Delays
Prediction delay refers to the time difference between when a task is scheduled to start and when it was initially predicted to start. To visualize prediction delays, enable the ‘possible dates’ setting. If a task bar extends beyond the possible dates range, it indicates a delay, prompting action.
In Epicflow, you have two options to visualize possible dates for the item execution.
- in Quick Edit Mode
- in Task List Group View
Visualize possible Dates in Quick Edit Mode
- Open Quick Edit Mode of a project
- In the top right corner, click on the Gear Icon
- Check the option for ‘Possible Dates’
Visualize possible Dates in Task List Group View
- Navigate to Task List Group View
- In the top right corner, click on the Gear Icon
- Check the option for ‘Possible Dates’
- Enable the Timeline to view possible dates for task execution.
Screen #4– Enable Possible Dates
Prediction Delay Example:
In the image below, you can observe that the CR Introduction Task is not predicted to be delayed, as the possible dates bar does not precede the task execution. However, the AB Introduction’s possible dates bar precedes the task execution, indicating a predicted delay that requires prompt action.
Screen #5 – Visualization of predicted delay
Manual Planning
As has been noted above, in the Manual Planning mode, you as a project manager can reposition project items in the timeline, expand or decrease their duration manually for special needs. For instance, a project manager can change the project duration before the meeting with clients to hide the float (buffer) from them as they may consider it as unnecessary idle time. Besides, a PM can apply manual planning just to compare their own approach to the execution of the project and the way the Epicflow system suggests to run it.
Epicflow algorithms provide the best possible way to complete your multiple projects on time, so the Manual Planning functionality is just a way of communicating with clients. It has no effect on prioritization and load graphs.
Let’s consider the ways you can plan your project flow manually.
Repositioning Itemsm
To plan the order of completing project tasks and summaries, a Project Manager (PM) can use an item re-positioning option provided by the “Manual Plan” mode by drag-and-drop directly from the Gantt chart.
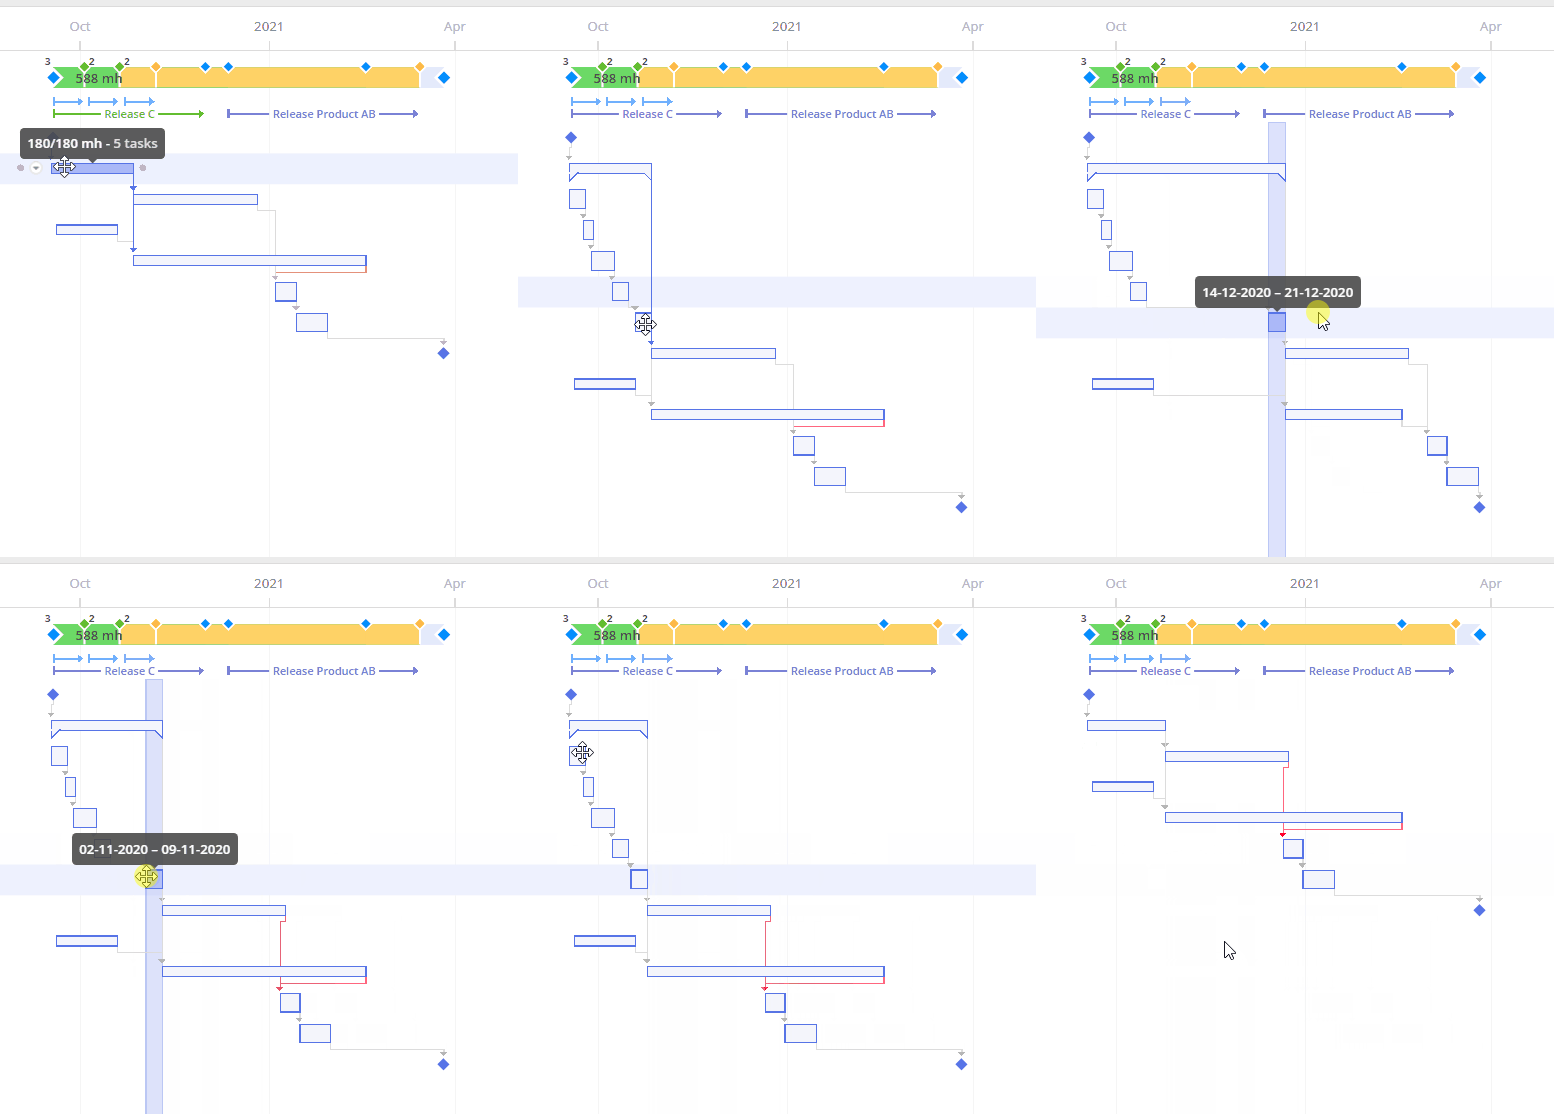
Screen #6 – Planning Mode – Task Repositioning
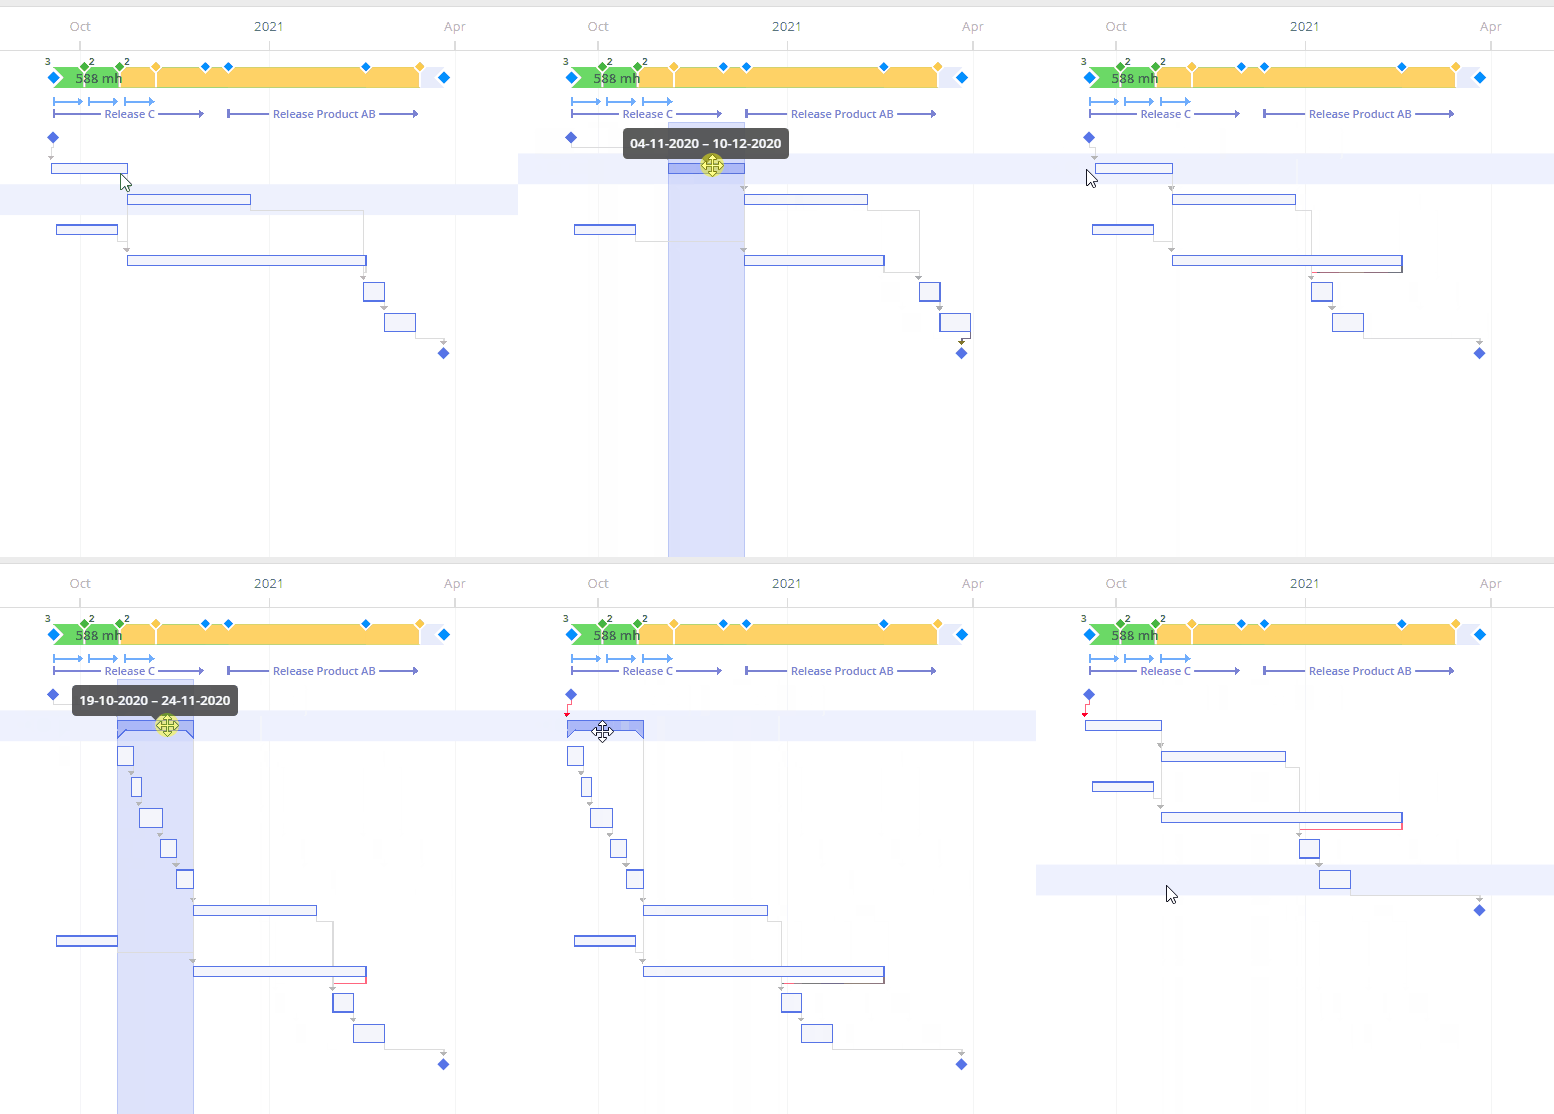
Screen #7 – Planning Mode – Summary Repositioning
Remember that any Summary or Task position changes will affect all the chain of successors but won’t change predecessors.
If a Summary contains a milestone, the repositioning will limit one of the Summary boundaries.
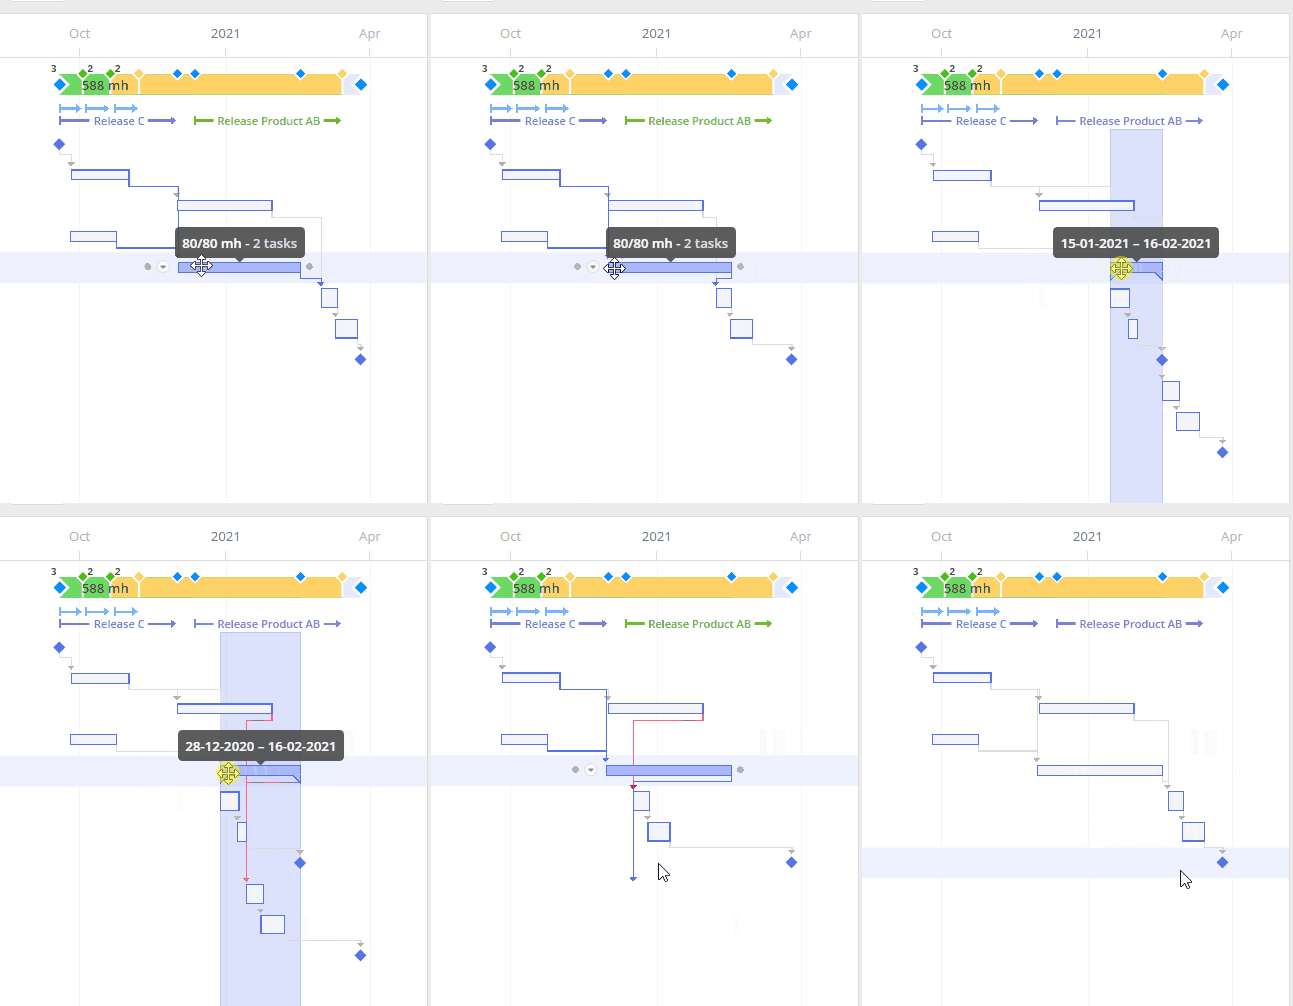
Screen #8 – Planning Mode – Repositioning Summary with a Milestone
For all actions like this, the order of Summary sub-items remains unchanged.
To reset the item’s position to the initial one select the “Reset to Auto Plan” option in the context menu.
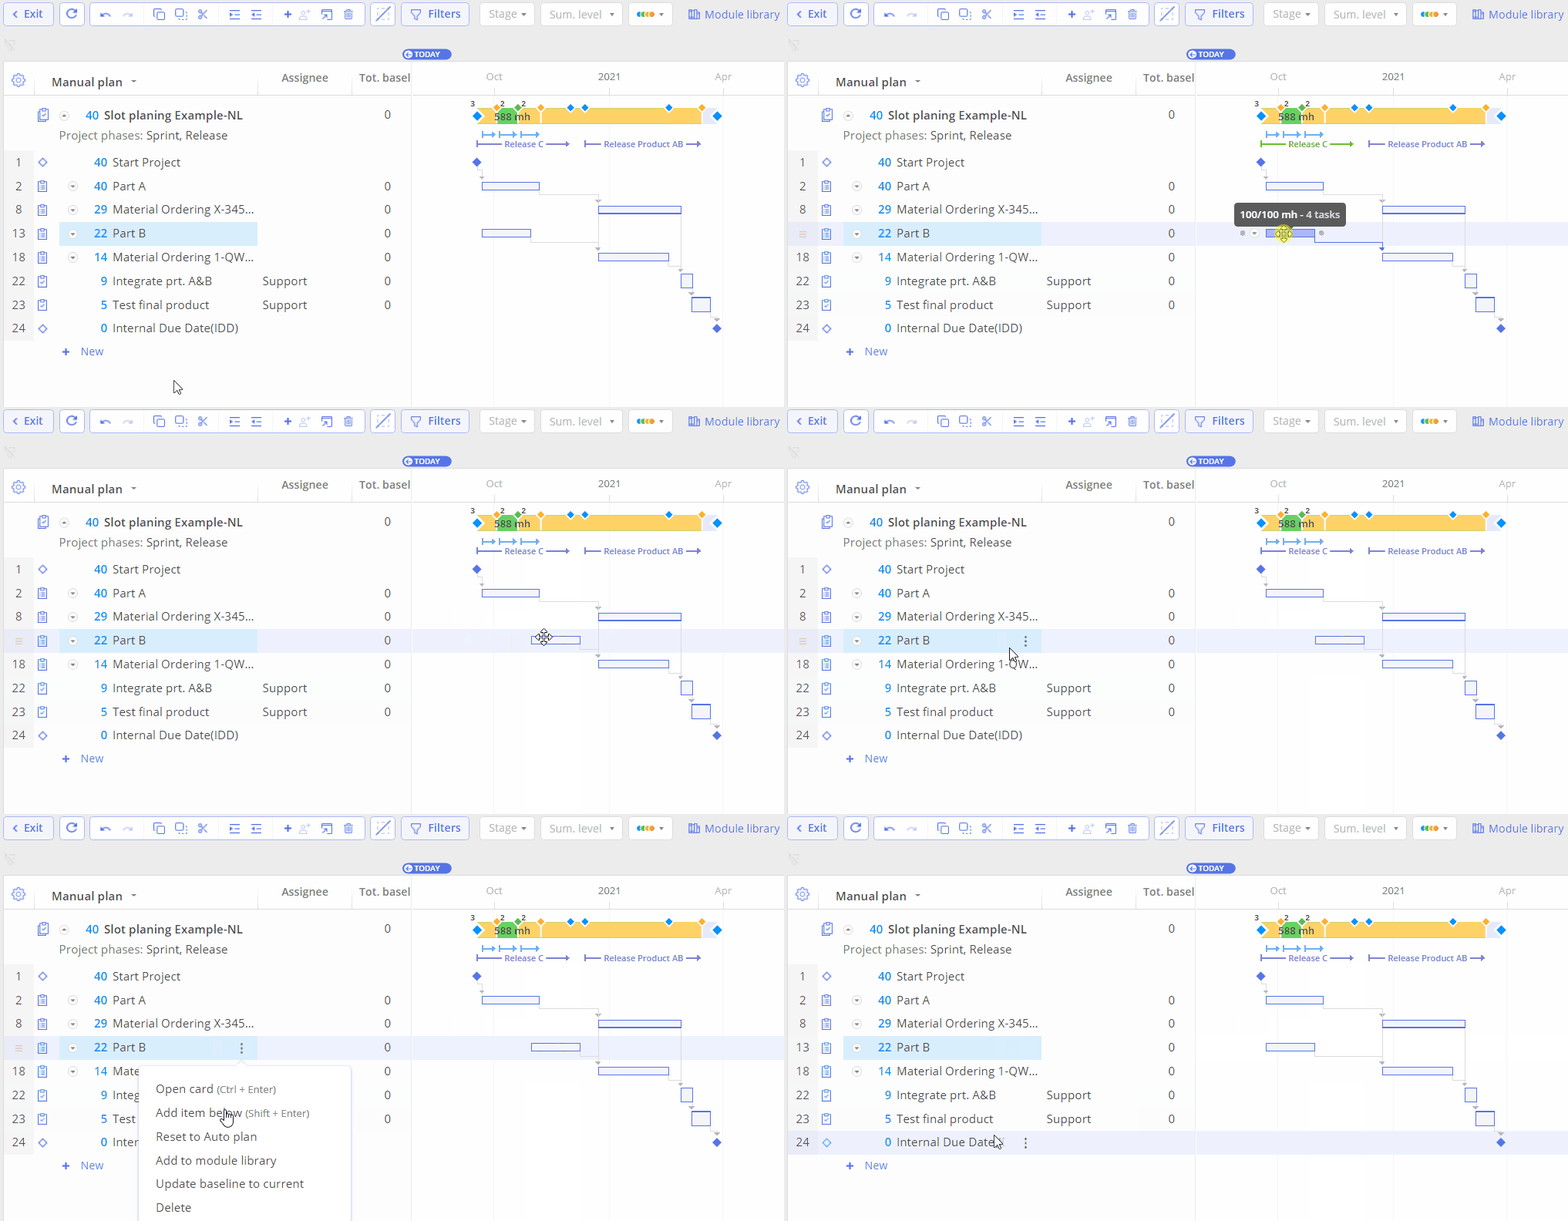
Screen #9 – Planning Mode – Position Reset
Please note that the position reset will be applied only for the selected item.
Changing Duration
Task duration is one of the main parameters in project planning. It can be changed only in the “Manual plan” mode view.
You can extend or decrease task duration by using a special separator located to the right of the task at a Gantt chart. Please, note that this element appears only for tasks. The Summary duration can be adjusted only by changing its sub-items’ positions.
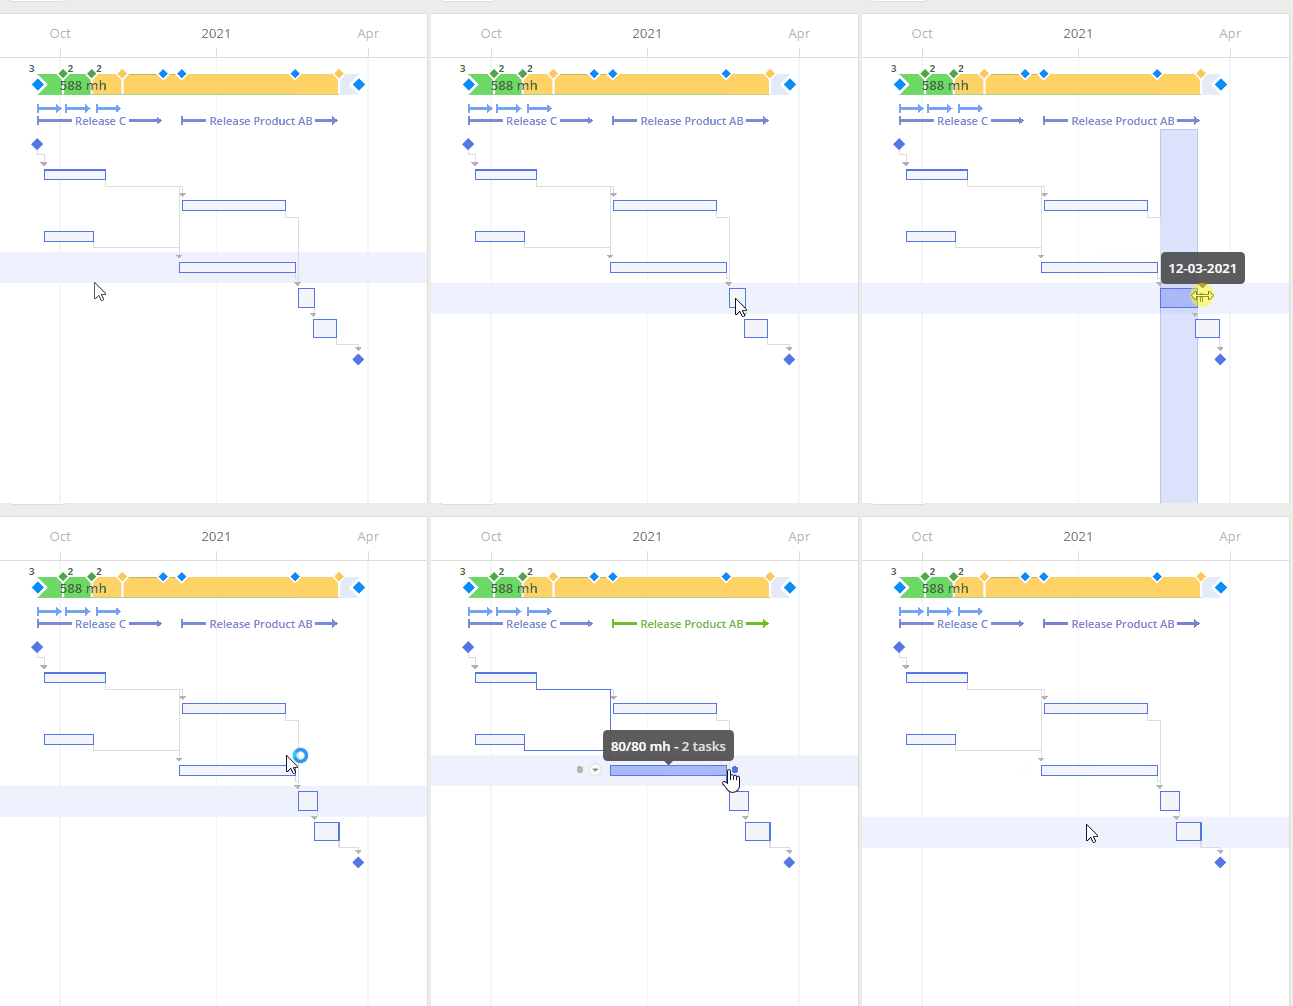
Screen #10 – Planning Mode – Task Duration
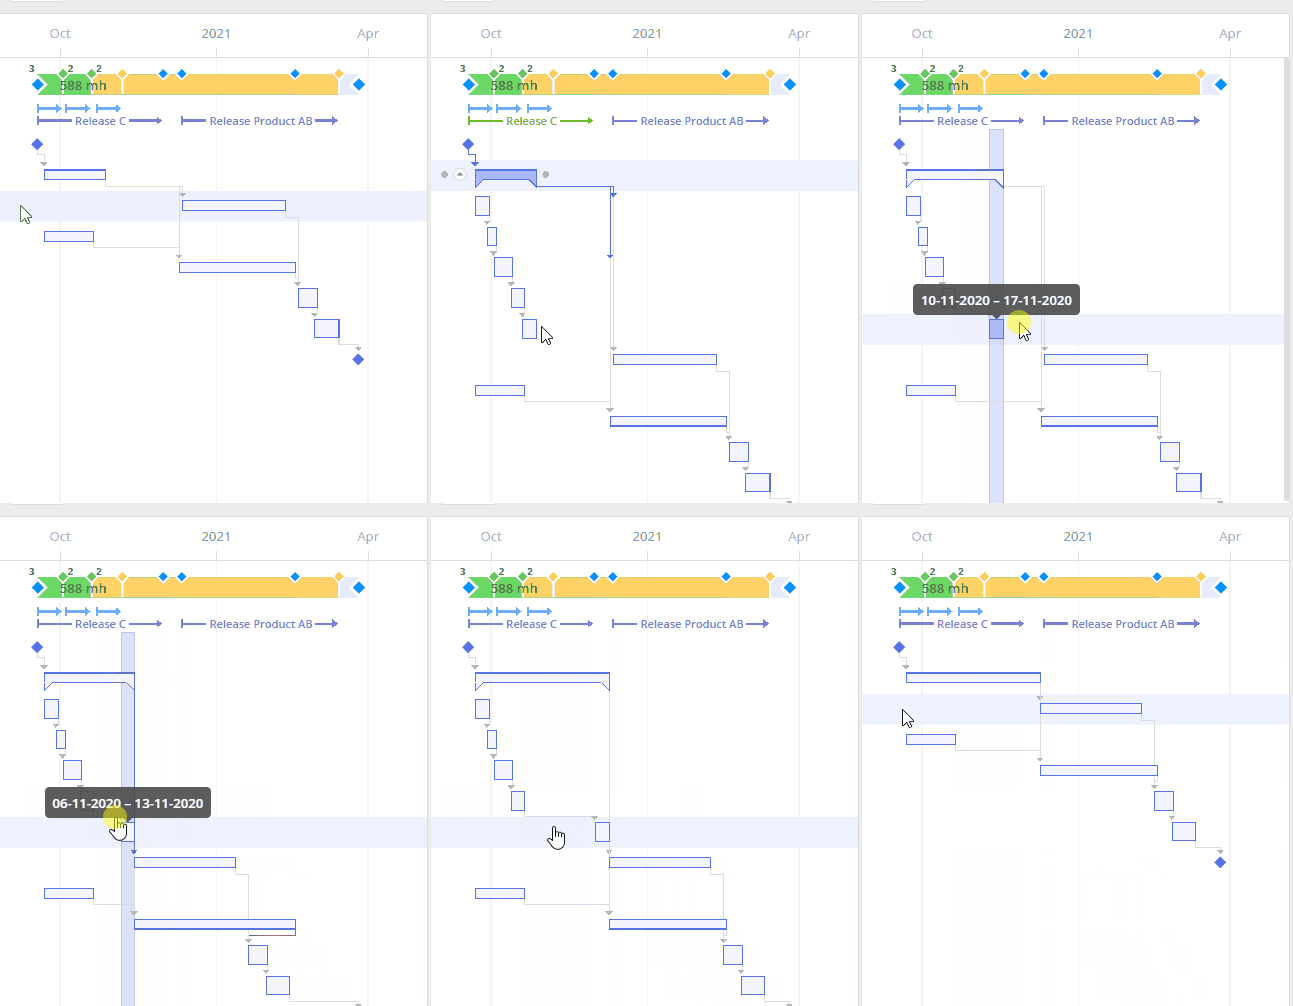
Screen #11 – Planning Mode – Changing Summary Duration
Keep in mind that initial estimations won’t be changed as a result of this action.

