Introduction
Inspired by the Personal Task List, Epicflow introduces the Group Task List. This enhanced feature aims to provide a broader scope, offering a more comprehensive perspective for task management.
The Group Task List is an advanced feature within the Epicflow system, designed to provide an in-depth overview of task management, building upon the foundations of the Personal Task List.
Screen #1 – Group view in Task List selection
Access the Task List Group View
To access the Task List Group View, follow these steps:
- Navigate to the ‘TaskList’ page from the left pane.
- Select ‘Group’.
Views
Tasks in Epicflow can be displayed in various formats, catering to different user needs. In the group view, there is a views selector available.
- The view options can be found in the top right corner.
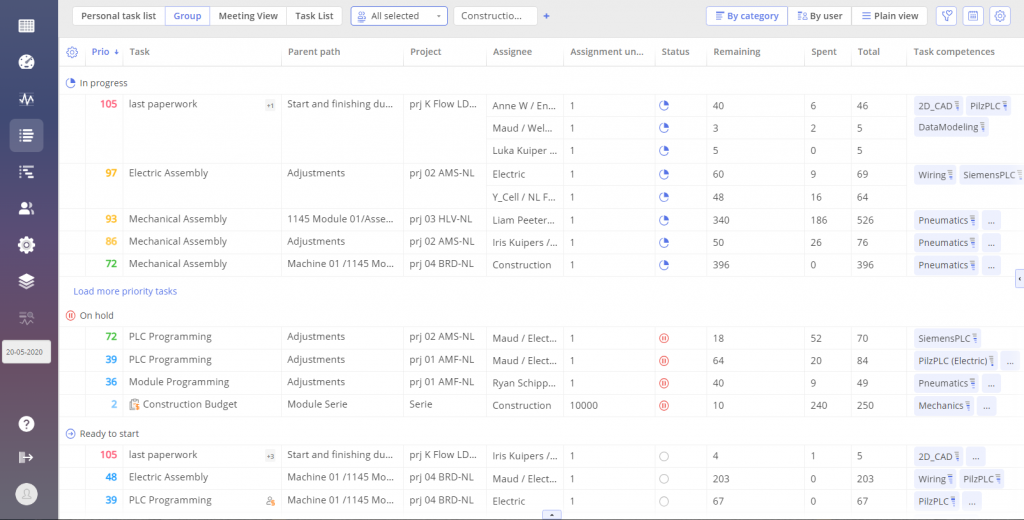
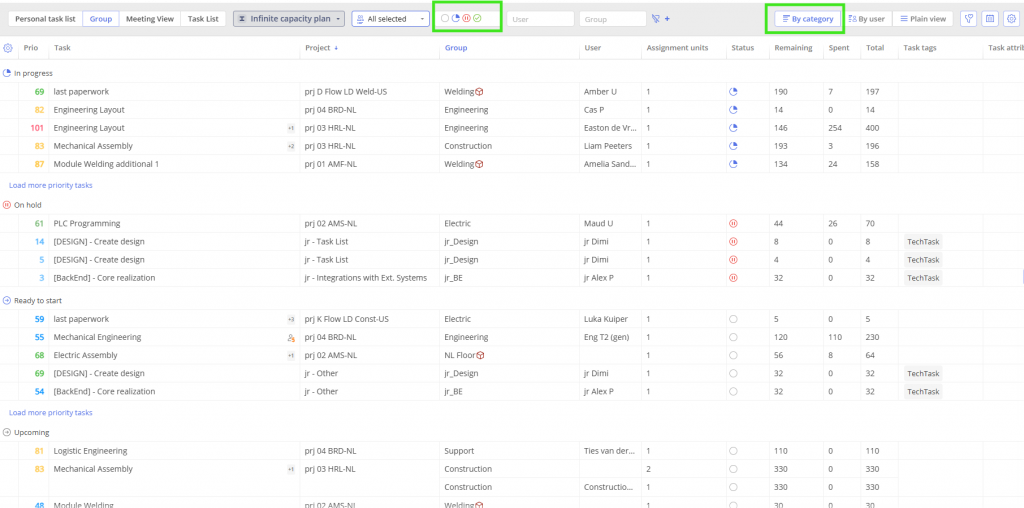
- By Category View: Focuses primarily on the ongoing execution status of tasks.
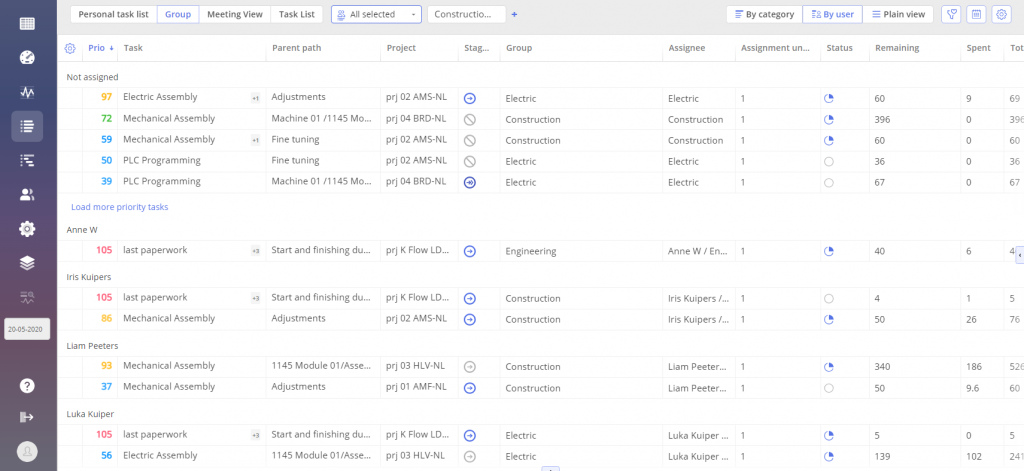
- By User View: Especially curated for resource managers, it offers an overview of task assignments per individual and draws attention to tasks that haven’t been designated.
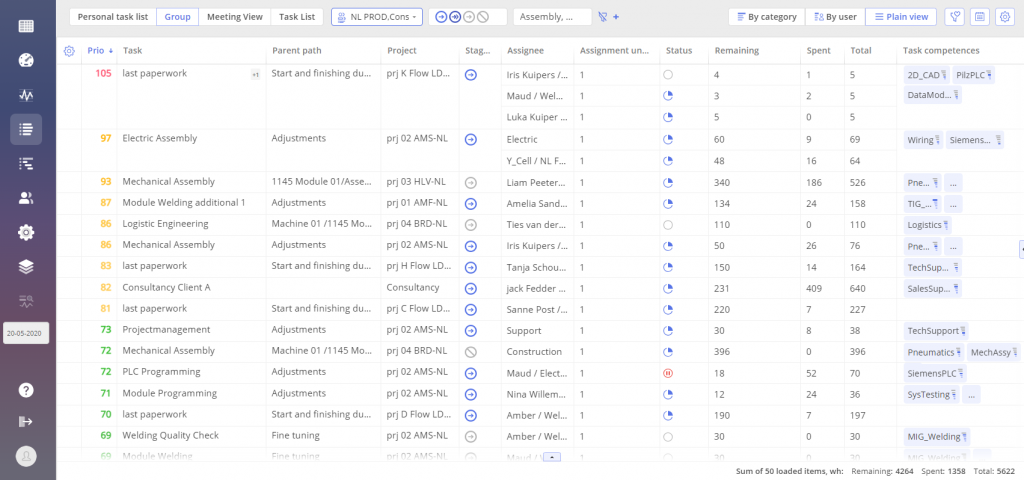
- By Plain View: A basic list to give a swift look at all tasks.

Screen #2 – Group view in Task List selection
Screen #3 – By Category View
Screen #4 – By User View
Screen #5 – By Plain View
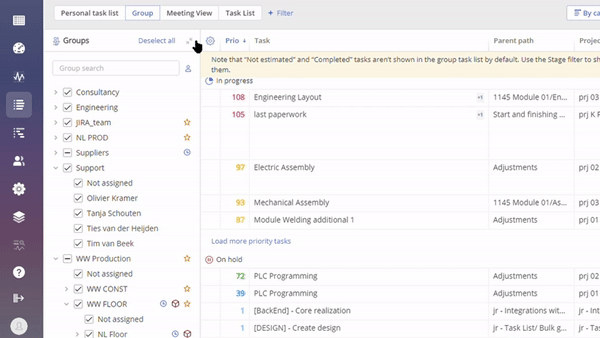
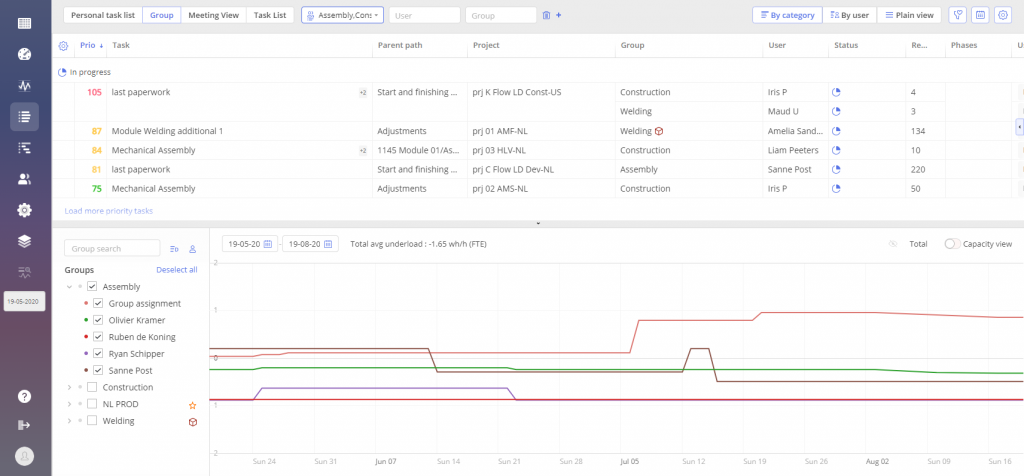
Group Selector
The Group Selector offers an opportunity to choose a group from the list and view its tasks based on the granted permissions. You have the option to choose its placement, either on the left side or in the top menu.

Screen #6 – Group Selector
Screen #7 – Group Selector Customization
If you have the rights to see all tasks, you can easily select any group you like from the drop-down list and check its tasks.
When you select a group in the Group Selector drop-down list, this group will be shown even after a page refresh/logging out/duplicating the page/going to another page and returning.
Timeline Feature
Users can activate the task timelines simply by clicking on the arrow icon to the right of the task list. For users looking to tweak their settings, the gear icon at the top right corner provides further options. This setting reveals a task’s feasibility and a probable date range, marking the earliest and latest practical dates for the task’s completion.
Enable the Timeline
To enable the Timeline, follow these steps:
- Locate the arrow icon on the left-middle of the screen.
- Click on the arrow icon.
Prediction Data (RTS – Remaining Time to Start)
The Prediction view provides additional insights into task scheduling by displaying RTS (Remaining Time to Start) bars on the timeline.
RTS shows where a task would be positioned relative to its earliest possible start date, considering only predecessor delays and ignoring resource constraints. This allows users to clearly distinguish delays caused by dependencies from those caused by limited resource availability.
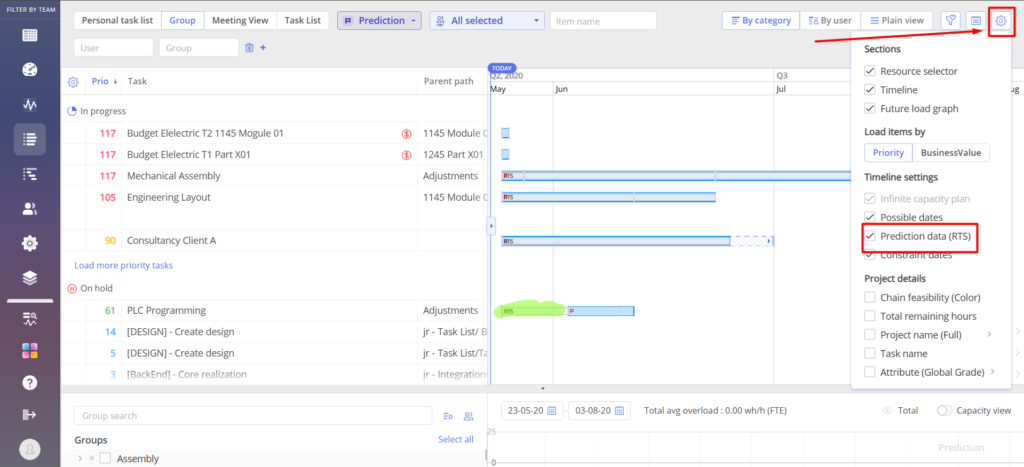
Screen #8 – RTS (Remaining Time to Start) Bars in Prediction View
Note: RTS bars are not available in Infinite Capacity Plan mode. In that mode, there are no resource constraints — every task is scheduled to start as soon as its predecessor finishes. Since all tasks are already at their earliest possible start, RTS has no additional meaning and is not displayed.
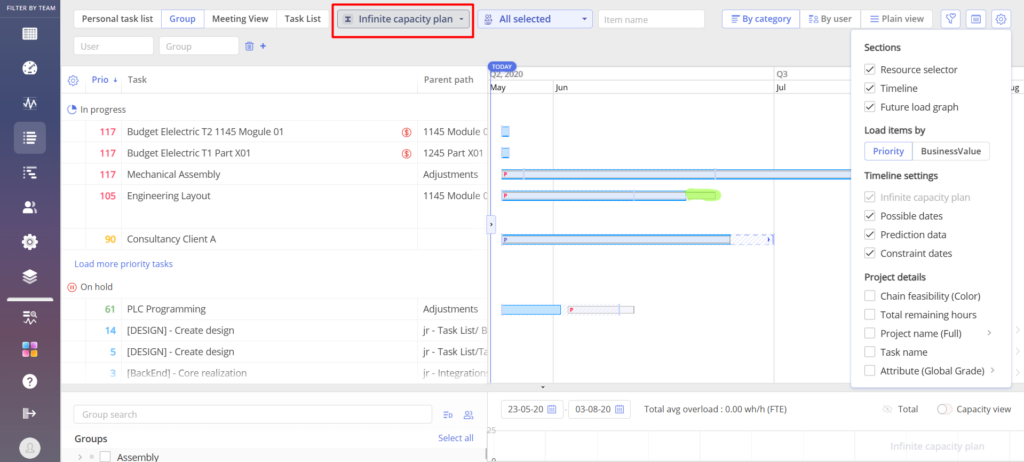
Screen #9 – Prediction Data option in Infinite Capacity Plan (RTS not shown)
How to Enable
Enable Prediction data (RTS) under Timeline settings.
Open the Group Task List.
Click the gear icon in the top-right corner.
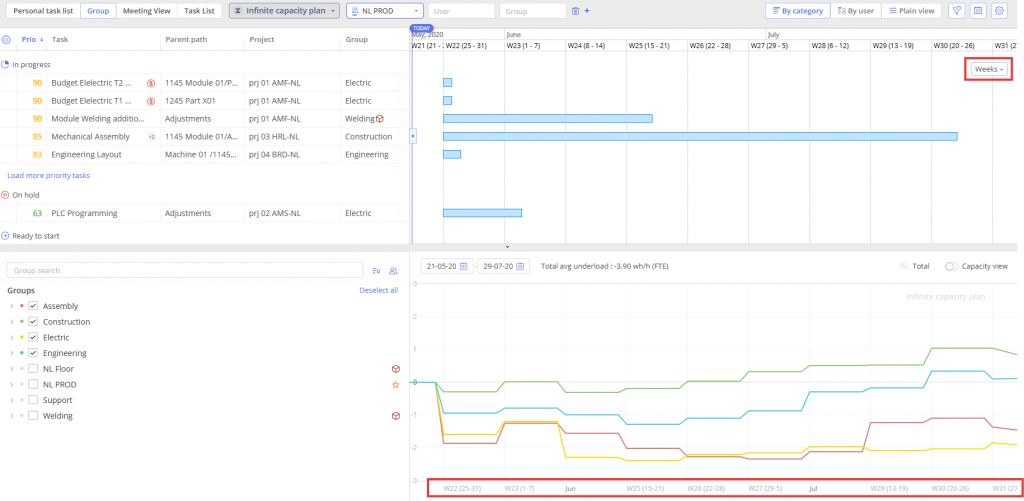
Time Scale Adjustment
Found in the top left, users can switch between viewing tasks in days, weeks, months, quarters or years. For detailed adjustments in the capacity view, place the cursor over the time bar and scroll. It’s essential to maintain the cursor’s position over the time bar during this.

Screen #10 – Timeline and Time Scale Adjustment
The chosen parameter will also determine the scale displayed on the Future Load Graph. For example, if you select weeks, weeks will appear on the Future Load Graph slider. The same applies to days, months and quarters.
Screen #11 – Timeline and Time Scale Adjustment
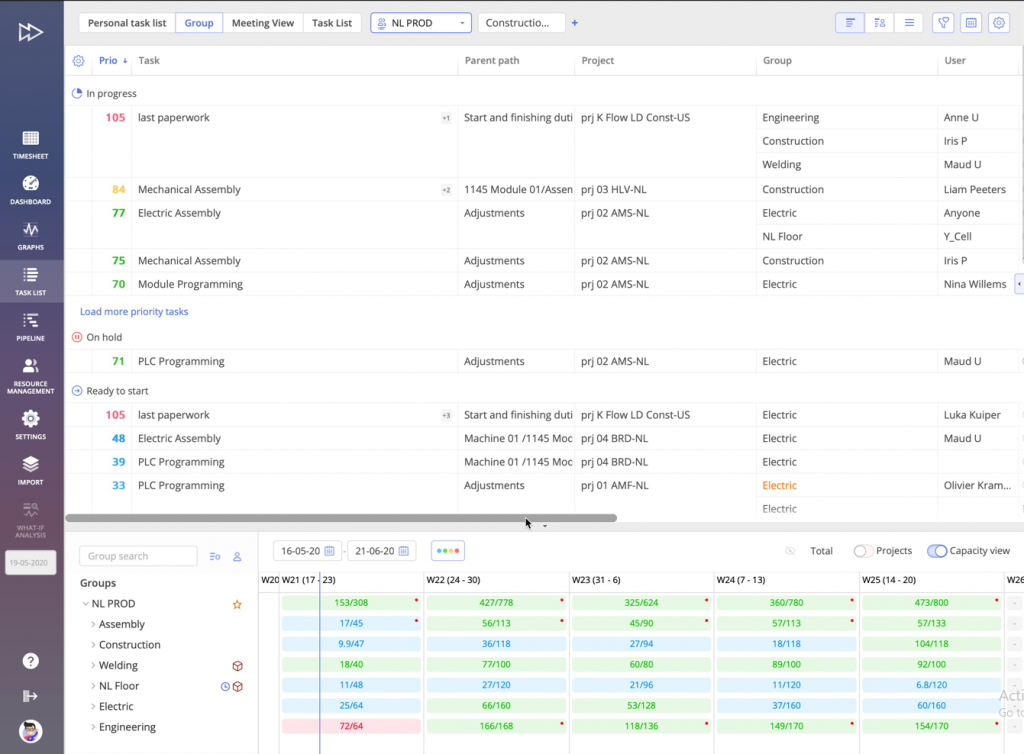
Future Load & Capacity view
This bottom feature reveals the Future Load graph. In addition to the standard view, there’s the Capacity View which presents a balance between available capacity and task utilization.
Enable Future Load Graph & Capacity view
- To enable the Future Load Graph, click on the arrow located in the middle at the bottom of the page.
- After you have enabled the Future Load Graph, you can switch to the Capacity view, which is located in the top left corner of the Future Load Graph view.
Screen #12 – Future Load Graph

Screen #13 – Capacity View
You may also be interested in the article: Understanding the Capacity View in the Group Task List.
Time Period Selection
Users can select a desired time period either by dragging within the capacity view on the time bar or using the calendar icon at the top right. A distinctive feature, “Only tasks from range”, highlights tasks within the selected date range. Additional filters, aligning with Epicflow standards, are also accessible.
- To choose a date range, click on the calendar icon positioned in the top right corner.
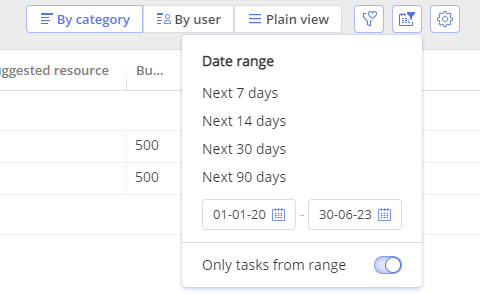
Screen #14 – Time range
Planning Types
You have possibility to run planning types directly in Task List Group View. More about Planning Types you can read in this article.
- Navigate to the Task List Group View.
- Select the appropriate Planning Type,
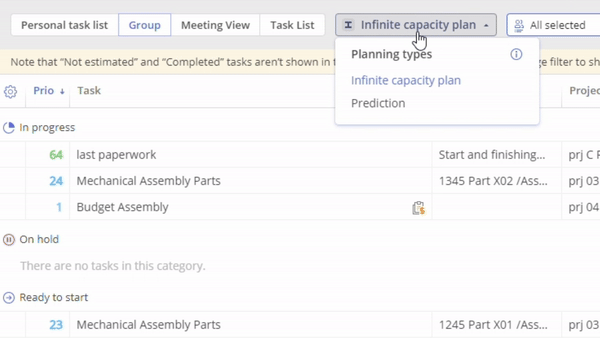
Screen #15 – Planning Types
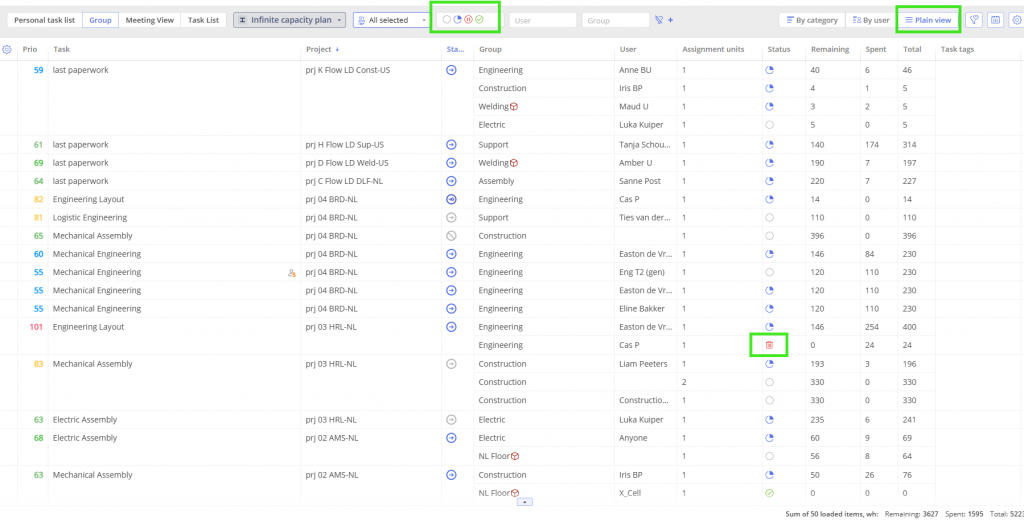
Understanding Task Assignments and Filtering Options
A task can consist of multiple assignments, and by default, all assignments for a task are displayed, as each assignment contributes to the overall task. When viewing a task, you see all related assignments to ensure complete visibility.
Plain View
The Status Filter applies to the entire task and not to individual assignments. Even if you apply the ‘Status’ filter ‘In Progress’ – assignments marked as ‘Completed’ or ‘Deleted’ will still be displayed if at least one assignment within the task is ‘In Progress.’
Screen #16 – Plain View: Assignments
Category View & User View
These views allow you to filter assignments based on their status.
How to Filter Assignments in Category View & User View
- Navigate to the Task List Page
- Switch to either Category View or User View.
- Enable Status Filter – This filter controls which assignments are displayed.
- Select the desired status – Choose only the statuses you want to see (e.g., In Progress, On Hold).
- Apply the filter – The view will update to show only the assignments matching your selection.
- Verify the results – Ensure that unnecessary assignments (like completed or deleted ones) are no longer visible.
Screen #17 – By Category View: Assignments
Working with Tasks
You can read more about working with tasks and how to manage them in this article.