This part of Wiki describes processes and functionalities of the Epicflow system integration with JIRA.
All topics are set in the step-by-step order to make the process of integration intuitive and easy.
JIRA Account Creation
The first step is creating a JIRA account. A user should possess read-and-write rights to the defined projects for their import into the Epicflow system and additionally rights to operate with API.
A permission can be granted to a group, project role, or issue role a user belongs to or granted directly to a user. For additional information about different approaches please refer to official JIRA documentation.
The most common permissions are as follows:
- Administer the Cloud site: Users in the site-admin group have this permission.
- Administer Jira: granted by Jira Administrators global permission. Users in the administrator group have it.
- Administer a project in Jira: Granted by the “Administer projects” permission for a project. It can be granted to a user, a group, a project role, and more.
- Access a project in Jira: Granted by the “Browse projects” permission for a project. It can be granted to a user, a group, a project role, and more.
- Access Jira: Granted by the Jira Users global permission. Users in the [product]-users (for example, Jira-software-users) group have this permission.
For additional information please refer to official documents Manage groups and Managing global permissions.
You can create an account having one of the following set of rights:
Admin Rights
- Log in with the administrator account to the JIRA environment.
- Go to site administration and invite a user by selecting the corresponding button at the top right corner located at the User page of the USER MANAGEMENT block.
- If it’s applicable for you, select the products from the Application access list that the user should have access to. In this case, at least choose Jira Core.
- Specify the following set of groups:
- administrators
- site-admins
- Jira-developers
- Jira-users
- users
- Indicate a separate email for the user.
- Click ‘Invite user’ and proceed with invitation email to accomplish user creation.
Read-Write Rights
The difference from the previously described option covers only the scope of the set groups:
- Jira-developers
- Jira-users
- users
- <other groups> specially created to define read-write access to the projects prepared for the import into the Epicflow system.
Read Rights Only
For this approach, you should define only a set of
- <other group(s)> specially created to define read access to the projects prepared for the import into the Epicflow system.
If you need to use the Epicflow system in the configuration when it doesn’t write anything back to JIRA and has only one-way synchronization from JIRA to Epicflow, please communicate with the Epicflow team to address this issue. A special mode can be activated for such purposes.
API Tokens
API tokens are a must for JIRA authentication when configuring the connection between Epicflow and JIRA.
For two-step verification, the REST API token must be used.
Create an API Token
To create an API token
- Log in to your JIRA environment https://<Company_Name>.atlassian.net
- Go to your Profile by selecting the “Profile” option in the context menu that appears when you click on your Account Icon with the left mouse button at the left bottom corner.
- Click on the “Atlassian account” link to be redirected to the “Manage your account” page and select the “Security” tab.
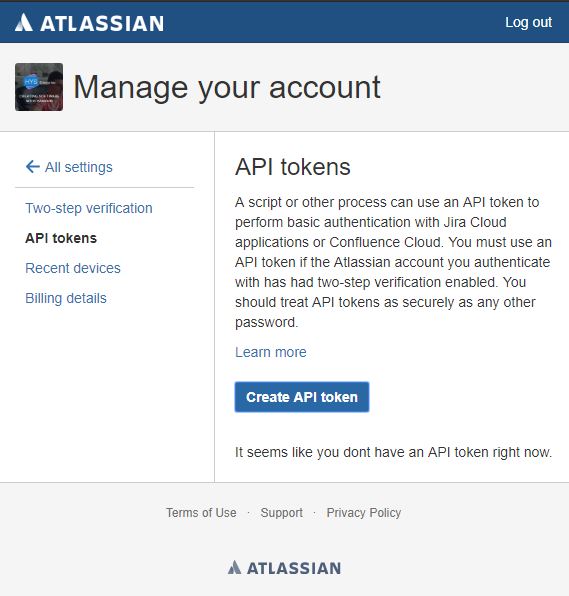
Screen #1 – JIRA-API token creation
- In the API token chapter, select “Create and manage API tokens” and as soon as you are at “Manage your account” page -> API tokens confirm the token creation by clicking “Create API token” with the left mouse button.
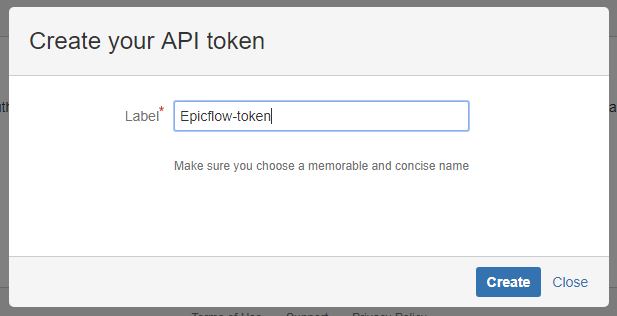
Screen #2 – JIRA-API token creation
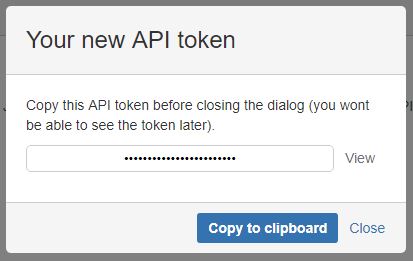
Screen #3 – JIRA-API token creation
- After label identification, your system will grant you a token that will be required for Import.
JIRA Scope Filter
As a preparation step, you should create a filter (query) in JIRA to define the scope of projects, epics, and tasks defined for the Import itself.
- Log in to the JIRA environment with a previously created account;
- Choose the “Issues and filters” JIRA icon;
- Select “Search issues”;
- If a basic search is shown instead of an advanced one, click Advanced (near the icon).
- Enter your JQL query. As you type, Jira will offer a list of “auto-complete” suggestions based on the context of your query.
- Keep in mind that auto-complete suggestions include only the first 15 matches that are displayed alphabetically, so you may need to enter more text if you can’t find a match.
- Press Enter or click to run your query. Your search results will display in the issue navigator.
To limit the scope and decrease the load on your system we recommend you to use a query similar to the following one:
category = Epicflow AND NOT updatedDate < “YYYY/MM/DD”
where “YYYY/MM/DD” defines a period that doesn’t exceed one year.
Please note that the category should be defined and set separately.
- Save your filter by pressing the “Save As” button located over the inserted JQL query.
- If you have used any other account different from that which is going to be applied for the Import you should share your filter with it. For that end,
- go to the Filter list and locate your previously-stored JQL query filter.
- select “Edit filter details” from the context menu to the right in front of the current filter.
- share your filter with the required user, group, or project, and save.
- If you have used any other account different from that which is going to be applied for the Import you should share your filter with it. For that end,
For additional information please refer to official JIRA documentation regarding JQL(JIRA Query Language).
First Data Import
- Before you start, please, verify with your Epicflow System Administrator that your account has the required permissions to access and configure the Import page.
- Login into the Epicflow system and navigate to the “Import” menu item, which is located at the bottom part of the left menu column. You’ll be automatically redirected to the Connection configuration page.
Connection
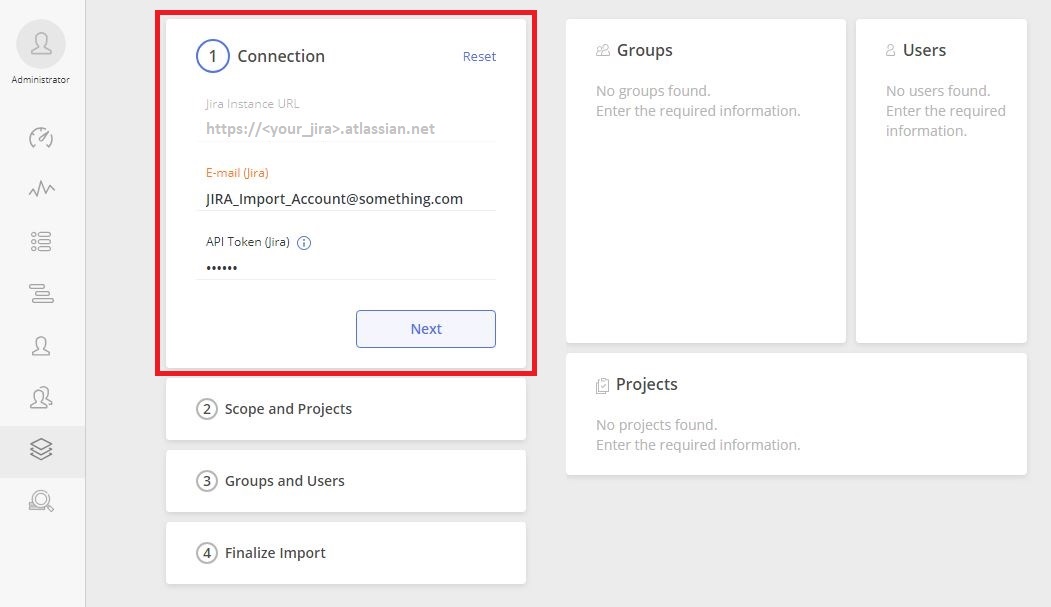
Screen #4 – JIRA – Connection
- First, you have to specify your Jira Instance, Username, and JIRA token and press the “Next” button.
- As the next step, you have to configure and define Scope and Projects.
Scope and Projects
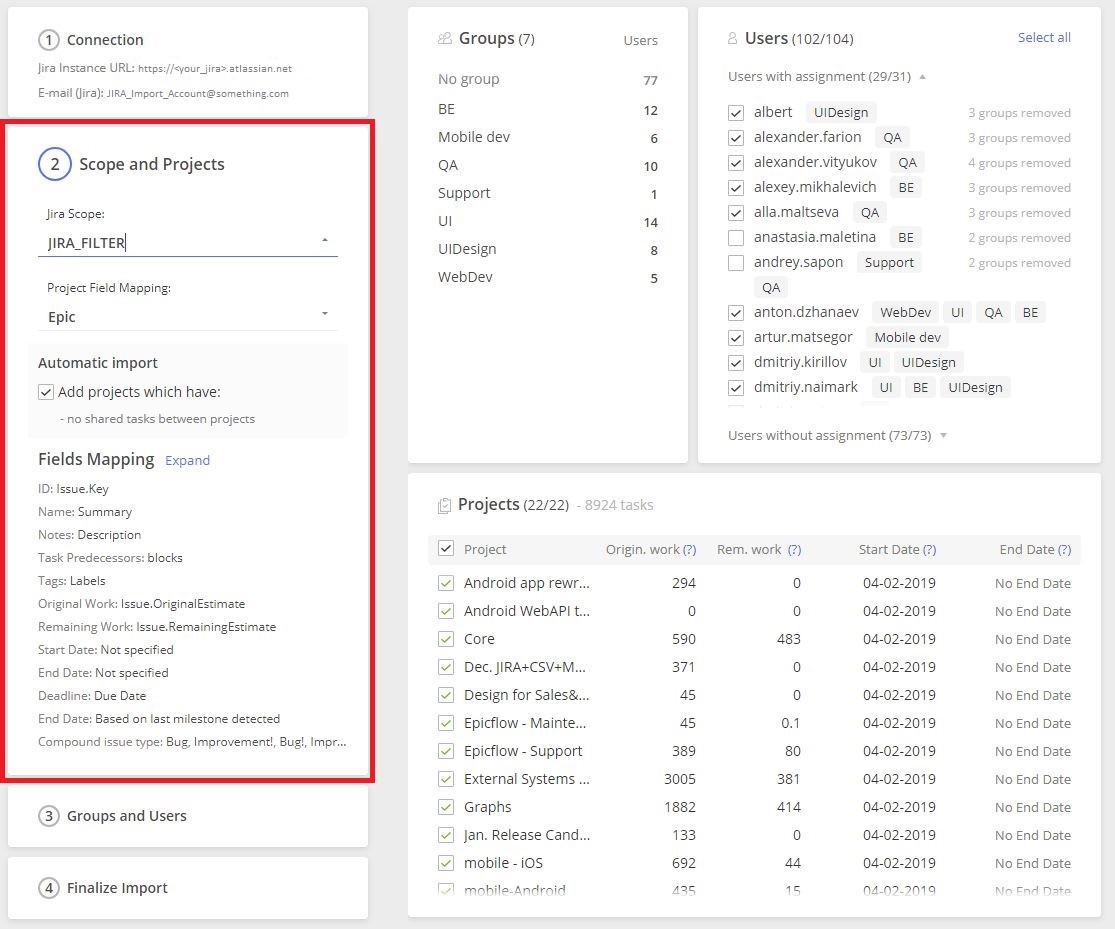
Screen #5 – JIRA – Scope and Projects
Below, you can find a description of all settings of this configuration part.
- Jira Scope – select previously created JIRA Scope Filter.
- Keep in mind that if you select the “Whole Jira Scope” option, the system will work with the whole set of available data, which is NOT RECOMMENDED. In such a way, you create unnecessary load on the Epicflow and JIRA systems. Even if you would like to import everything from JIRA, it will be better to take the recent year’s data only by creating a special filter to this end.
- Project Field Mapping – defines what you would like to have as a project in Epicflow:
- Project – each separately created project in JIRA will be imported as a Project to Epicflow;
- Epic – each Epic will be presented as a separate project in Epicflow;
- Query – each selected query will be defined as a separate project in Epicflow.
- If you put a tick opposite the Automatic Import, the system will automatically import the newly appeared projects from the defined scope if related projects have no shared tasks between projects. Keep in mind that if you have unchecked any Project in the Projects list (despite the automatic import button is on), the project will be imported to the system neither now nor later automatically, unless it’s selected again.
- On pressing the “Expand” text, to the right side from the “Field Mapping” label, Epicflow will expand additional block with the advanced configuration settings. All settings are grouped into the following blocks:
- “Common fields” – defines the set of parameters used for the mapping of appropriate fields in JIRA to particular fields in the Epicflow system. Usually, you don’t need to change them.
- ID – defines which parameter (Key or ID) will be used as a primary ID in Epicflow;
- Name – defines the name of the issue which can be either ID or Key or Summary or Description;
- Notes – usually, this field contains Description but again you can redefine it accordingly;
- Task Predecessors – defines the type of connection used to define the link between the issue and its predecessor. By default, it’s “blocks” but a multiple one can be selected if required;
- Tags – only one possible option – “Labels”. It’s used to identify budget tasks;
- “Task Fields” – this block of parameters defines the mapping for values which should be used as Original and Remaining work;
- Original Work – Original Estimate is a default setting which shouldn’t be changed;
- Remaining Work– Remaining Estimate is a default setting which shouldn’t be changed;
- “Parent field” – here you can define parameters that must be accepted as a Start Date of the Project or End Date;
- “Milestone fields” – additionally to the previous block you can also set milestone parameters;
- “Compound task fields” – if you use multiple assignments for one issue with the identification of different roles required to finish the task you may use this part to configure this relation and work separation between the two defined assignees.
- Compound issue type – defines the type of an issue (Bug, Sub-task, Task, etc.) which should be processed as a compound task (separated accordingly into two related tasks);
- Second assignment field – usually, a QA engineer is defined as the second assignee;
- Work ratio – defines the ratio of work between the first and the second assignee. As a result, the initial estimation will be divided accordingly to the defined value (30, 40, 50, 60 or 80);
- The first assignment done status – defines the status of an issue when the first assignee has finished their part and the second assignee should be involved;
- Second assignment done status – defines the issue status when all work is done and the issue is accomplished;
- First Assignment prefix is a special prefix that is automatically added to the task name and used to identify the compound task of the first assignee in the Epicflow system;
- The second Assignment prefix is a special prefix that is automatically added to the task name and used to identify the compound task of the second assignee in the Epicflow system;
- Work – this parameter is used to define the field which is used for Compound task estimation. It could be either Story points or Task progress or compound issue estimation parameters;
- Time unit is a unit of measure: hours, minutes, or seconds;
- The second assignment group field – if any field is used for the second assignment group identification, you can configure it here;
- Default group for the second assignment – Group name from JIRA which must be used in Epicflow for the second assignment;
- “Budget fields” – part for budget task configuration. Please refer to the Budget section for additional information on the topic;
- Enable budget processing – deselecting this field will switch off the budget processing for the whole list of projects but you can switch it on later in Project Card for a specific project;
- Use ‘relates to’ as a link to budget – apart from specially defined rules on how tasks can be connected to the specific budget task, you can also specify such connection directly by setting up the link of “relates to” type. It can be configured for each project separately in the Project Card.
- Identifier of budget tasks is a key that should be used for budget task identification. It can be also configured for each project separately in the Project Card;
- Budget mark text is a marker for the task to make it more convenient for the end-user for identification. It can be configured for each project separately in the Project Card;
- “Backlog fields” – this part defines work with the backlog and additional configuration of the sprints. All settings can be configured separately for each project in the Project Card.
- Import backlog – defines if we should import tasks from the backlog;
- Set default start/end dates for new sprints – will enable automatic calculation of start/end dates for the upcoming inactive sprints in accordance with the below settings.
- Interval between sprints, working days – this parameter is applied for the future automatically calculated sprints.
- Default sprint duration – this parameter is applied for the future automatically calculated sprints.
- Max parallel sprints – the number of sprints that can be started simultaneously.
- “Version as Milestone fields” – allows you to use additional milestones for your projects:
- Use a release date as a Milestone
- Use a start date as a Milestone
- “Jira Status fields” – this part helps to define additional business rules of managing the remaining hours for tasks that have been transferred to the “Done” status.
- Set remaining to 0 for `Done` tasks
- Add remaining to spent for ‘Done’ tasks
- “Common fields” – defines the set of parameters used for the mapping of appropriate fields in JIRA to particular fields in the Epicflow system. Usually, you don’t need to change them.
- As soon as Scope and Field Mapping is configured, you can proceed with the refinement of the Project list. By selecting and deselecting projects you can define those which will be imported into the system. Nevertheless this list, as all other settings, can be edited later.
Groups and Users
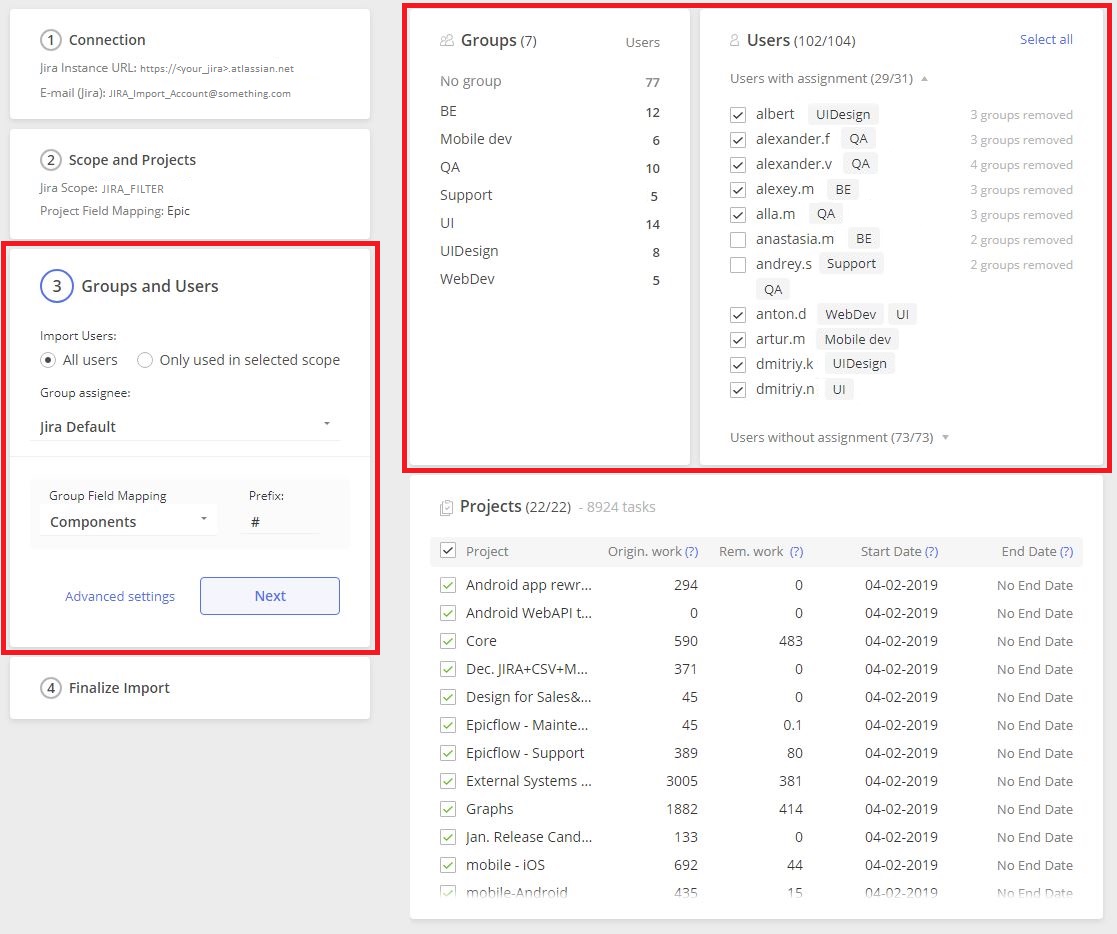
Screen #6 – JIRA – Groups and Users
- The third step is configuring and defining Groups and Users for the import.
- Import Users – Epicflow allows you to choose all users from the Jira system or users from the selected scope of Projects;
- Group assignee – defines source of group assignee;
- Group Field Mapping and Prefix – allows you to specify the Component and the Prefix which should be used to refine the group list.
Closer to the top of the screen, you’ll see the list of Groups with the specified number of Users in the loop and a separate field displaying the names of users and the groups they belong to.
- Review this section to determine the right relation of users to groups and select those that should be imported into Epicflow. Be aware that all deselected users will appear in the unmapped area and you still will be able to take them to the process later.
You can either remove a group relation or add a new one to a specific user by clicking a left mouse button.
Completing Import
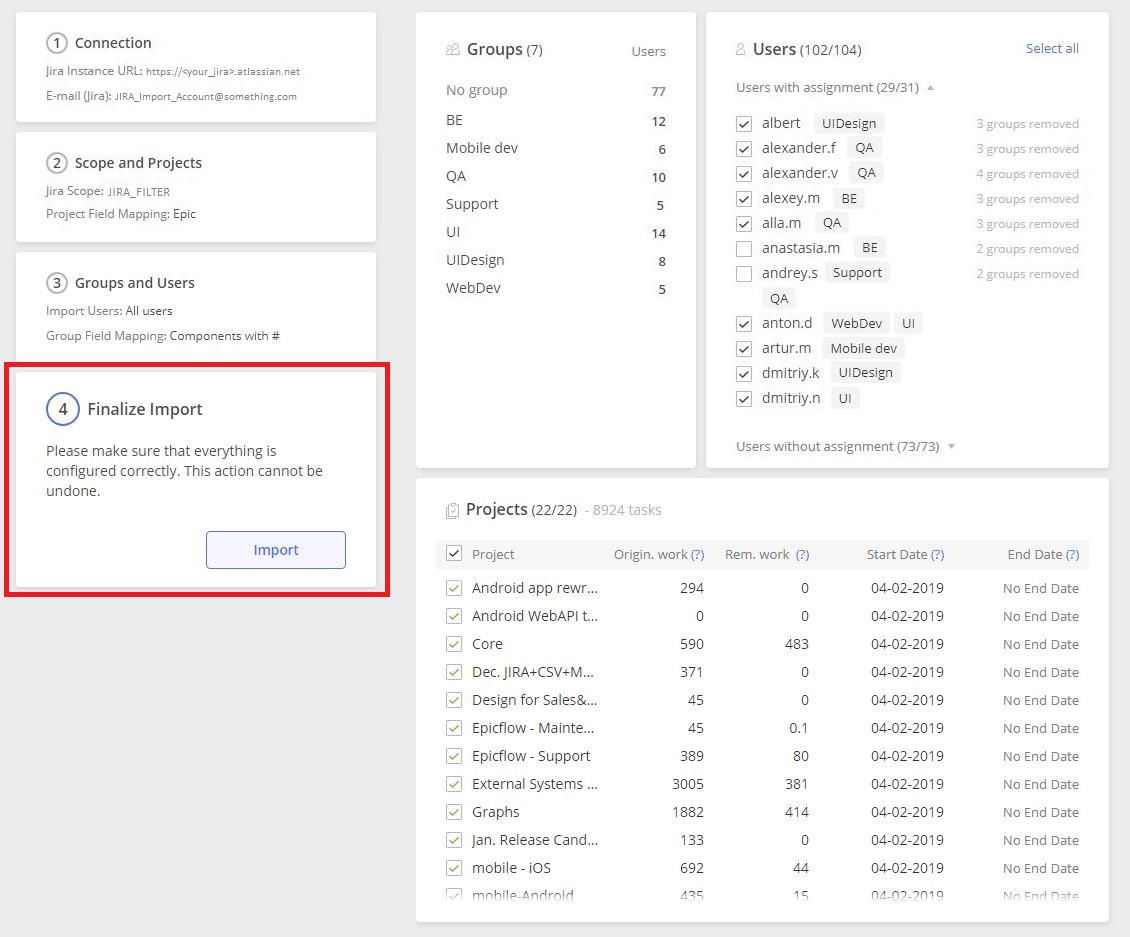
Screen #7 – JIRA – Finalize Import
- Now, as long as everything is configured correctly, you can complete the import with a left mouse click on the “Import” button. Be aware that even that this action cannot be undone Import settings can be reconfigured later if needed.
Having imported your Jira data into the Epicflow system, you’ll be redirected to the Pipeline page with all projects imported into the system.
Second Import Configuration
If your system was previously configured to connect with different JIRA instances you’ll see a list of these connections as soon as you visit the Import page.

Screen #8 – JIRA-import Connections list
- To create a new connection to the external JIRA system, press the “New connection” button. As a result, you’ll be automatically redirected to the Connection configuration page. All you need to do is to cover all steps as during First Import Configuration described above.
Editing Connection
To edit any previously created connection, take the following steps:
- Go to the Import page;
- In the context menu, choose the “Edit” option as shown in the screenshot below. As a result, you’ll be redirected to the Connection Configuration page.
- You’ll be able to edit configuration after you take all steps and click the “Import” button.

Screen #8 – JIRA-import Edit Connection
The system will allow you to specify new rules and add projects you’d like to import OR remove an established connection from the list. At the end, you’ll be asked to confirm your actions, and if you approve all changes will be implemented.
Deleting Connection
To delete any previously created connection, you would need to follow these steps:
- Go to the Import page;
- In the context menu, choose the “Delete” option as shown in the screenshot below and confirm your action;
- As soon as you confirm it, the connection link will be removed as well as all projects related to it with the corresponding resource pool and mapping links. Nevertheless, internal Epicflow users and groups will remain.
- Repeat Connection configuration will be treated by the system as a new one and no historical or configuration data will be restored.
Data Optimization
To optimize Epicflow output and bring it closer to JIRA, you’ll have to complete the following steps:
- As a first step, make some efforts in verifying your data in Jira.
It includes:
- Tasks and their dependency network verification;
- A rough time and cost estimate of each task;
- Resource groups assigned to complete each task or Components identification for each task;
- Projects, epics and versions deadlines where applicable;
- Creating a separate account for JIRA integration;
- Providing access to the created account for a required scope of projects;
- (Optional) If you would like to have Epicflow updated in the real-time mode also add the account to the “administrators” and “site-admins” groups. Otherwise, JIRA to Epicflow update will be done on an hourly basis.
Epicflow and JIRA Hours Correlation
Please, remember the difference in the interfaces of these two systems. However, the flexibility of our product allows them to interact effectively. Consider the following rules:
- Remaining in Epicflow is equal to the “remaining estimate” in Jira.
- Total in Epicflow is equal to the “original estimate” in Jira.
- Spent in Epicflow is calculated as total minus the remaining from Jira.
- Logged work is not synchronized from Jira so Epicflow doesn’t use logged work value directly.
If you log hours in Jira it will reduce the remaining estimate of the issue, so it will be shown in Epicflow as updated remaining (and updated spent value).