Introduction
Employee resource groups are groups of employees who join together in their workplace based on shared characteristics or skills. Correct groups allocation is an important key for reference, identification of the impeded resources and understand reasons of such on project flow. Analysis of the employee resource groups can provide insightful information for business.
Manage Groups
Add
Epicflow contains two mechanics for the group creation:
- direct in Epicflow system without the link specification on external system’s group
and
- from external system(s) with the link.
Presence of this link is desirable but not a crucial one. Sometimes you can have a group only in Epicflow system and don’t have such in external system due to a different circumstances.
Nevertheless if link is not specified it can be added later. Refer to “Map Group” section of the wiki for an additional information on this topic .
- To create a Group\Multigroup direct in Epicflow press “plus” icon located to the left from the columns names in the top left corner of the page. Newly appeared context menu will grant you an option to create either simple group or multi-group. To finish group creation process name and color of such must be specified.
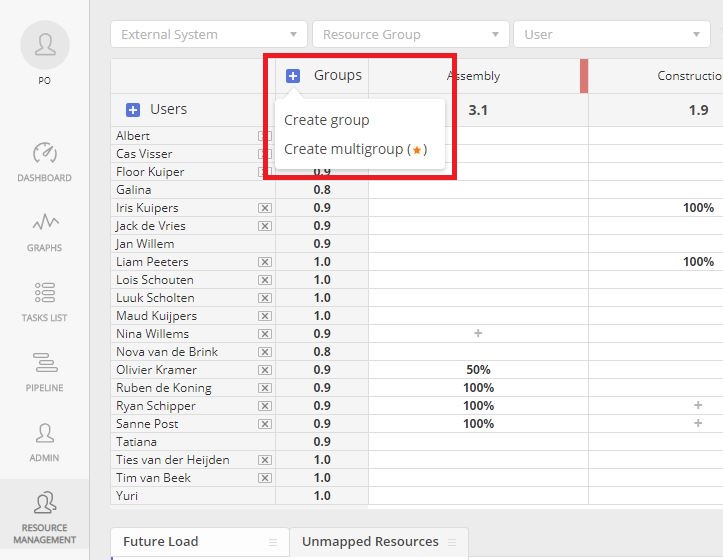
Screen #1 – Add Group
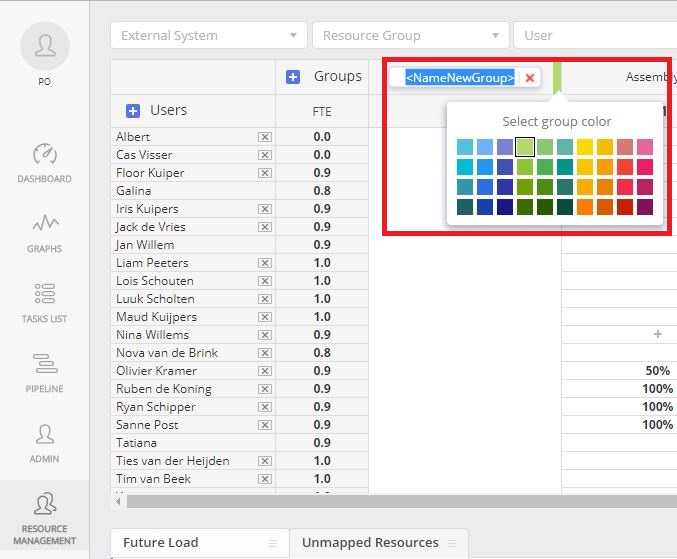
Screen #2 – Add Group – Name and color specification for the newly created group
- To create a Group\Multigroup from external system
- synchronize Resource Pool with the system
- open “Unmapped Resources” tab and locate required group.
- Press “plus” icon located to the right from the Group’s name.
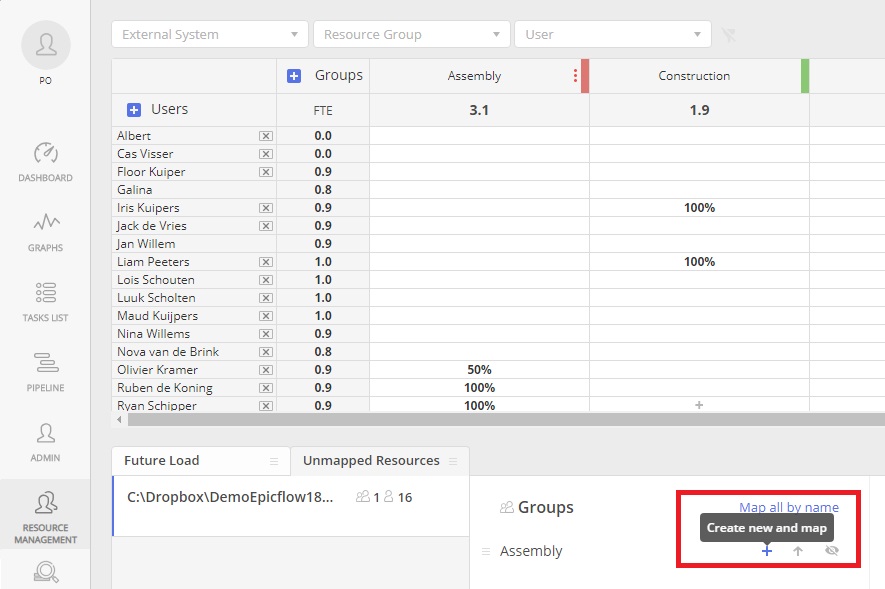
Screen #3 – Add Group – From external system
Rename
To rename a group follow these steps:
- Navigate to the Resource Management page.
- Left-click on the group name.
- Select the Rename option.
- Enter the new name in the provided field.
- Press the Enter key to save the changes.
Map
To map(link) external Group to previously created group directly in Epicflow open “Unmapped Resources” tab and
- drag required group from the Groups list directly to the name of previously created one.
or if name of the group created in the Epicflow and external system is the same
- open “Unmapped Resources” tab, locate required group and press “arrow” icon located to the right from the Group’s name.
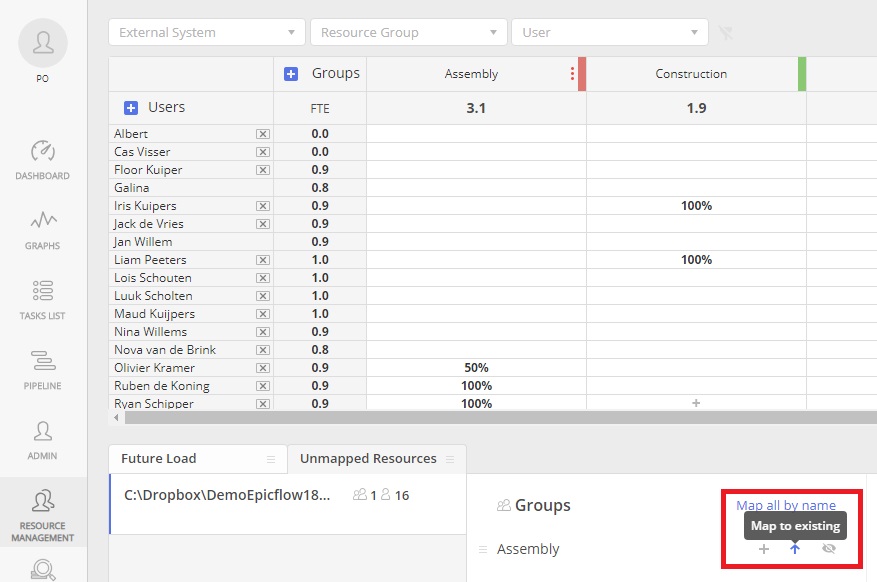
Screen #4 – Map Group
Un-Map
- To unlink external Group with the Group in Epicflow hover over mouse cursor on the Group name and click left mouse button on “three dots” icon menu, located to the right from such. In appeared “External Resources group” context frame press “trash” button to the right from the specified link.
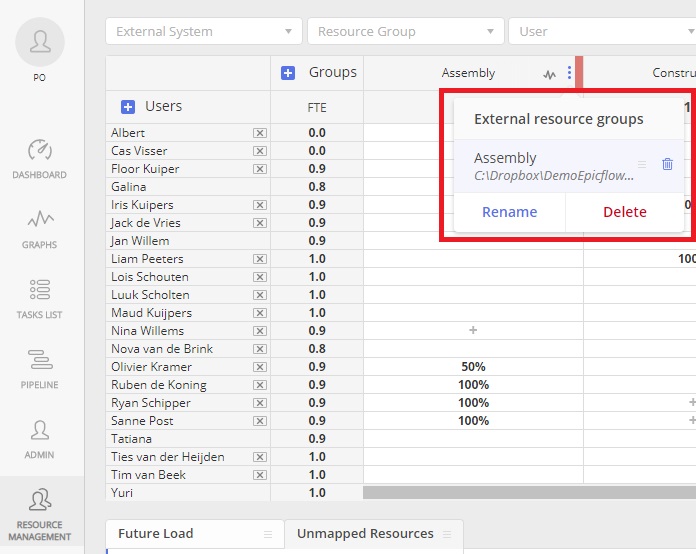
Screen #5 – Un-Map Group
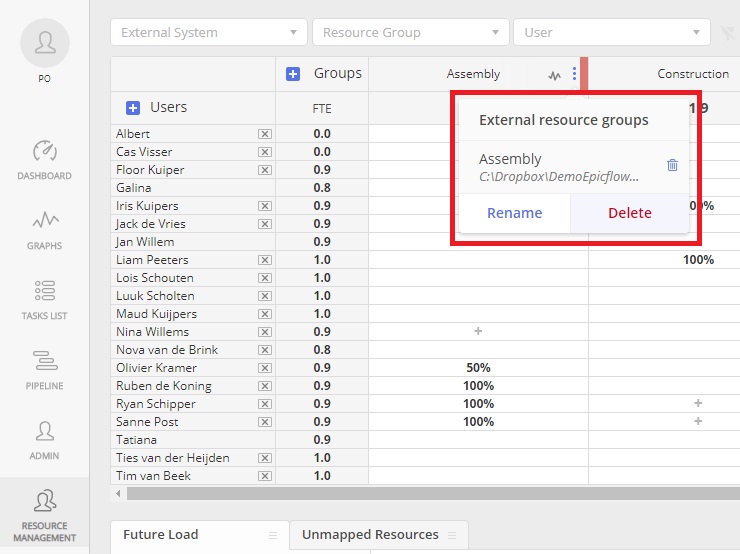
Delete
- To delete Group
- remove all resources from the group by left mouse click on appropriate capacity cell and removing the link by selection of “trash” icon
- As soon as group contains no resources assigned to such as next step you would need to reassign all tasks assigned on the group itself to any other group. For that go to the “Task List” and after filtering out all task by the group name perform “Group reassignment”. Refer to “Manage Task” chapter of the wiki for additional information on such topic.
- The last step is the group deletion itself. Hover over mouse cursor on the Group name at “Resource Management” page. Click left mouse button on “three dots” icon menu, located to the right from such, and press “Delete” button.

Screen #6 – Removing resources from the group
Screen #7 – Delete Group
Groups’ Display Configuration
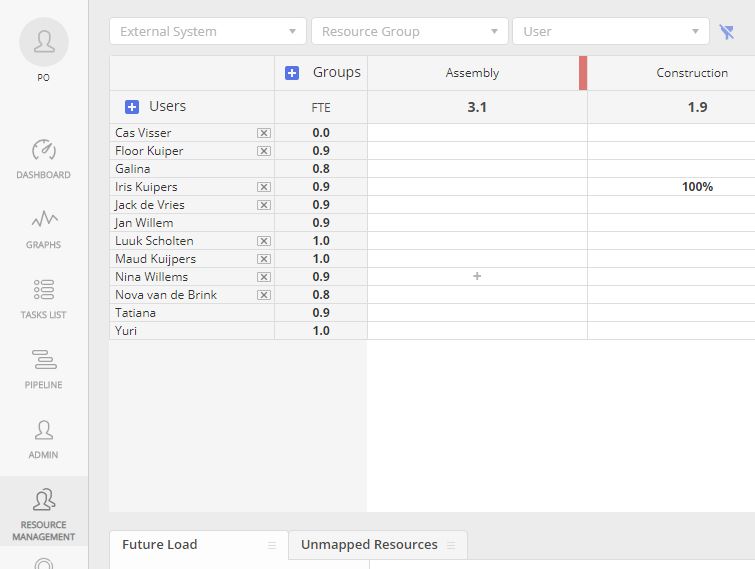
- For filtering data representation at Resource Management page corresponding fields with drop-down elements located at the top left corner of the page must be used. You can either select required elements from the drop-down list or type in some key for data filtering.
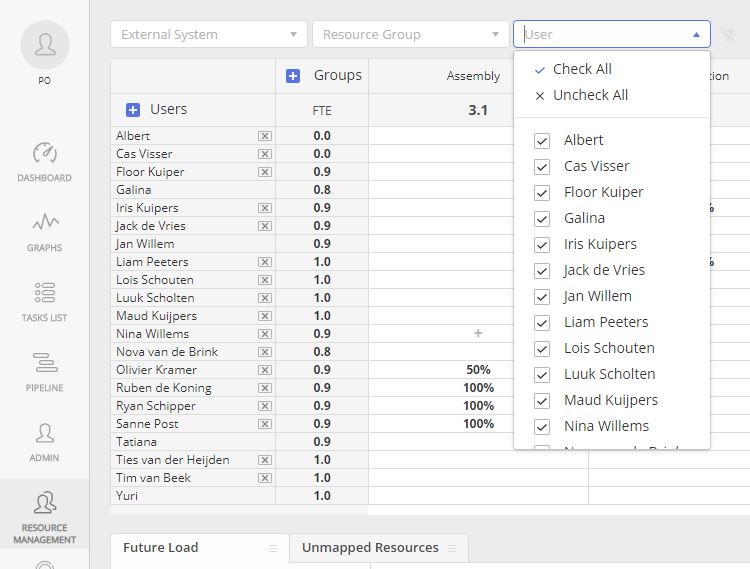
Screen #8 – Filter Data by Resource Name
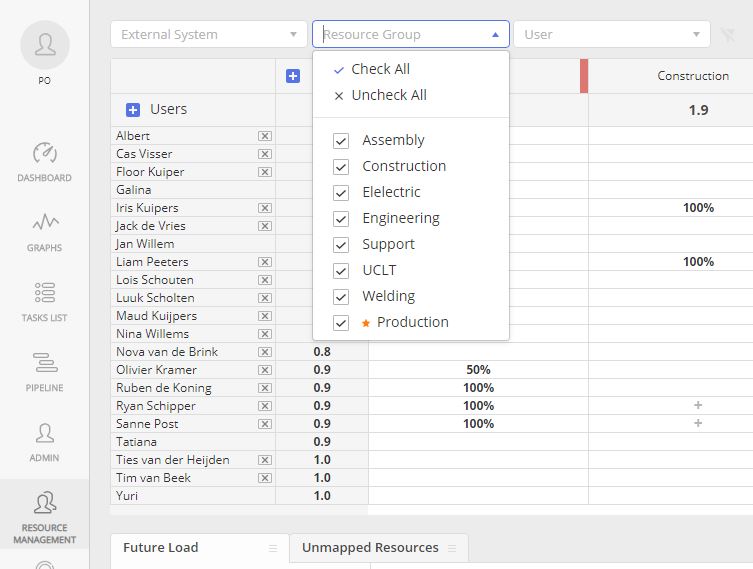
Screen #9 – Filter Data by Resource Group
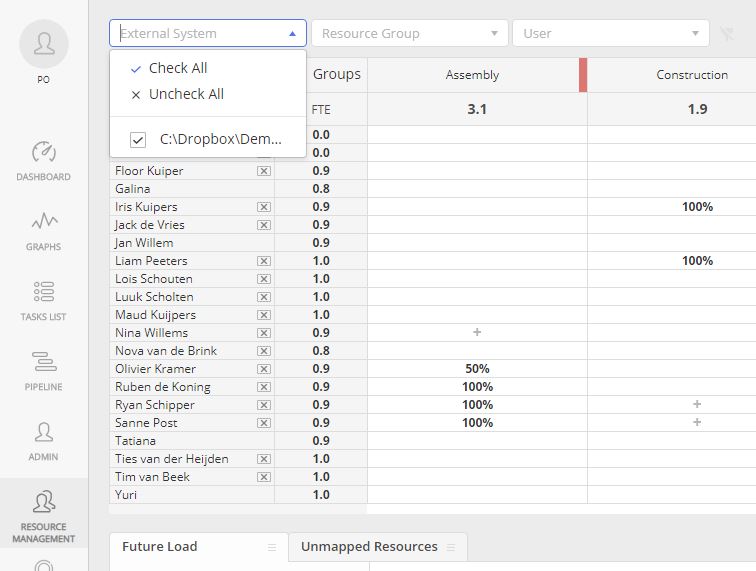
Screen #10 – Filter Data by link on External system
- to remove applied filters press “watering can” icon located to the right from the filter cells
Screen #11 – Remove filter
- To hide group for representation at Resource Management page use “eye” icon element located at the top right corner of the page.
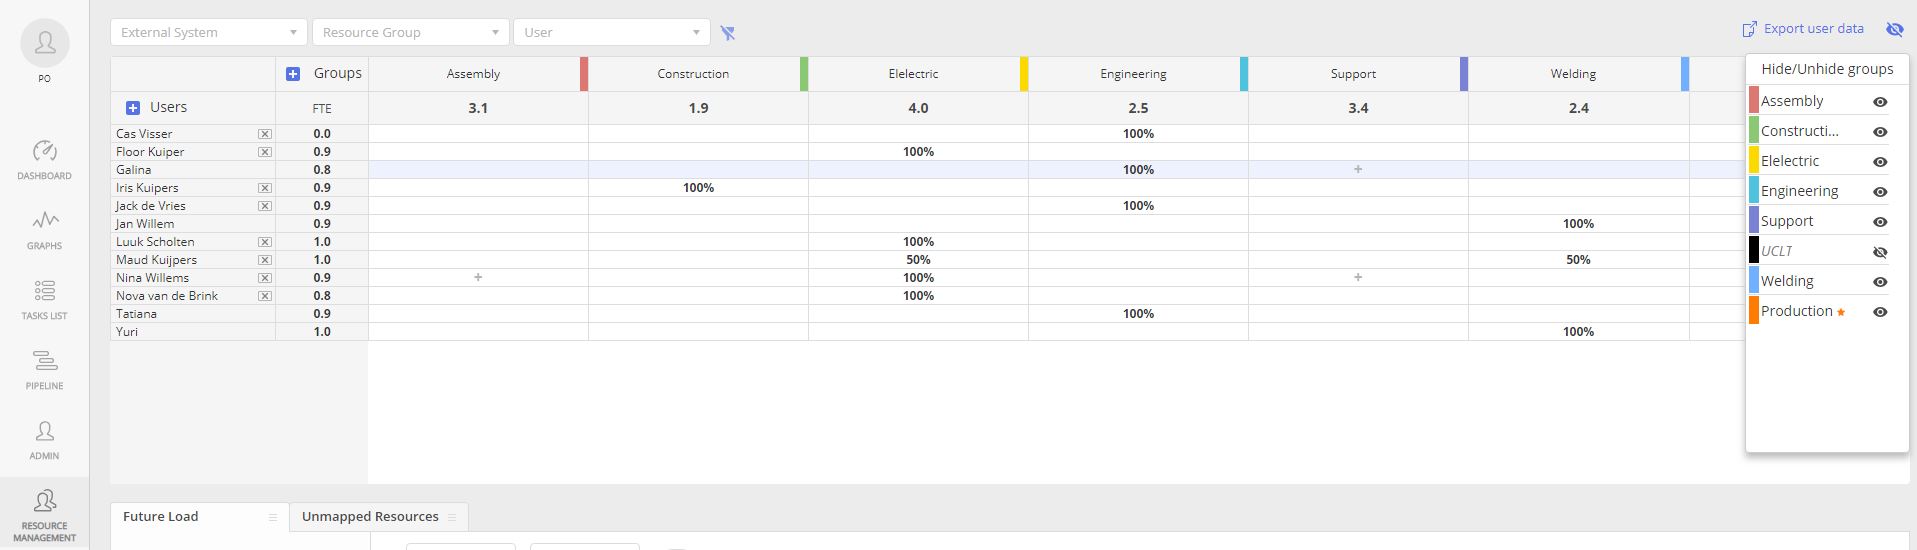
Screen #12 – Hide Group