Introduction
Epicflow proudly introduces Teams, a new functionality designed to enhance collaboration and streamline task management within our system. With this new feature, users can effortlessly organize group tasks, foster communication, and achieve project objectives with even higher efficiency.
What is a Team?
A team is a group of people who work together to achieve shared project goals. Whether it’s a project team, service team, leadership team, or any other variant, a team is like the heart of a project, where everyone works together to reach the same goals.
The Purpose of Having a Team
Having a team makes it easier for everyone to work together smoothly across different projects. Here are the benefits of teamwork:
- Enhanced Collaboration – With a team structure, individuals can collaborate seamlessly, leveraging their diverse skills and expertise to achieve shared project goals.
- Efficient Information Sharing – Teams enable quick and efficient sharing of information among members, ensuring everyone stays informed and aligned towards project objectives.
- Effective Coordination – By working as a team, members can coordinate their efforts more effectively, ensuring tasks are completed on time and project milestones are reached efficiently.
- Improved Productivity – Streamlining communication channels within a team can lead to increased productivity, as members can communicate more effectively, avoid misunderstandings, and focus on their tasks
- Utilization of Diverse Strengths: Unlike groups, which typically consist of individuals with similar skills, teams bring together members with diverse skills and expertise. This diversity allows teams to capitalize on various strengths and perspectives, enhancing their ability to achieve project goals successfully
Difference Between a Group and a Team
Groups usually have people with similar skills, while teams have members with different skills and expertise. Additionally, a team can include multiple groups working together on one project, using their various strengths to achieve goals.
Example:
For a better understanding, imagine that you have groups like Backend, Frontend, and Design. Each group gathers people with similar skills. All these groups can then come together to form one Software Team.
Forming a Team
Create a Team
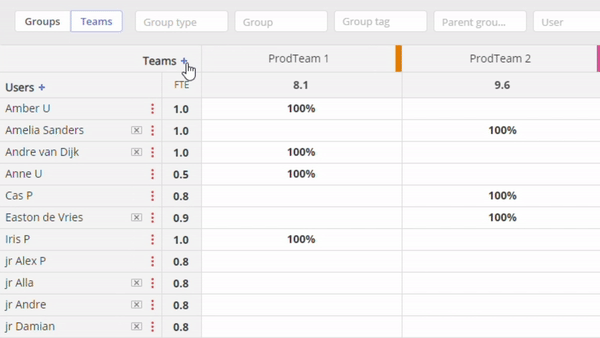
To create a team, you have to navigate to the Resource Management page and switch the view to Teams. Furthermore, you need to click on the +Team button to create a new team. You have two types of teams.
- Team – Selecting this option will create a single team.
- Multiteam – Selecting this option will create a multi-team, meaning it will contain more than one team.
Screen #1 – Create Team
Add Members to a Team
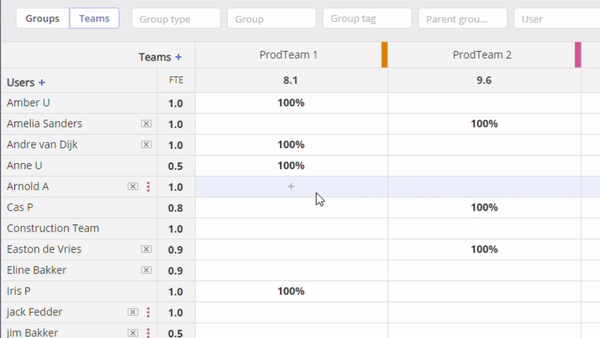
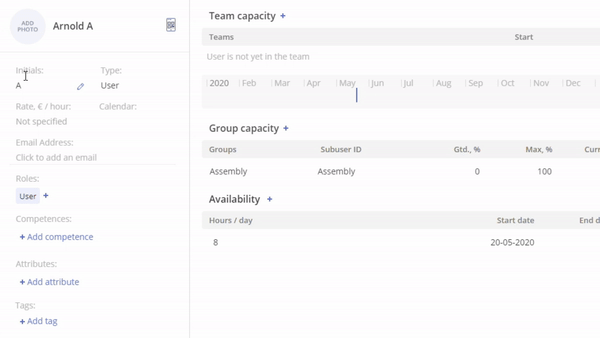
To add members to a team, you have three options. Firstly, you can navigate to the Team details, where you simply click on the Team Name and the plus icon beside Team members. Secondly, by clicking on the plus icon next to the user’s name in the cell beneath the Team name. Lastly, you can add a team directly from the User’s Card.

Screen #2 – Add a team member via team details
Screen #3 – Add a team member by clicking on plus icon
Screen #4 – Add a team member via User’s Card
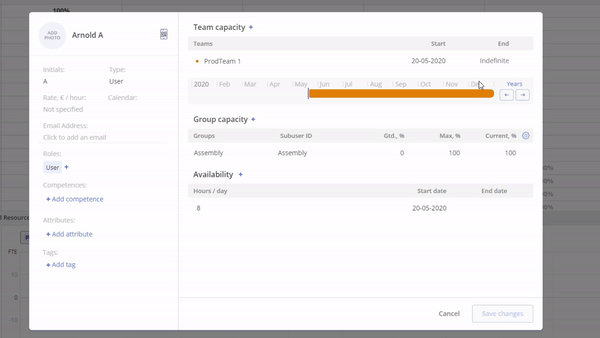
Specify the Time Range
You can specify time range during which the user is a member of a team.
Screen #5 – Specify time range during which the user is a member of a team
Automatic Capacity Adjustment
You can set up an automatic decision point after user’s capacity in a Team is changed. You can set up in from the specified date in the past or in the future by clicking on an appropriate arrow.
Add Decision Point
- Open User’s Card
- Hover over Time Line
- Click on +Decision Point
- Choose an arrow: the right is for the future from the specified date and the left arrow is for the past from the specified date
- Enter capacity change
- Save changes in user’s card
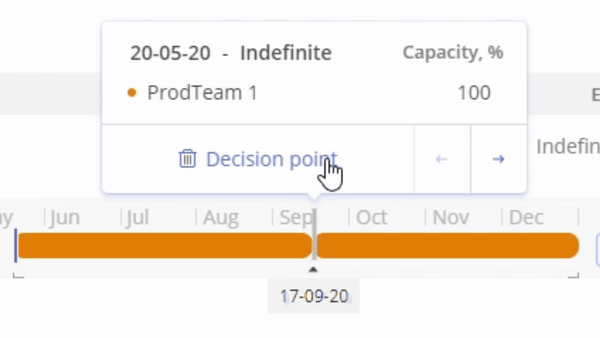
Screen #6 – Add Decision Point
Delete Decision Point
- Open user’s card
- Hove over Decision Point
- Click on trash button to delete Decision Point
- Save changes in a user’s card
Screen #7 – Delete Decision Point
Delete Members from a Team
You can delete members from a team directly in user’s card by clicking on the Team Name and further on trash icon. Remember to click on Save button to apply changes.
Screen #8 – Delete User from a Team
Using Teams in Project
Add a Team to a Project
- Navigate to Pipeline page
- Open Project’s card
- Click on plus icon next to Team name
- Add an appropriate Team
- Apply changes
Screen #9 – Add Team to a Project
Inheritance of Teams
Inheritance of teams means that when you set a team at the top level, like on a project card, it automatically applies to everything below it. The main purpose of inheritance is to ensure consistency and uniformity across different levels of a system. Inheritance works from the top level to lower levels, meaning that teams applied at a higher level propagate downwards, affecting all items nested within that level. In the context of teams, this implies that assigning a team at a higher level, such as a project card, will automatically assign the same team to all its subordinate elements, such as project summaries and tasks. If you add a team at the summary level, such as in a project summary card, it will propagate downwards to its subordinate items so tasks. However, this setting does not propagate upwards; it does not affect higher levels in the hierarchy.This hierarchical inheritance ensures that teams are consistently applied throughout the project structure, maintaining clarity and organization across various levels of detail.
Assigning a Team
If you want to assign a team to a task, please note that this team must be specified either in the project card or the summary card. You can assign a team directly during task creation or reassign a team in a task card using the resource allocator.
Out of The Team assignment
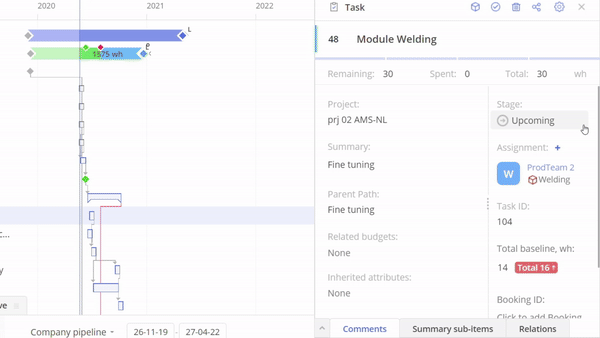
Although you have specified the team that will be inherited in all tasks, you can still assign different resources to tasks. This means that the budget will be taken from the team specified in the project card, but the workload will be taken from the team to which the assigned user belongs. Work hours are deducted from ProdTeam 2’s budget, but the workload remains with the original user’s team.
To assign a resource from a team not specified in the Project Card:
- Open the task card.
- Click on the ‘+’ icon next to the assignments.
- Select ‘Show Teams.’
- Choose the team and resource you want to assign.
- Click on ‘Add Group Assignment.’
- Click the ‘Save’ button.
After completing these steps, next to the assignment, you’ll see an orange exclamation mark indicating that this assignment is outside the team assigned in the project card. You can click on it to view the relevant information.
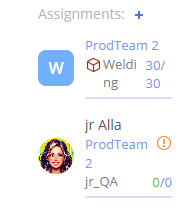
Screen #10 – Assignment out of the Team assigned in the Project Card

Screen #11 – Warning regarding Assignment out of the Team assigned in the Project Card
Screen #12 – Add Assignment out of the Team assigned in the Project Card
Delete Team from a Project
- Navigate to Pipeline page
- Open Project’s card
- Click on a Team name you want to remove
- Click on trash button to remove the Team from a Project
- Apply changes
Screen #13 – Delete Team from a Project
Filters
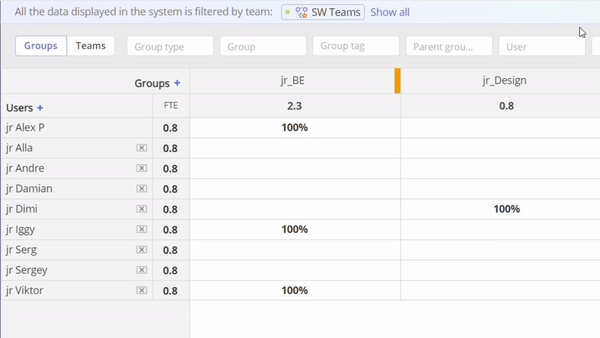
You have the option to apply general filters to an appropriate Team. This means that across all pages, you’ll only see information relevant to the selected team. It’s similar to customizing your Epicflow view specifically for the filtered team.
Apply Team Filter
- In the top left corner click on Filter By Team.
- Search for or choose an appropriate Team.
Screen #14 – Apply Team Filter
Clear applied Team Filters
- In the top left corner click on people icon or click on Show All next to the warning that displays on top of the screen.
- Click on Clear.
Screen #15 – Clear the applied for Teams
or
- Click show all next to the warning message.
Screen #16 – Clear the applied for Teams by clicking on Show All
How to recognize if Team Filter is applied?
In the top there is a message that informs you that you filtered data by Team so you can easily remove applied filters by clicking on Show All.

Screen #17 – Warning about the filter applied for Teams
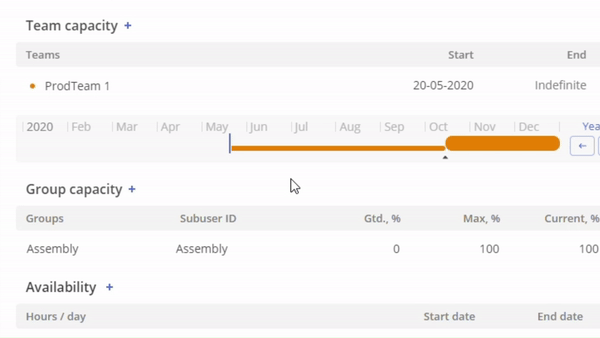
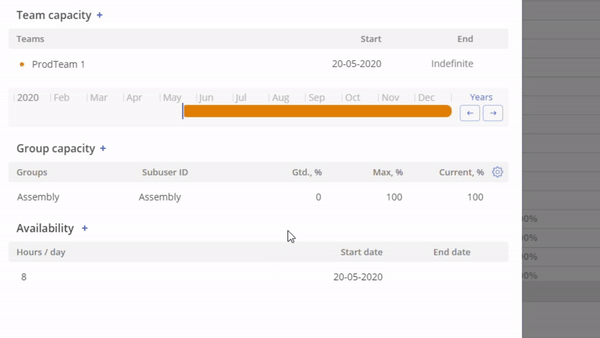
How to Control Team Capacity?
You can easily control your Team Capacity by using Future Load Graph and Load Analysis.
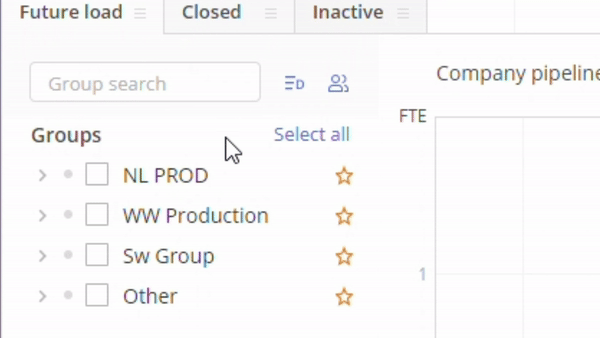
Team View in Future Load Graph
- Click on people icon next to search field to see available views for Future Load Graph
- Choose Teams view
Screen #18 – Choose Teams view in Future Load Graph
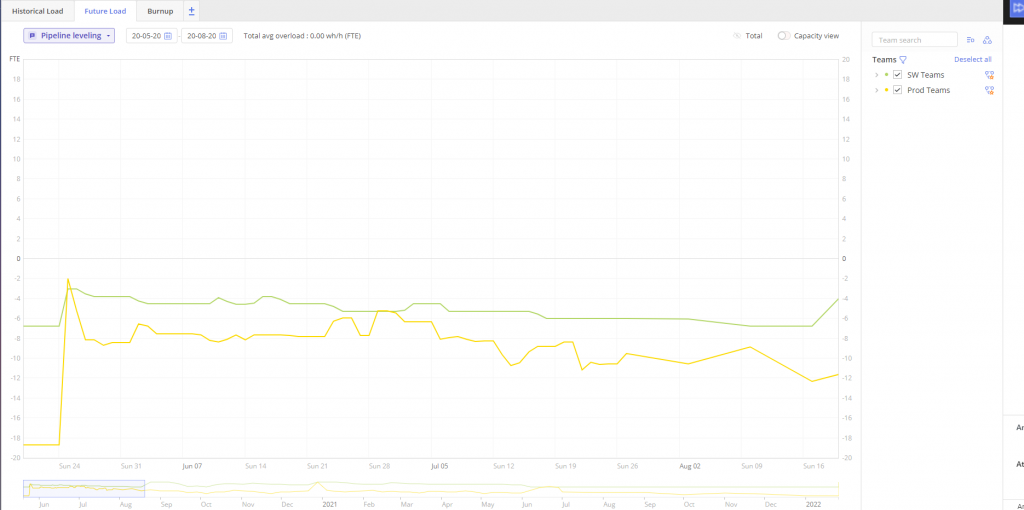
Screen #19 – Future Load Graph Team View
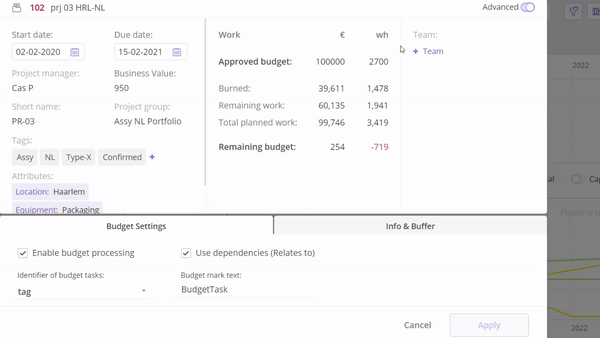
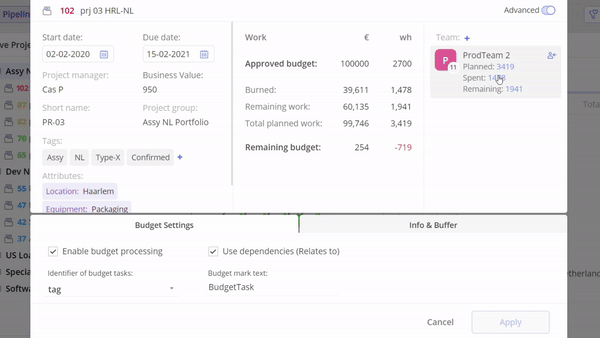
Team Budget
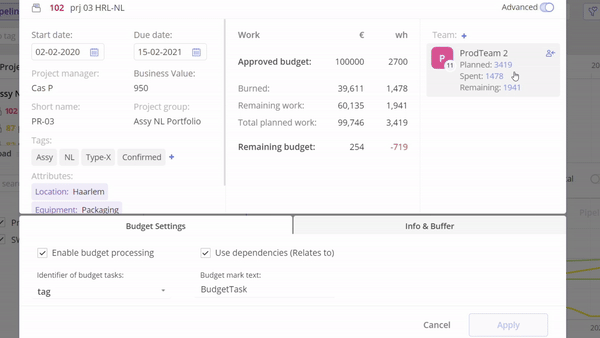
A Team budget refers to the allocated funds or resources available for a specific team to use within a project or organization. It outlines the financial resources that the team can utilize to accomplish their objectives.
Add Budget
You can add budget directly to a Project Card or Summary Card. Adding a budget to a Project Card allocates funds specifically for that project. This budget is intended to cover all expenses related to the project, including resources, materials, and other costs. Adding a budget to a Summary Card allocates funds for a broader category or grouping of projects. This budget encompasses the combined expenses of multiple projects or aspects of a larger initiative, providing an overview of financial resources allocated to that particular summary.
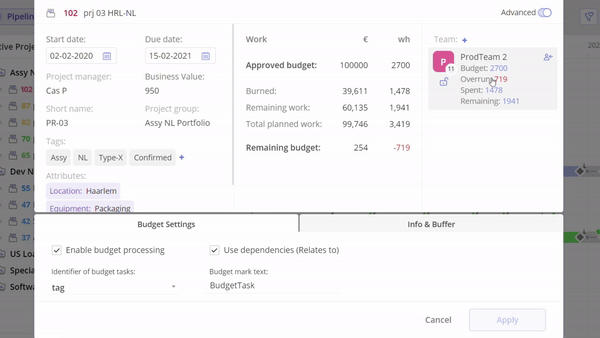
Add Budget in a Project Card
- Open project card
- Click on an added team.
- Click on add budget.
- Enter budget amount in the Budget Field.
- Click Apply.
Screen #20 – Add Budget in a Project Card
Add Budget in a Summary Card
- Open summary card
- Click on an added team.
- Click on add budget.
- Enter budget amount in the Budget Field.
- Click Save Button.
Screen #21 – Add Budget in a Summary Card
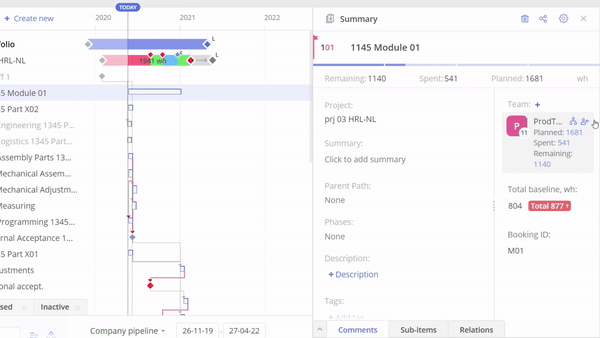
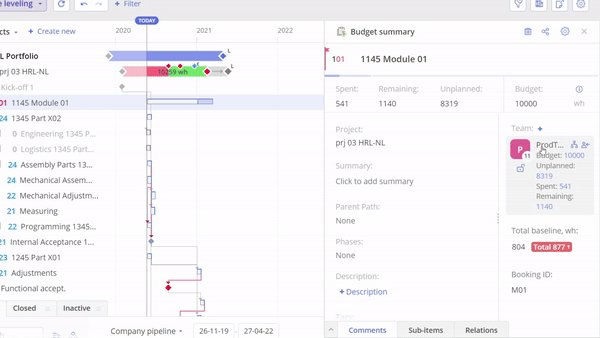
How to see consumption of Team Budget?
The purpose of checking the consumption of a budget is to monitor and manage spending, ensuring that resources are used efficiently and effectively to meet project objectives within the allocated financial constraints.
To view the consumption of the team budget:
- Open the Project Card.
- In the Team section, you can see the consumption of the team.
Screen #22 – Team Budget Consumption
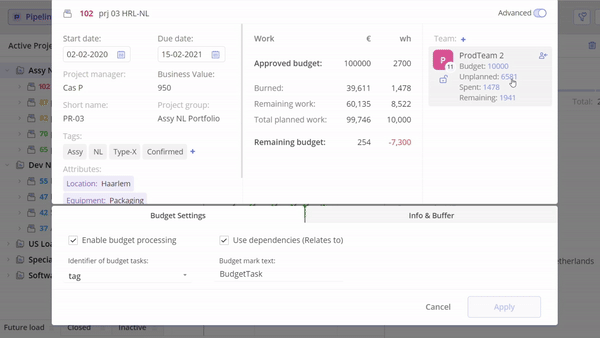
Edit Budget
You have possibility to edit the amount of budget.
Edit Budget in Project Card
- Open the Project Card
- Click on Team field to view the budget.
- Edit the amount of budget.
- Apply changes.
Edit Budget in Summary Card
- Open the Summary Card
- Click on Team field to view the budget.
- Edit the amount of budget.
- Click on the Save button.
Screen #24 – Edit Budget Amount
Delete Budget
You can fully delete budget from a Project Card and Summary Card.
Delete Budget in a Project Card
- Open the Project Card
- Click on Team field to view the budget.
- Click on Remove Budget.
- Apply changes.
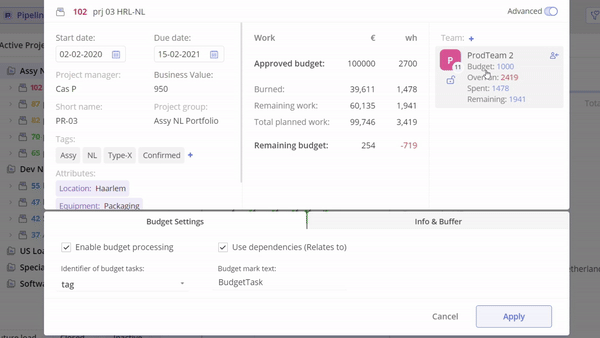
Screen #25 – Delete Budget in a Project Card
Delete Budget in a Summary Card
- Open the Summary Card
- Click on Team field to view the budget.
- Click on Remove Budget.
- Click on the Save button.
Screen #26 – Delete Budget in a Summary Card
Inheritance of Team Budget
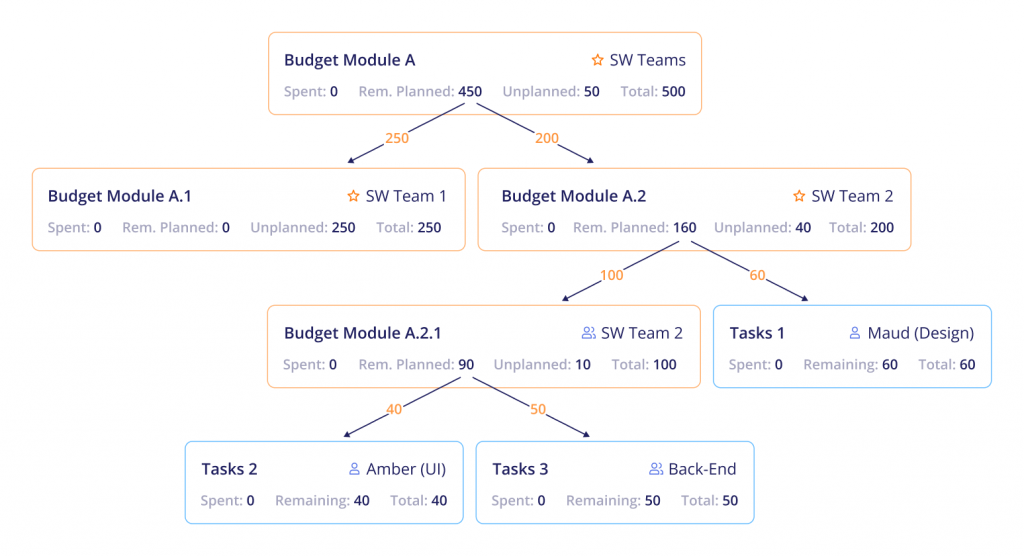
Screen #27 – Budget Inheritance visualization