The terms ‘Resource’ and ‘User’ generally refer to similar concepts and in our system are used as one entity, but there is a slight difference in understanding, especially in the context of project management.
‘Users’ refer to accounts that have been created and who have been invited to the system. However, ‘Resources’ in project management are more specific. We refer to individuals as resources when they start being utilized in the project, such as being assigned to tasks. Therefore, in task assignments, we observe resources rather than just users.
Add user \ resource
- To create a user in Epicflow press “plus” icon located above the users list in the top left corner of the page. On this action you’ll be redirected to User Card frame in which you’ll need to specify all mandatory information such as user name, role, email address and finish user creation by granting confirmation via pressing “Save changes” button.
- To invite user into Epicflow system press left mouse button on the user name to open User Card and specify email address in corresponding field. As soon as previous action is done press “Invite” button appeared at the bottom of the frame page to finish invite procedure.
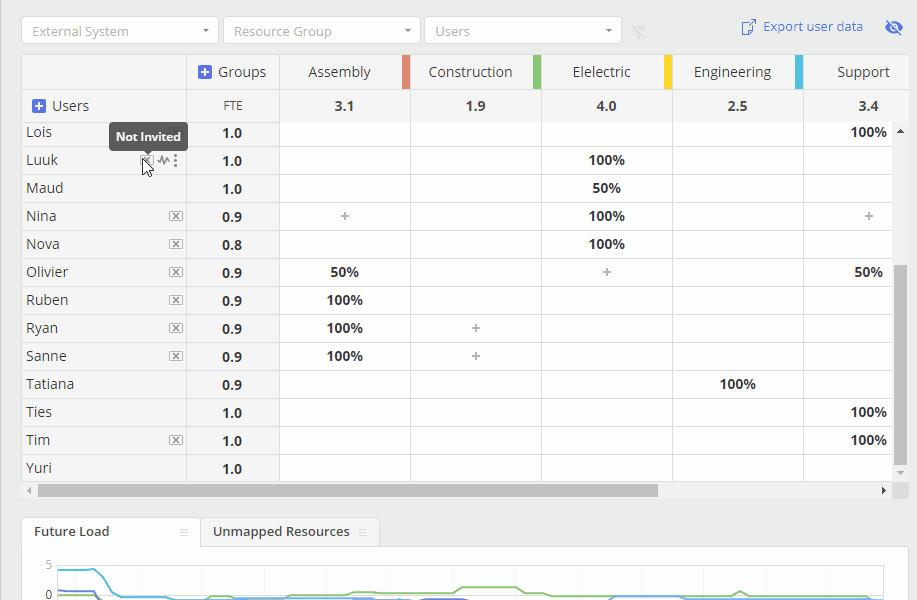
Map external resource
- To map(link) external resource to previously created user in Epicflow open “Unmapped Resources” tab and drag required user from the Users list directly to the name of previously created one.
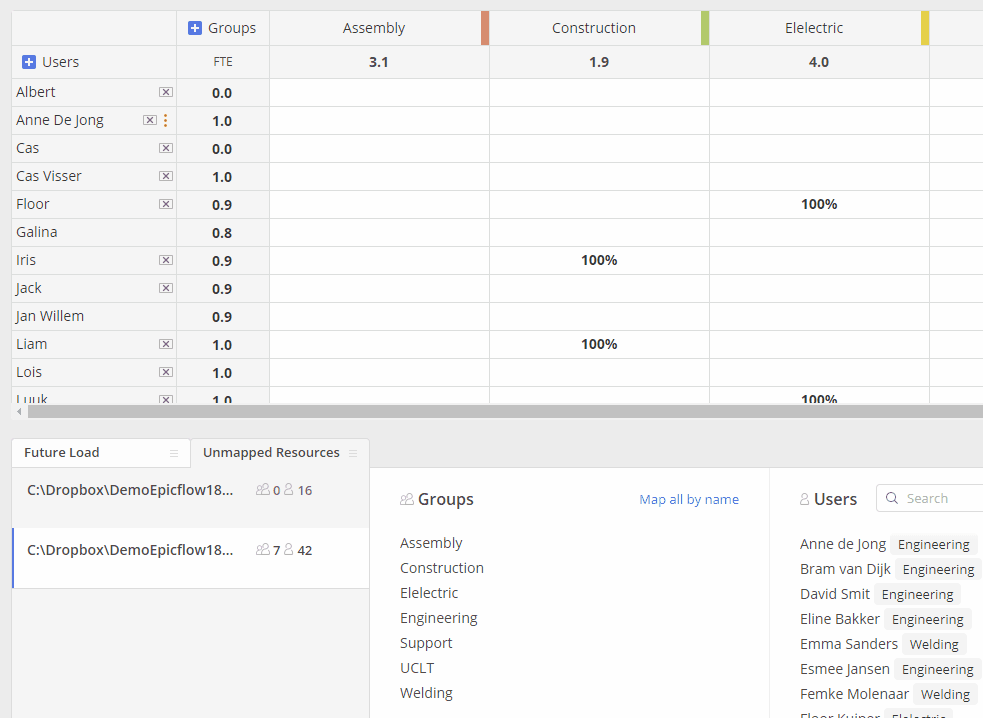
Screen #1 – Mapping external user
- To create new resource and map(link) such to external one open “Unmapped Resources” tab and press “plus” icon located to the right from the name.
Screen #2 – Add new and map user
- You can also use the Map All Automatically feature.
This function itself determines the mapping of the resource using the name and email assigned to the resource
Screen #3 – Map All Automatically button
- To unlink external resource with the user in epicflow hover over mouse cursor on the user name and after the click of left mouse button on “three dots” icon menu, located to the right from such, press “trash” button in front of the specified link in newly appeared “External Resources” context frame.
Screen #4 – Unmapping user
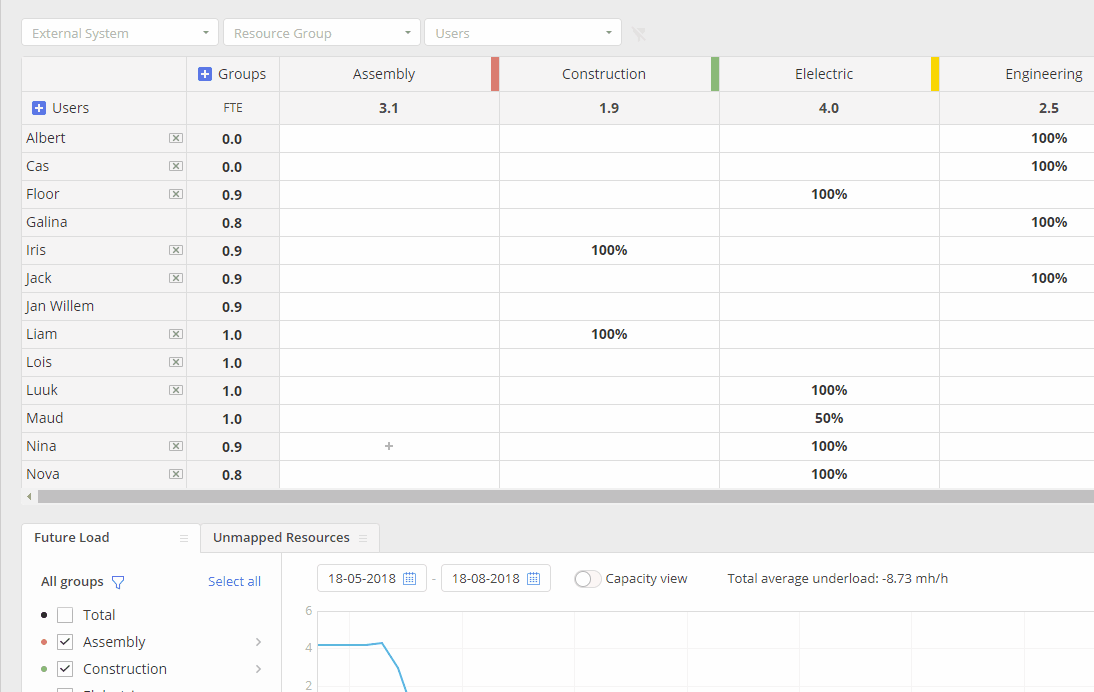
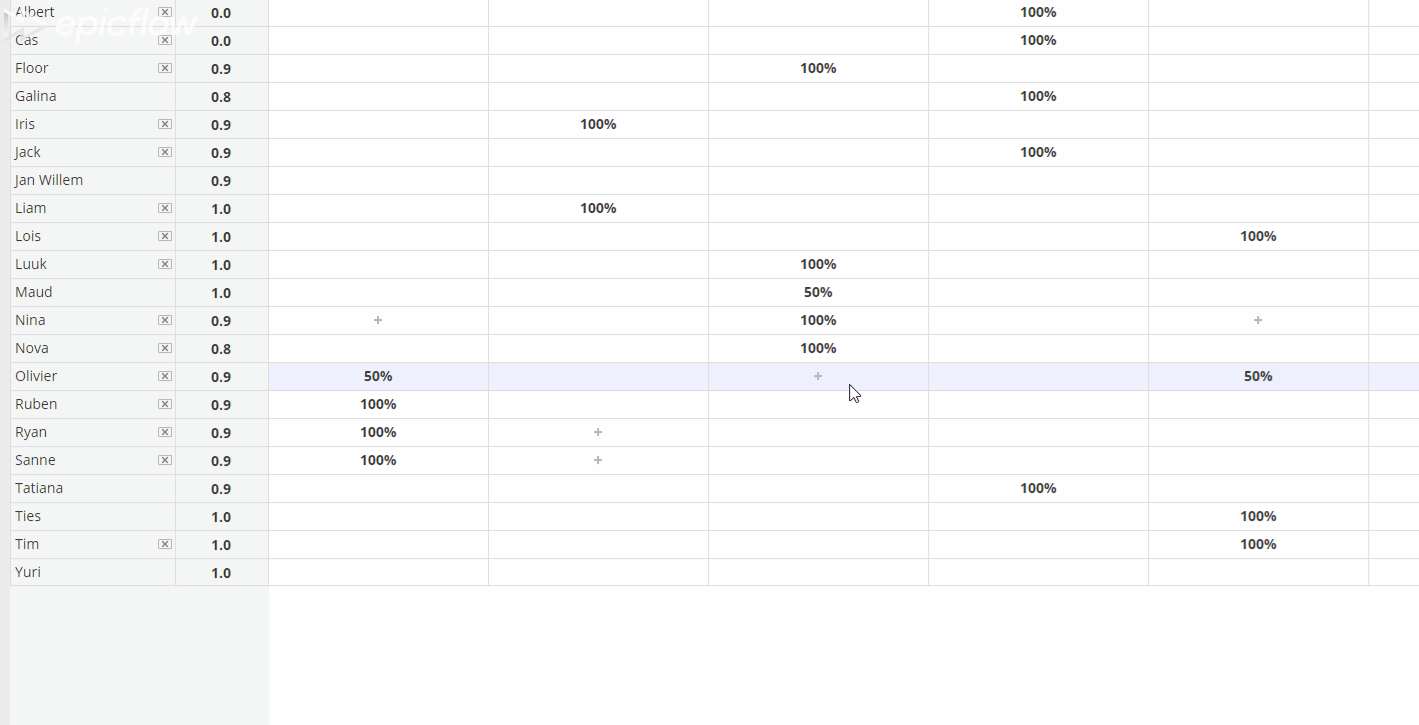
Assign User to the Group
- The first method to assign a user to a group or multiple groups, navigate to the resource management page, locate the user, and the group to which you wish to assign them. Then, click on the plus icon at the group level.
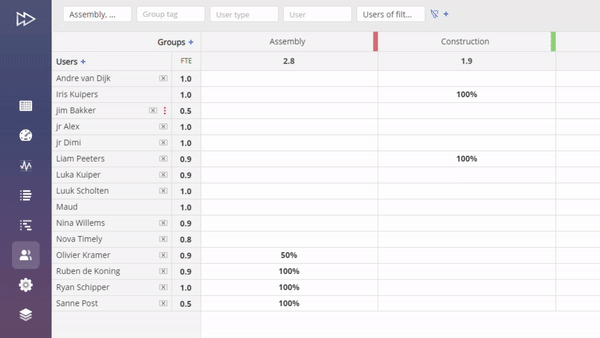
Screen #5 – First Method of Assigning user to the group
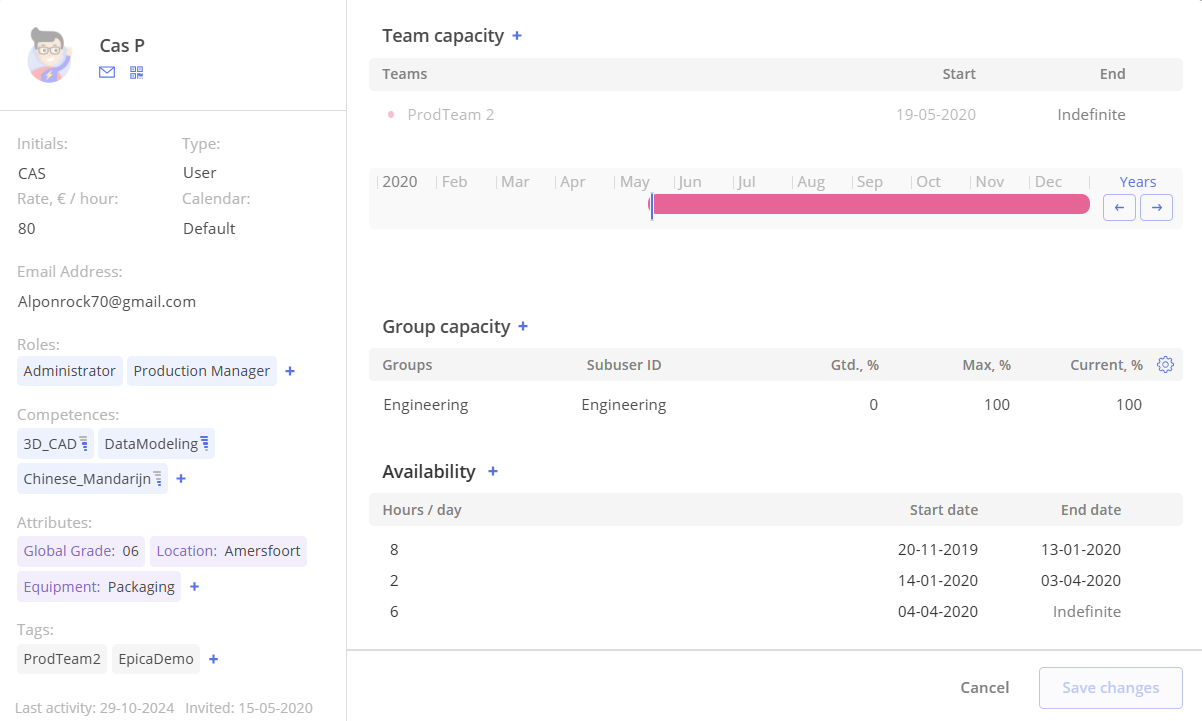
- The second method to assign a user to one or multiple groups is by navigating to the resource management page, finding the user, and opening the user’s card. Next, click the plus sign beside ‘Group capacity,’ add the group, and press the save button. This method also allows you to assign users to hidden groups.

Screen #6– Second Method of Assigning user to the group
Delete user
- To delete user from Epicflow press left mouse button on “three dots” icon menu, located to the right from such, and press “Delete user” button in newly appeared context menu.
Screen #7 – Deleting user
Define permissions
Each resource in the Epicflow system has its own set of permissions called ‘Roles.’ These are defined on the Settings Page, and depending on which role is assigned to the user, this will determine their permissions. You can learn more about Roles by reading this article Roles and permissions – overall overview.
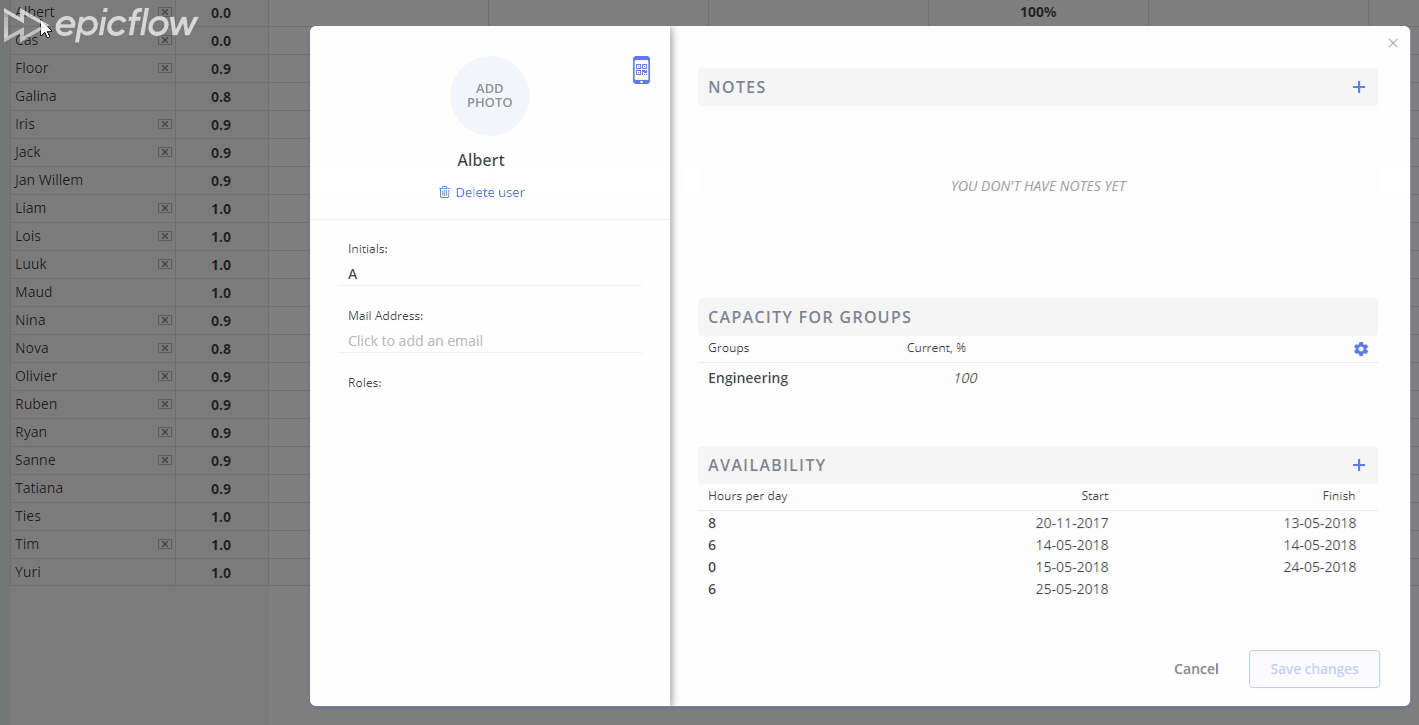
User \ Resource Card
The User Card contains all the information about a user \ resource, such as the name, email, roles, tags, attributes, competences, last user’s activity, Internal ID (Used for mapping a user to an external system), when the user was invited to the system, groups, group capacity, teams, team capacity, and availability.
Screen #8 – User Card
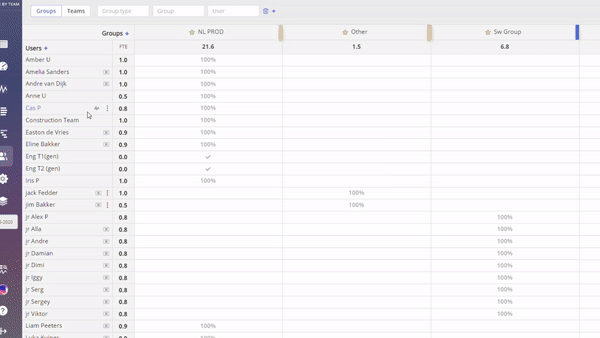
Group Capacity Overview (Gtd %, Max %, Current %)
When a user belongs to multiple groups, their capacity is managed using three key values: Guaranteed %, Maximum %, and Current %. These values help ensure fair and predictable workload distribution across groups.
1. Gtd % (Guaranteed %)
Definition: Minimum mandatory involvement of the resource in a group.
- This is the guaranteed share of capacity reserved for the group.
- Even if the resource is assigned to multiple groups, this percentage is protected and always reserved.
2. Max % (Maximum %)
Definition: Maximum allowed involvement of the resource in a group.
- This sets the upper limit of how much the resource can be allocated to a specific group.
- The system will not assign more than this percentage to the group.
3. Current % (Actual %)
Definition: Real (calculated) involvement of the resource in a group.
- This reflects the actual distribution of workload across all assigned groups.
- It is calculated dynamically based on current assignments and resource load.
Usage Note
These values are mainly used for resource sharing across multiple groups to ensure balanced and predictable capacity allocation.
To access a User Card (also called as Resource Card, depending on context of discussion), please do the following:
Access User Card
- Navigate to the Resource Management Page.
- Click on the desired name to access the User Card.
Screen #9– Open the User Card through Resource Management Page
Also it’s possible to open your personal User card by pressing on corresponding account Icon located at the bottom left corner.
Screen #10 – Open the user card by clicking on the corresponding account icon
Edit information
- Navigate to the Resource Management Page.
- Click on the desired name to access the User Card.
- Make the desired changes: you can edit the name, email, roles, assigned teams, groups, user availability, tag, attributes and also Internal ID (Used for mapping a user to an external system).
- After you’ve made the changes, click on the Save button to apply them.
You may also be interested in how to update resources using CSV files.
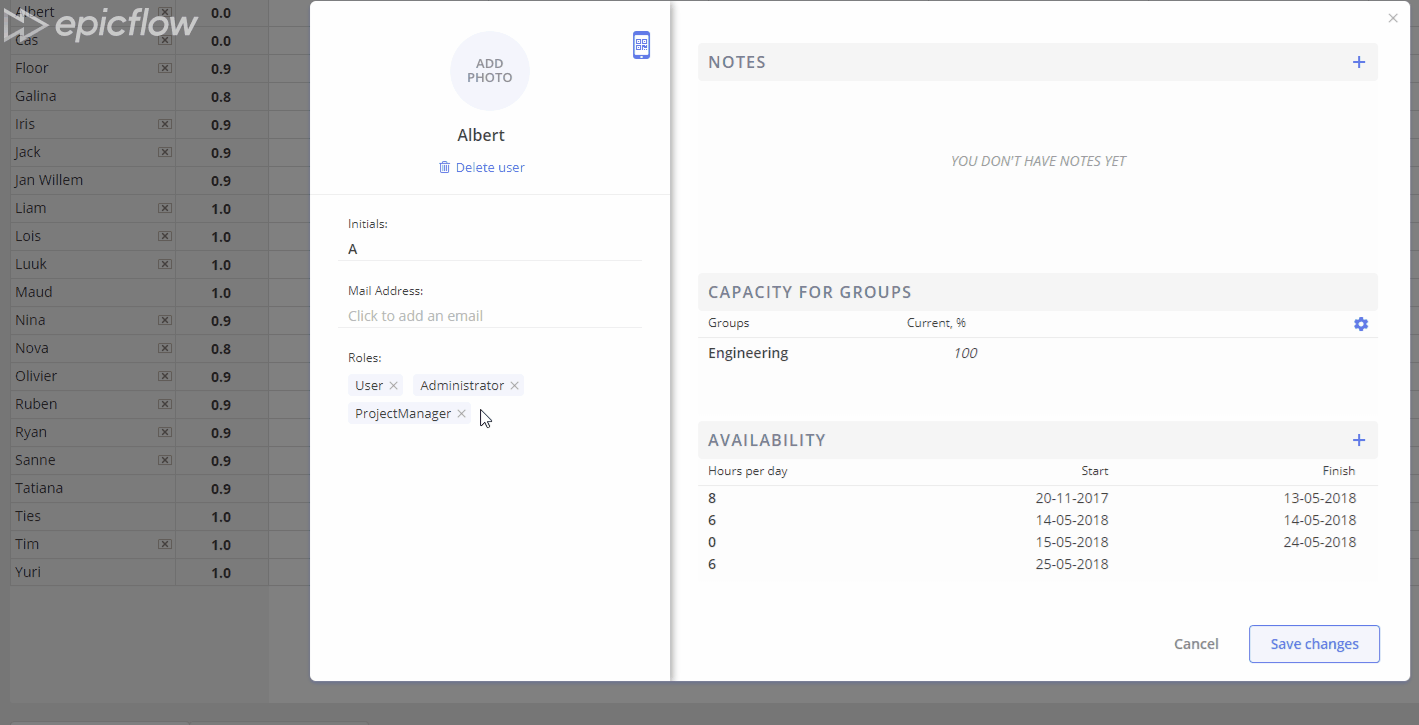
#Example: Edit User’s Roles
1. Navigate to Resource Management Page and Open User Card by clicking on the name.
2. In the lower left part of the user card, you will see the “Roles” section. The standard role is the User role. Let’s add the roles of “Administrator” and “Project Manager” to this resource.
Screen #11 – Assigning roles to user
3. Now you need to save your changes. Click the “Save Changes” button. They will take effect immediately and will be visible to the user after the page is reloaded.
Screen #12 – Saving changes
Add Notes
You have the possibility to add notes in a user’s card. To do this, please:
- Navigate to the Resource Management Page.
- Click on the desired name to access the User Card.
- In the User Card, click on the envelope icon in the top left corner to add notes.
- Add your notes.
- Click on the [X] button to close notes pop-up.
- Click on the Save button to apply the changes.
Screen #13– Add Notes through User Card