One of the crucial items in JIRA is Time Tracking, which lets your team record the time they spend working on issues. It shows product managers and engineers the progress on every stage of development.
Configuring
To record the time project team members spend on working use the Time Tracking element.
Configuration of Time Tracking fields is described here.
Make sure that your Jira admin has enabled time tracking and that you have the Work on Issues, Delete Work Logs, and Edit Work Logs project permissions.
Estimation
Before you start working on an issue, set a time estimation to indicate the amount of work you believe is required to accomplish the task.
To set an estimate for an issue,
- Select the issue and choose the Original estimate field.
- Enter the amount of time you believe it’ll take to complete the task.
You can enter time estimates in weeks (w), days (d), hours (h), and minutes (m). For example, 3w or 2d 4h 30m.
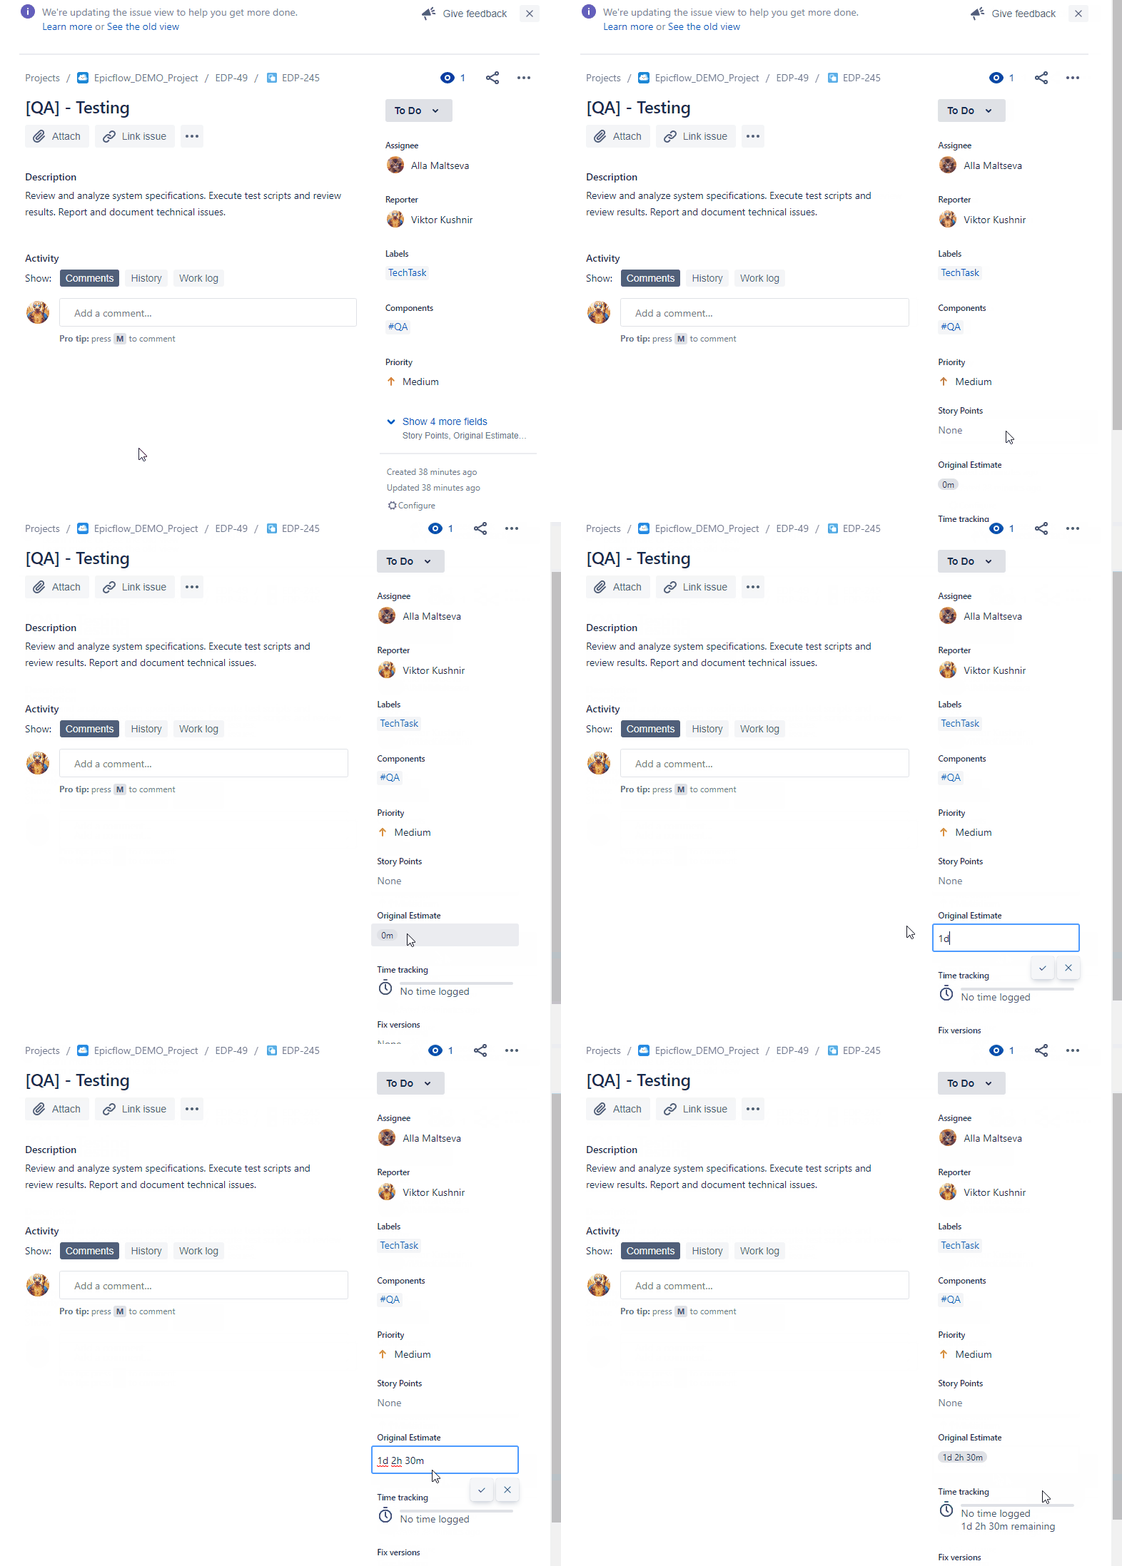
Screen #1 – Adding Estimation for the issue
Reporting Progress
Once you’ve started working on a specific issue, log the time to keep a record of it. That’ll let you estimate how long it actually took to resolve the issue.
To report progress for an issue,
- Open the issue and select ••• > Log work (or click on the time tracking field),
- Fill in the Log time fields and select Save.
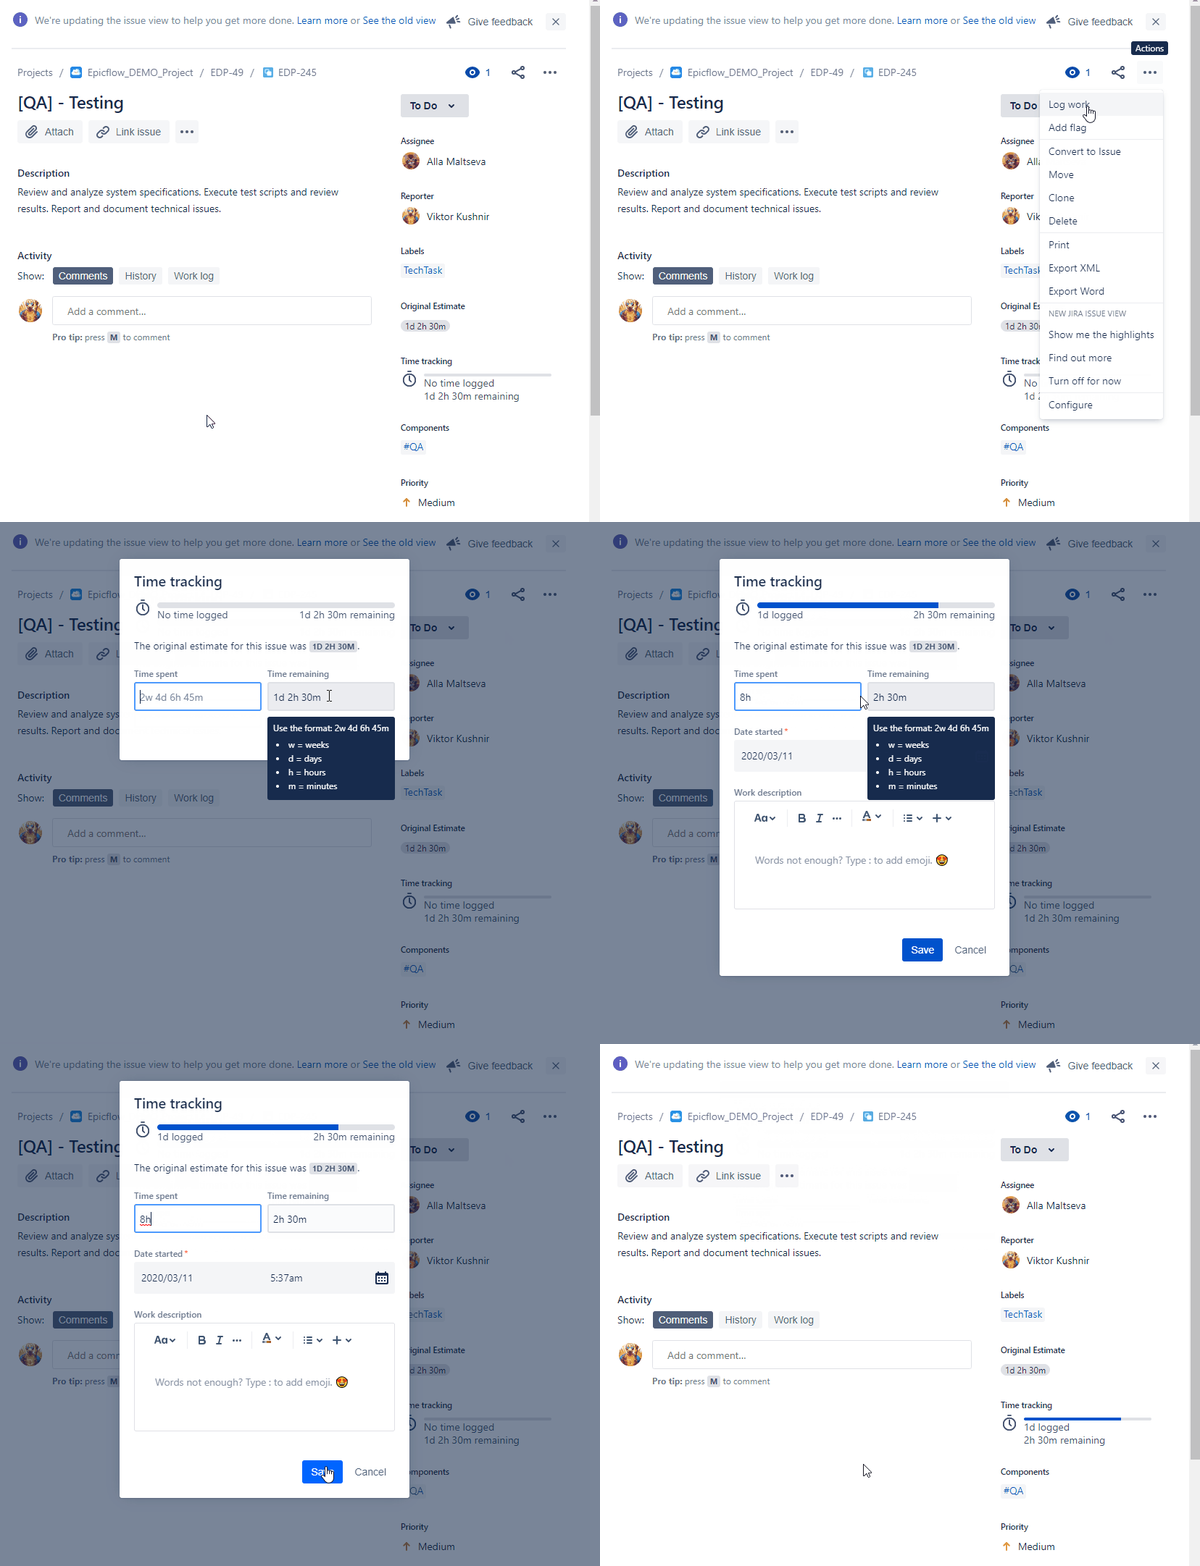
Screen #2 – Reporting Progress for the issue
Please note that progress on task accomplishment is measured in decreasing of Remained hours estimation.
As a result, if the Remaining hours aren’t changed, no progress will be reported into the Epicflow system.
Closing
Once all the Remaining hours have been spent, the task will be shown as completed.
You can also switch a task to the “Done” state and Epicflow will set the Remaining hours to 0 automatically.
Budget Tasks in Jira
1.1. To use budgets in your Jira project you must “enable budget processing”:
Open in the pipeline the project info card and turn on “Enable budget processing” in Advance settings mode.
The default Epicflow column for of budget task for Jira is “tag”. The “tag” column in Epicflow corresponds with the “label” field in Jira. In this label field, Epicflow looks for the budget mark text, “#budget” in our example.
Instead of “tag” you can also use “name” as an identifier for budget tasks. In that case, you have to use the budget mark text in the task name. Similar as with MS-project budget tasks.
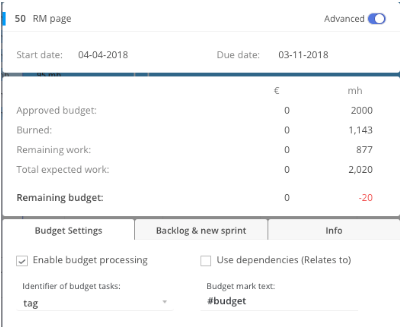
Screen #3– Budget Settings (Project Card)
You can also define this setting for all project at the import page:
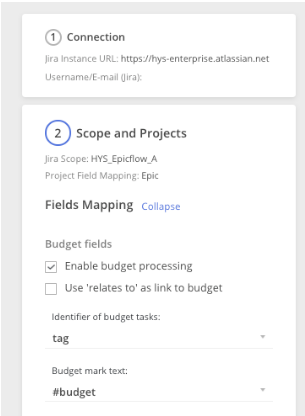
Screen #4– Import Page
1.2 To mark a task as a budget task one has to define a “#budget” in the label field as displayed in the example below. The group this budget is allocated to is #WebDev.
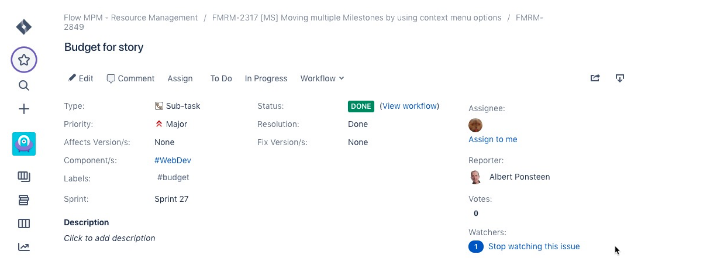
Screen #5– Budget (Jira)
1.3. You can define budget tasks at different levels:
- At Project level by defining a budget task that is not linked to an Epic or a Story
- At Epic level by defining a budget task that is linked to an Epic but not to a Story
- At Story level by defining a budget task as sub-task of a story
Similar to MS-project you can add hierarchy to budget tasks. See the MS-project example.
