Success of tasks management is an ability to keep under the focus crucial tasks and fulfill such in time. And it’s easily achievable if you use Task List functionality.
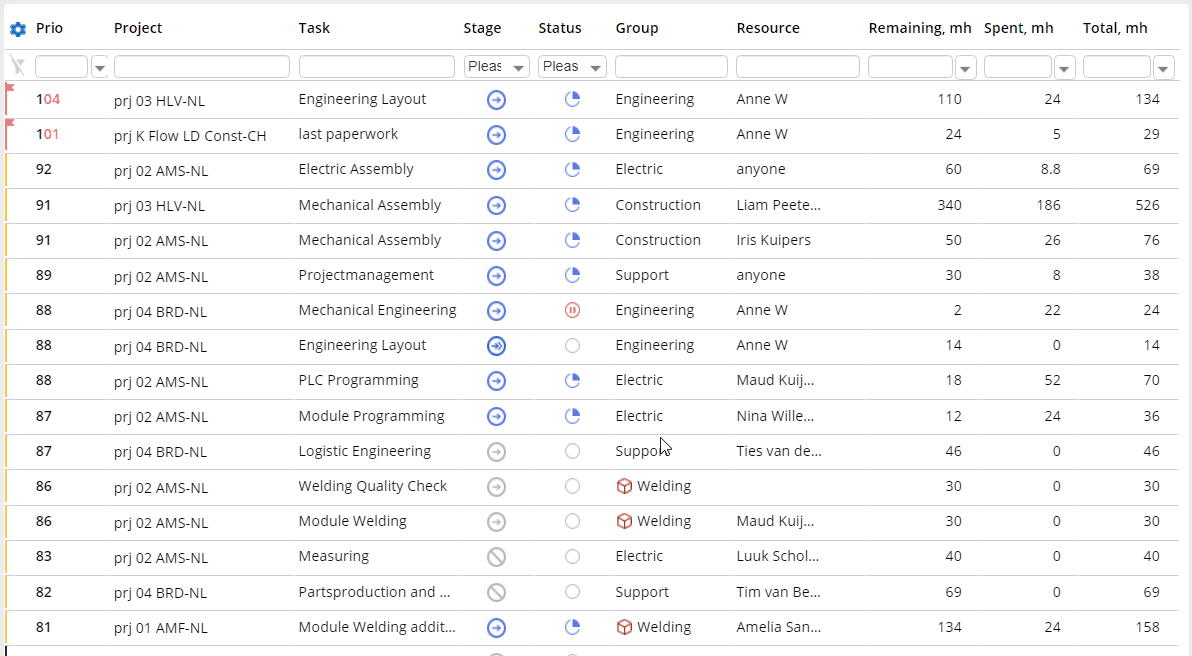
Tasks List Filter
Overview
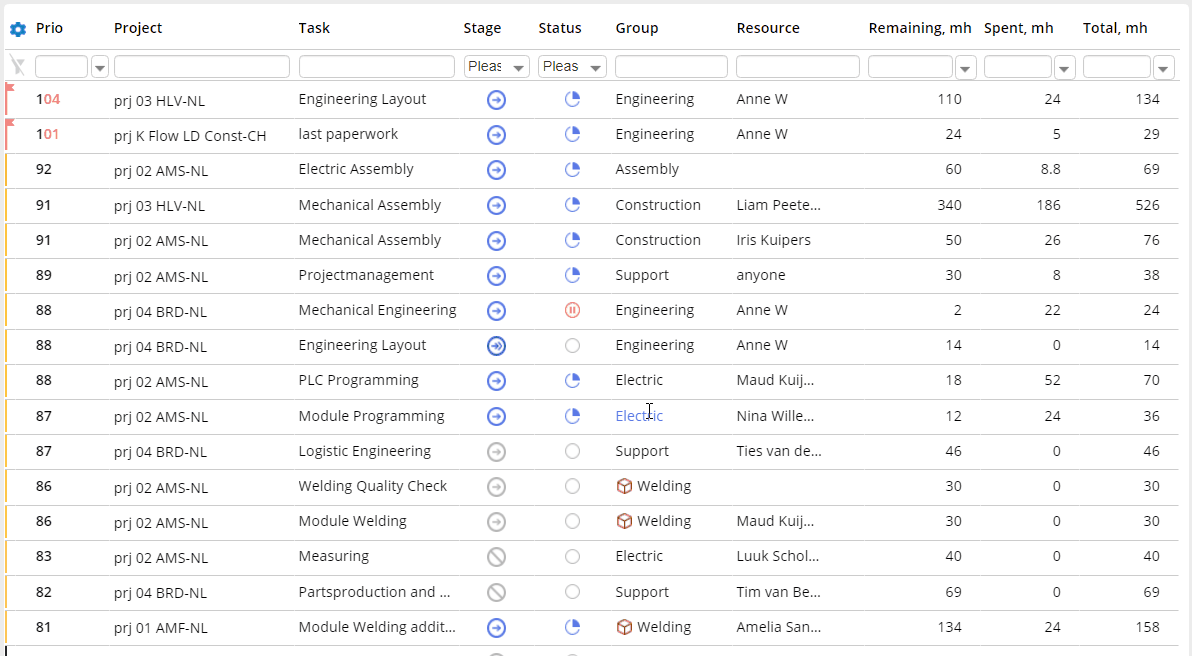
If you are a Project Manager, then you would be interested in a filtering all tasks by a Project Name key. That will help you to keep your attention focus over the most crucial tasks in the scope of the project and define the most appropriate strategy at level of the resources allocation with further control of tasks fulfillment.
If you are a Team Lead, then you would be interested in filtering all tasks by a Resource Group Name key. That will help you to keep focus of your group over the most prioritized tasks and proceed within the most optimal way.
If you are an Engineer, then your focus is a List of your Personal tasks.
- To apply Task List filter key you should enter it into the corresponding cell at teh top of the page and press Enter.
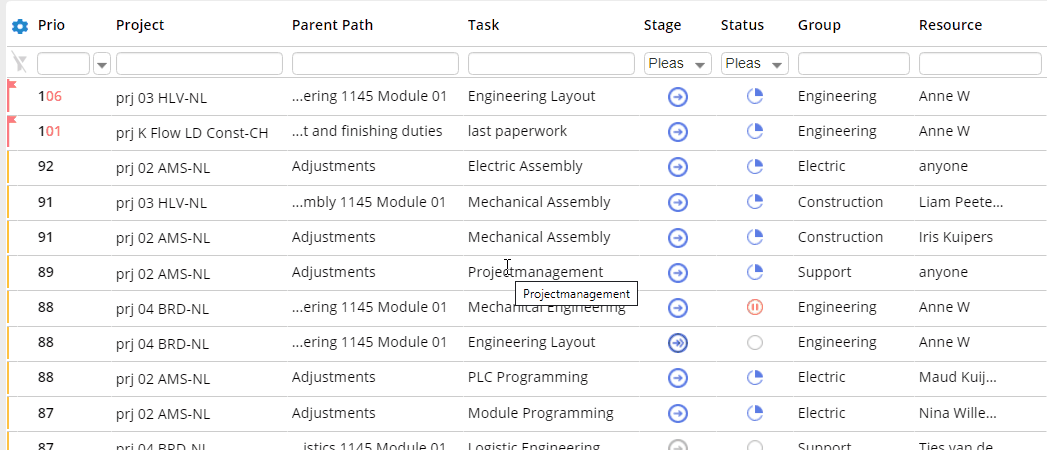
Screen #1 – Task List – Filtering by Project Name
Screen #2 – Task List – Filtering by Resource Group
Screen #3 – Task List – Filtering by Resource
- Also filter can be applied by double click over the displayed field at Task List.
- Particular Filter Reset can be done by selection of the “watering can” icon, located to the right from the column name.
Screen #4 – Task List – Excluding Particular Filter Criteria
- For All Filters Reset you can select “watering can” icon located at the left side of the page, right under the “gear” icon

Screen #5 – Task List – Excluding All Filters Criteria
Status and Stage filters
The main goal of Status and Stage is to help track and manage the progress of tasks within your system. Stages represent the different phases a task goes through, while statuses provide information about the task’s current state within a particular stage.
- Stage: The stage of a task refers to the phase or step that the task is currently in its lifecycle. It represents the progression of the task from its initiation to its completion. A task might have stages to indicate where it is in the overall process.
- Status: The status of a task describes its current state or condition at any given moment. It provides a snapshot of the task’s progress or state of completion. Statuses typically describe whether a task is pending, completed, in-progress, on-hold, or any other relevant state.
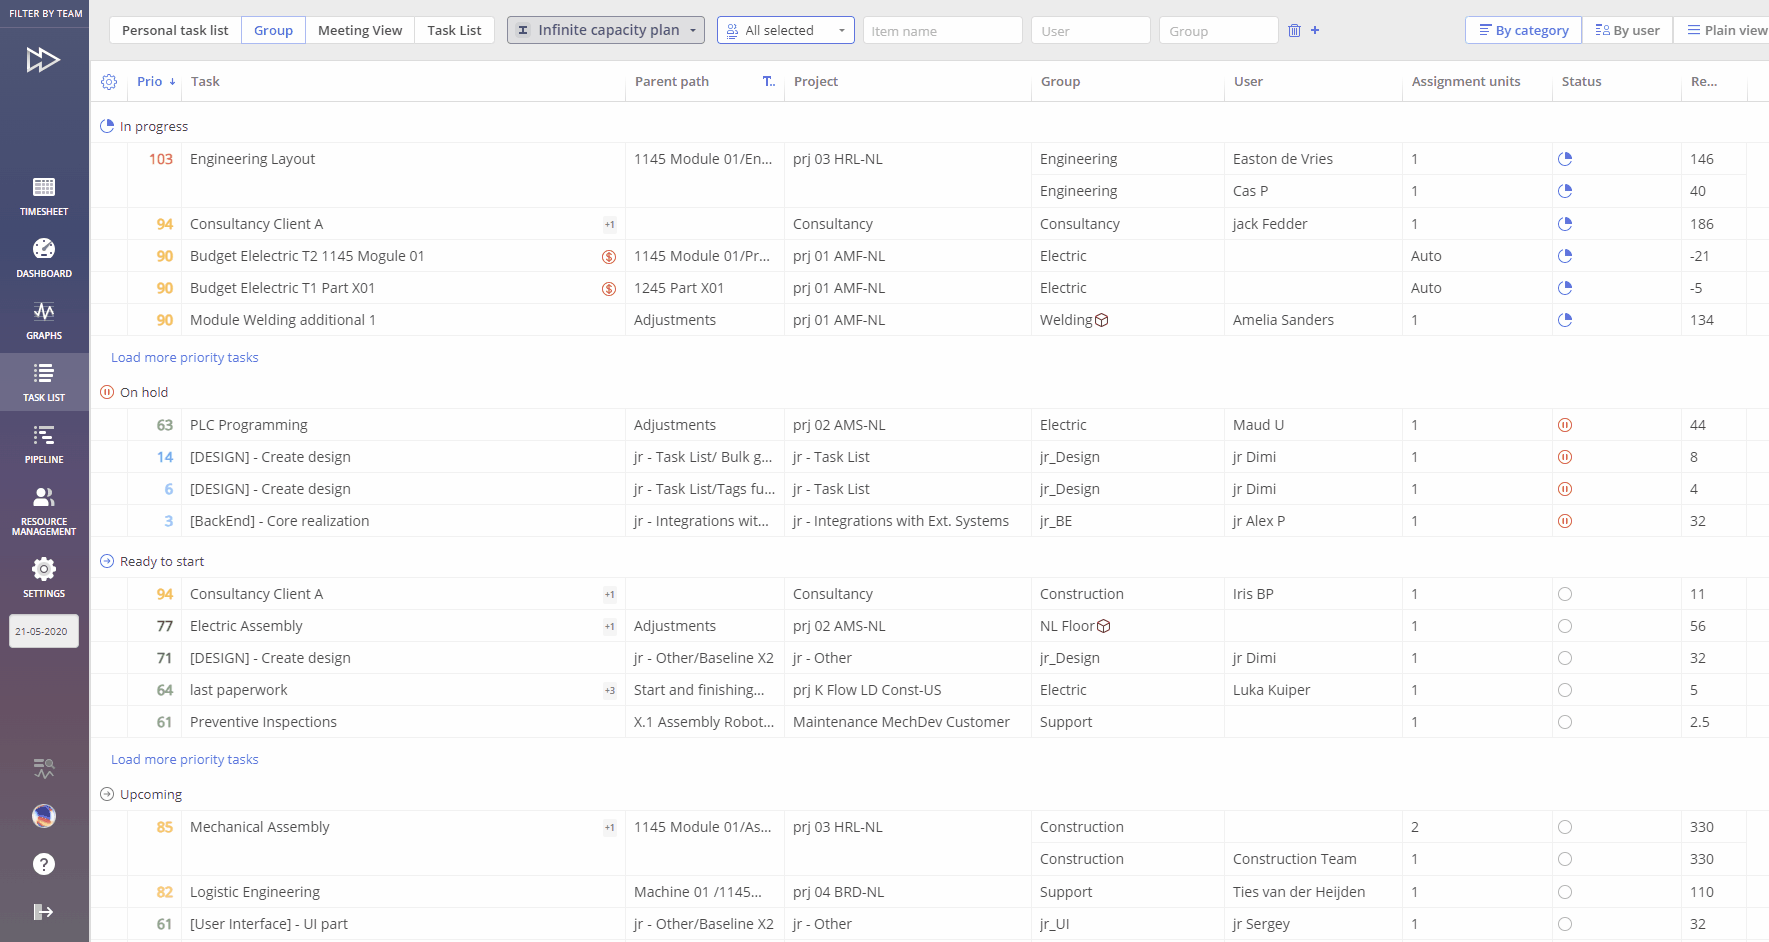
In Epicflow system we have defined next Stages:
- Completed – tasks with no Remaining work
- Not Estimated – tasks with no provided Estimations and as result for which Total is equal to 0. Such tasks won’t be included into load calculations.
- Ready to Start – tasks with completed predecessors. In other words the are no obstacles for assignee to start work on it.
- Upcoming – next going successor of “Ready to Start” task
- Not Ready to Start – next going successor of “Upcoming” or “Not Ready to Start” task
in addition to that also defined next Statuses
- Not in progress – nobody is working on the task yet
- In progress – task accomplishment is under the process
- On hold – task was set on pause
- Completed – tasks with no Remaining work
- Removed – tasks with removed assignment
- Non Completed – unites next statuses: “Not in progress”, “In progress”, and “On hold” statuses
Note on “On hold” status behaviour:
When logging hours for a task with the “On hold” status, the system will now prompt you to confirm whether you want to change the status to “In Progress”.
The “On hold” status will be removed automatically only if the task or assignment becomes “Completed” during that action.
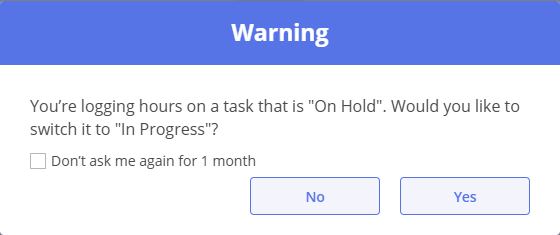
Screen #6 – Warning message
Screen #7 – Task List – Stages
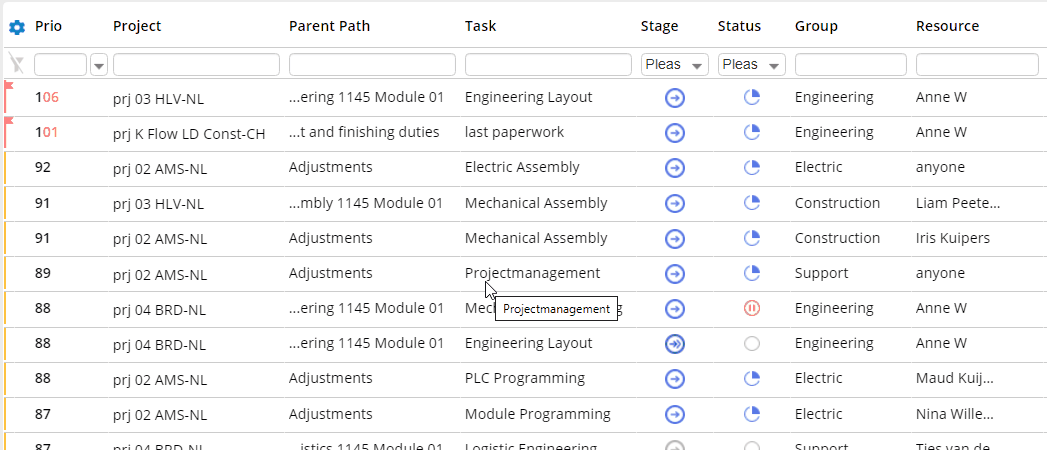
If you would like to get a short information description about the related tasks, just hover over your mouse cursor over the stage icon.
Screen #8 – Task List – Next tasks in the chain
Please note, that for the “Upcoming” and “Not Ready to start” tasks additional information frame will contain a list of tasks which blocks the current one.
Screen #9 – Task List – Blocked By
Chain Contributed to Priority
You have the possibility to see an overview of the items that contribute to the priority of the item you’re checking. You can do this by hovering over the item’s priority.
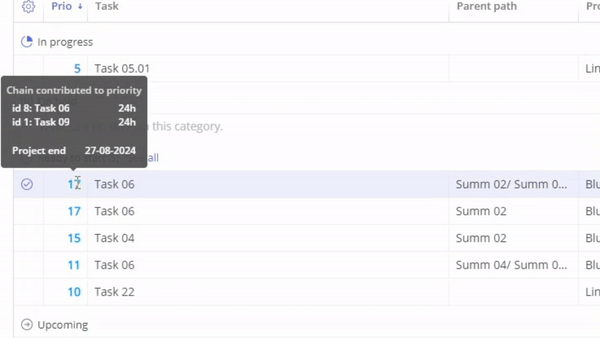
Screen #10 – Task List – Chain Contributed to Priority
Manipulation with Tasks
Creation
In addition to integration with the external systems Epicflow provides functionality to create and manage tasks directly internally in the system.
- Navigate to the “Task List” page and press “+ Create new” link located at the top right corner.
Screen #11 – Task List – New task creation
- To finish Task creation next fields are required to be specified:
- Task name
- Project for which is task was created
- Assignee or multiple one if required
- Total and Remaining work estimation
- Predecessor and Successor
- Notes
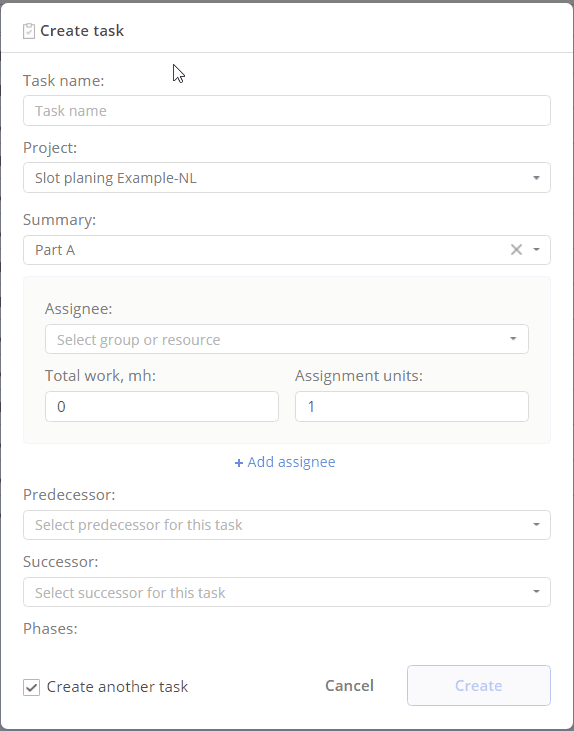
Screen #12 – Create task
- As soon previous step is finished press “Create” button to save the changes.
Reporting Progress
Progress on task accomplishment is measured in decreasing of Remained hours estimation.
To update the Task Progress you would need to change value of Remaining hours. Press left mouse button on the appropriate value of Remaining hours to start its editing.

Screen #13 – Tasks Progress Update
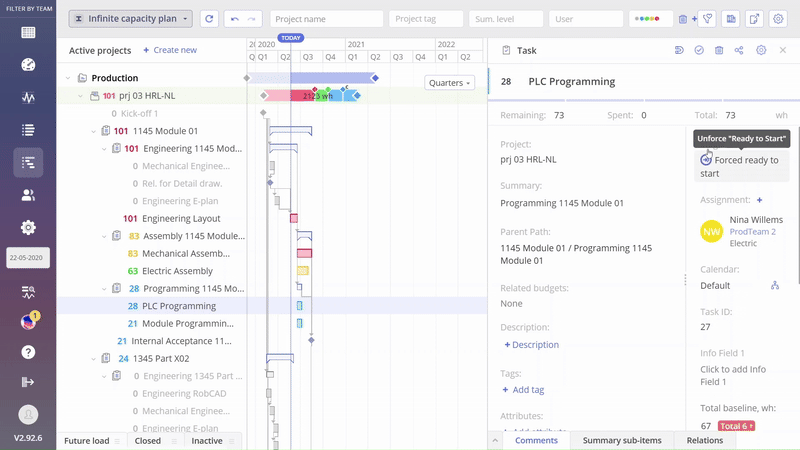
Force Ready to Start
In Epicflow, if you have the appropriate permissions, you can change a task’s status from “Upcoming” to “Ready to Start.” This can be useful in certain situations. For example, in a construction project, a task like “Start building the foundation” might be marked as “Forced Ready to Start” even if material delivery is delayed. This allows the team to begin setting up equipment while waiting for the materials to arrive.
Force a Task to be Ready to Start
- Open the task card.
- Hover over the task stage.
- Click “Forced Ready to Start
Screen #14 – Force Ready To Start
As a result, the task will be marked as “Forced Ready to Start,” indicating that it was manually set to this status. It will appear on the user’s task list under the “Ready to Start” category. Additionally, this action may cause the task to be predicted earlier in the “Prediction Planning” type.
This action can be undone.
Unforce Task To Be Ready to Start
- Open the task card.
- Hover over the task stage.
- Click “Unforce”.
Screen #15 – Unforce Ready To Start
A a result the task will disappear from the “Ready to Start” category on the user’s task list and reappear under the “Upcoming” category. Additionally, it may be predicted later in the “Prediction Planning” type.
Features of working with UCLT
Un-Compressible Lead Time (UCLT) is the time required for a task that cannot be reduced or sped up, regardless of the resources applied. This feature is used to record the necessary duration for actions that inherently take a fixed amount of time. For a better understanding, consider the time it takes for concrete to cure and harden. No additional resources can speed up this process.
When editing hours of a task assigned to UCLT Group, it must be remembered that any changes should be a multiple of the declared hours of one working day.
Examples:
- Example: Working hours are specified as 8 hours. This means that it won’t be possible to report 12 hours in a UCLT task. Instead, it will be rounded to 16 hours.
- Example: Working hours are specified as 8 hours. This means that it won’t be possible to report 5 hours in a UCLT task. Instead, it will be rounded to 8 hours.
From another side concept of UCLT tasks does mean that system automatically register progress on such tasks fulfillment each day and no manual update is required.
End Date Adjustment
The end date of a UCLT task can be adjusted, which may either shorten or lengthen the total hours, thereby affecting the duration of the task.
To adjust End Date of UCLT Task with Status “In Progress”, please follow these steps:
- Access the Task Card of the UCLT Task.
- Click on the assignment.
- Adjust the End Date.
- Click the ‘Save’ button to save the changes.
Example
- Initial State: Today’s date is 16.06.2020. The original task duration is 1 day, ending today, with a total of 8 hours for the UCLT task.
- Action: The task end date is changed to 19.06.2020, extending the task duration to 4 days.
- The system will automatically recalculate the remaining hours based on the new duration: 4 days * 8 hours = 32 remaining hours
You can see this example visualized below on Screen #13 – UCLT Task End Date Adjustment.
Screen #16 – UCLT Task End Date Adjustment
Note that adjusting the end date will only impact the remaining hours and is limited by the time already spent on the task. You can also manually update the “Spent” hours directly on the task card. When you update the ‘Spent’ hours, the system will automatically adjust the task’s end date to reflect the new ‘Remaining’ hours.
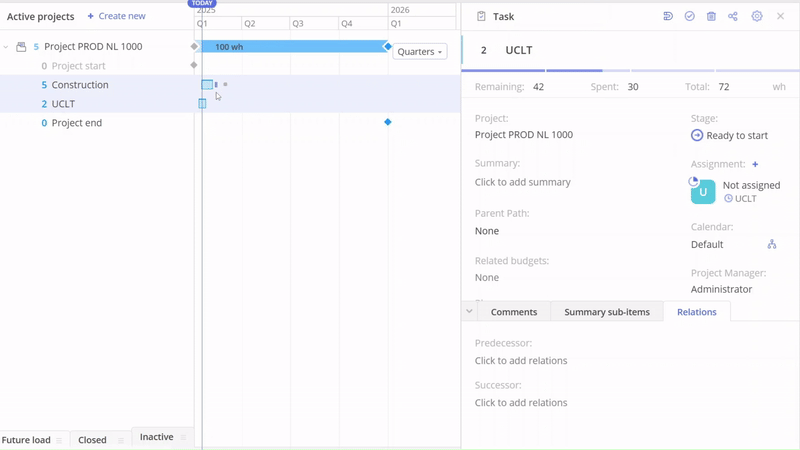
UCLT Tasks with Spent Hours: Impact of Adding Predecessor Tasks on Hours and Timeline
If a predecessor task is added to a UCLT task that is already in progress, the system will automatically reset the task’s “Spent” hours. After this action, a warning will appear indicating that the task is now blocked by the predecessor. This means:
- The spent hours will be reset to zero.
- A warning will appear indicating that the task is now blocked by the predecessor task.
- The task’s timeline will be recalculated, and the task will be effectively reset, which may impact its progress and related dependencies.
Example
- Before Predecessor Task Added:
- Total Hours: 72
- Spent Hours: 30
- Remaining Hours: 42
- Status: In Progress
- After Predecessor Task Added:
- Spent Hours reset to 0
- Total Hours reset to 72
- Remaining Hours reset to 72
- Status: Not In Progress
You can see this example visualized below in Screen #14 – UCLT Task Adding Predecessor Task
Screen #17 – UCLT Task Adding Predecessor Task
Difference between Spent, Remaining, Total
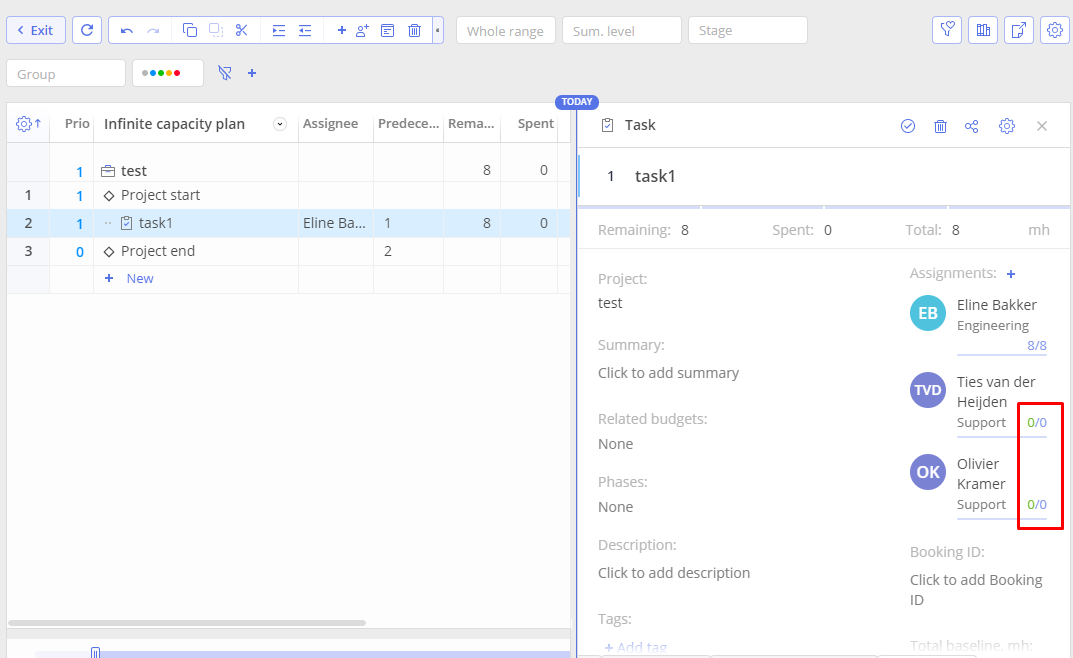
Each task is characterized by estimation of a time which is remaining for its fulfillment, already spent and total sum of such. It’s an essential part of the system and update of those values helps with project’s flow, impediments identification and priorities order.
Remaining is the number of work hours left to accomplish the task. You can modify this number, but please note that it will change the number of Spent work hours or Total.
Spent is the number of work hours that a resource has already burned to accomplish the task. If you increase the number of spent hours, Remaining hours will get reduced accordingly.
Total is the sum of Remaining and Spent work hours.
Closing
Once all the Remaining hours have been spent, the task will be shown as a completed one.
For JIRA and CSV integration in case of the task transfer to the “Done” state Epicflow automatically set Remaining hours to 0.
Tasks’ Assignment Manipulation
Assigning Resource or Group
- To change assigned Group for the task press right mouse button at the “Task List” page area and select “Change Group for this task” element of context menu. Type in Group’s name or select such from the appeared drop-down list.
Screen #18 – Change Group for the task
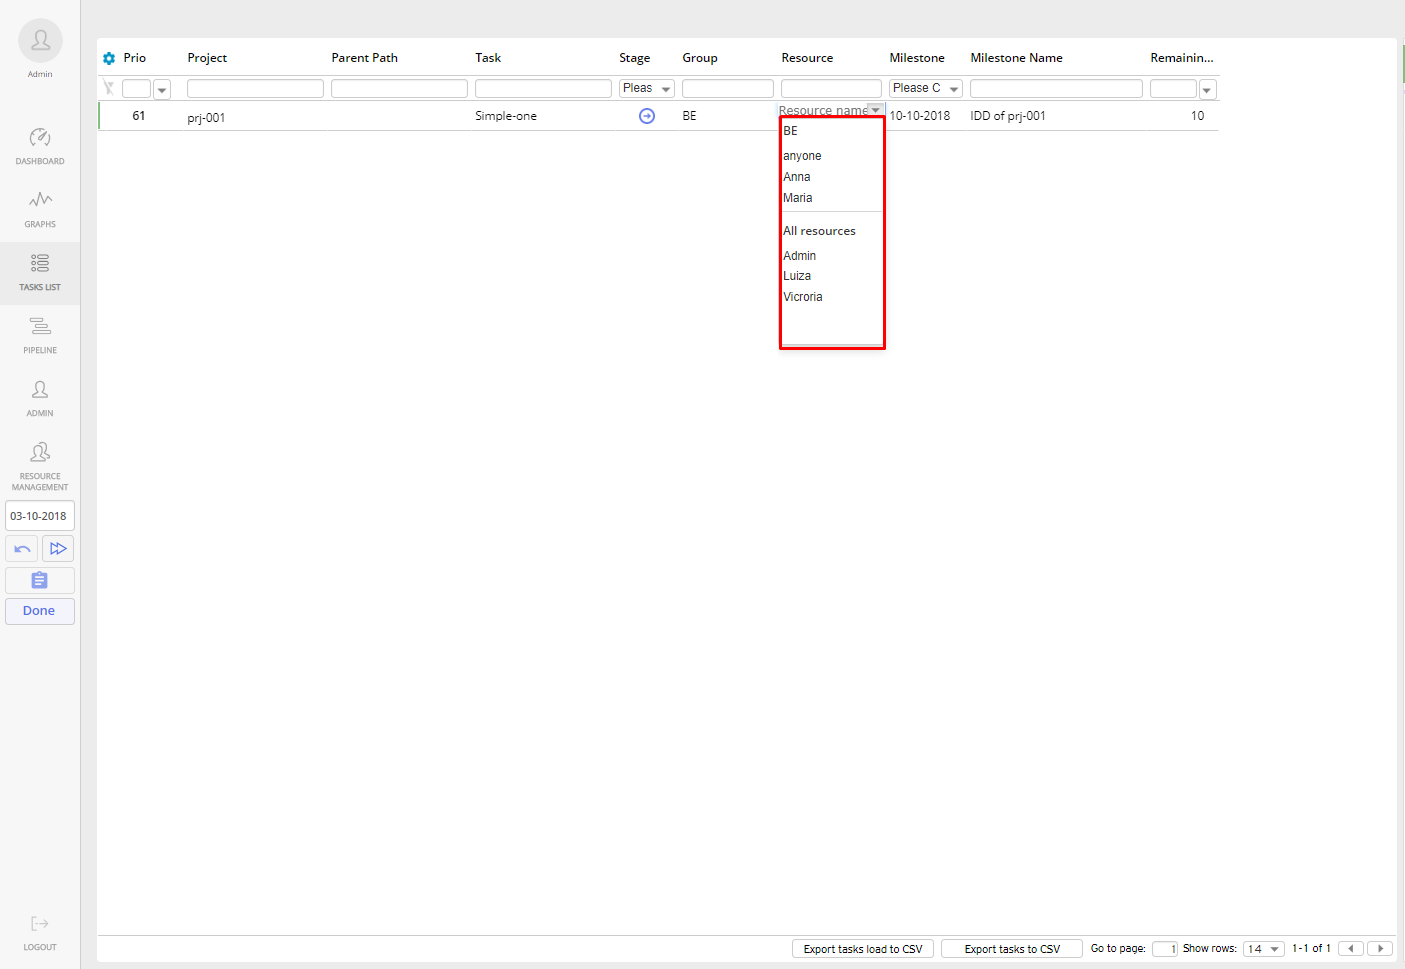
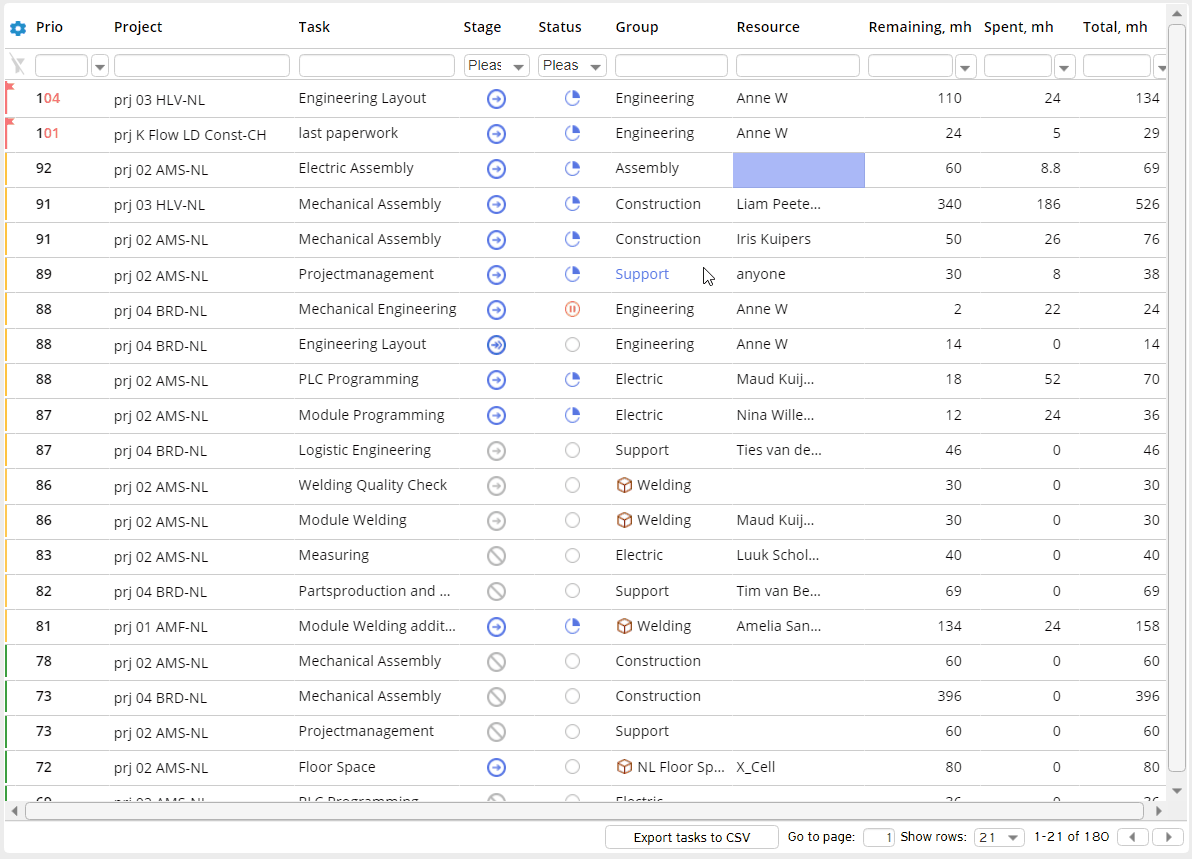
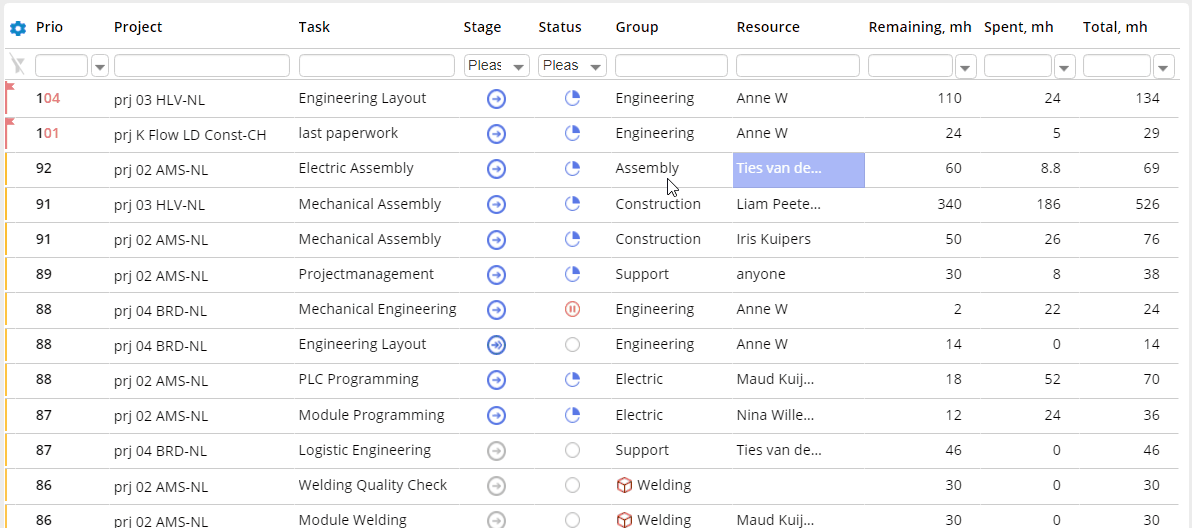
- To change assigned Resource for the task press right mouse button at the “Task List” page area and select “Change Resource for this task” element of context menu. Type in Resource’s name or select such from the appeared drop-down list.
Screen #19 – Change Resource for the task
“Esc” or left button click anywhere at the page will cancel the change Resource action.
Instead of any particular Resource assignment user can select “anyone” option from the appeared drop-down. It does mean that anybody from the specified Resource Group, who is available, is defined to carry our the task.
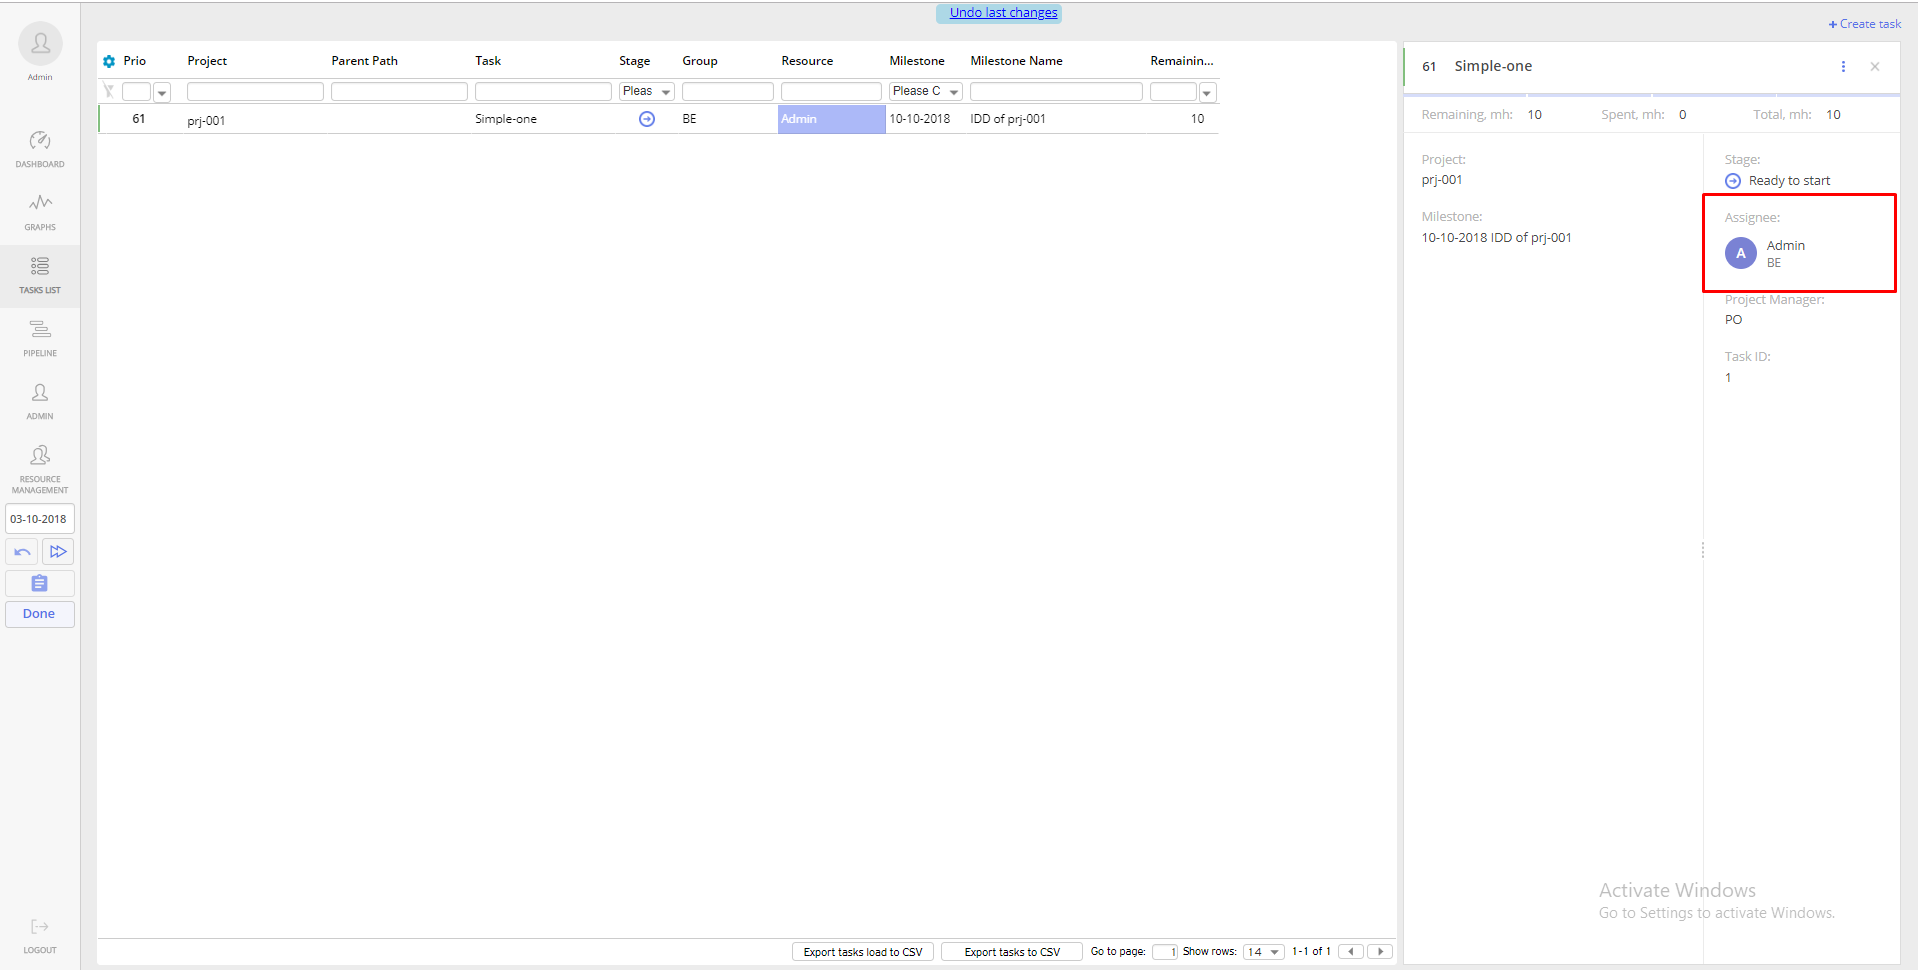
Also reassignment and view of the assigned resource can be done via direct display assignment option.
Screen #20 – Change \ Reassign Resource for the task
Not estimated assignment
Consider assigning a task to several resources for which the total number of working hours is zero.
Screen #21 – Assignments with 0 total working hours
If assigning resource doesn`t have free working hours or when adding you specified it zero, then not estimated assignment is shown in Recently completed section in Personal task list

Screen #22 – Not estimated assignment section
Out of group Assignment
It’s a mechanic which allows you to assign a resource from the different groups than a specified for the task accomplishment.
Such approach can be useful when engineers of the specified group experience lack of capacity or lack of skills, or they are simply overloaded and occupied for a different tasks. At another hand, to complete this task we would like to use resource of another group.
Suppose that the resource “Admin” has the skills to perform the task set in front of the “BE” group but he is not a part of that group. Also resources of “BE” group are not in position to work that task and to work it out we are going to involve “Admin” and for that we are going to reassign it on it.
When you go to the Task list page and right-click on the necessary task, a drop-down menu will appear with the “Add resource to this task” item we need.
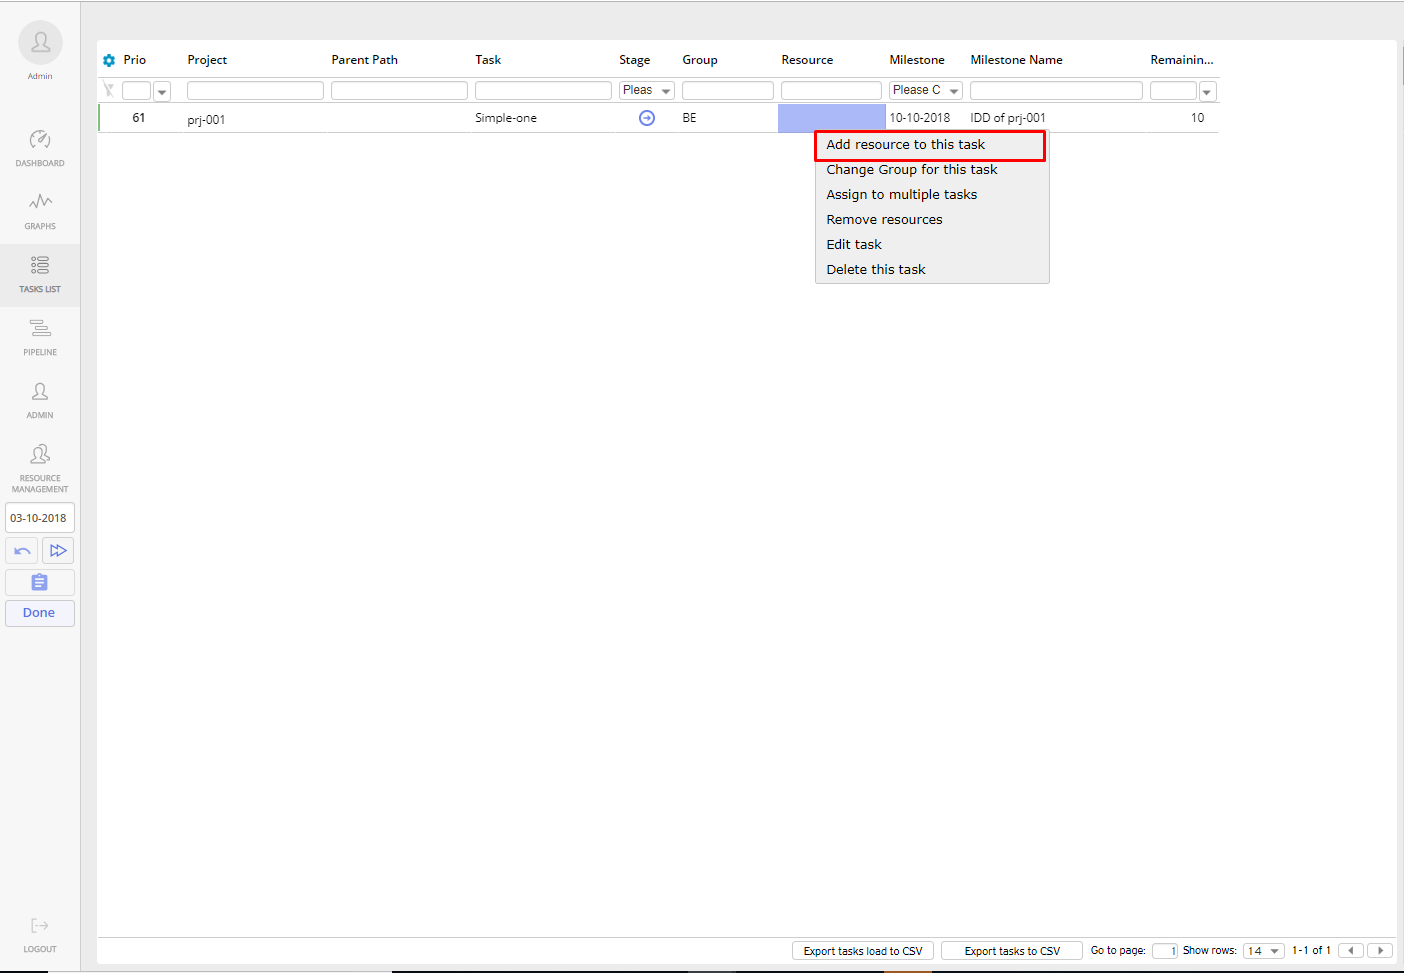
Screen #23 – Task list – adding resource drop-down menu
By selecting this item, you will see a list of available resources for assignment with the primary assigned group at the top of the list.
Screen #24 – Task list – resource list
We are interested in the resource “Admin”. By selecting it, we see that it is now indicated in the task card. However, the execution group is still considered “BE.”
Screen #25 – Task-card – out of group assignment
Note that with such approach the Load created by this task will be evenly distributed among all groups in which the “Admin” resource is allocated and excluded from BE group.
Screen #26 – Task List – out of group assignment
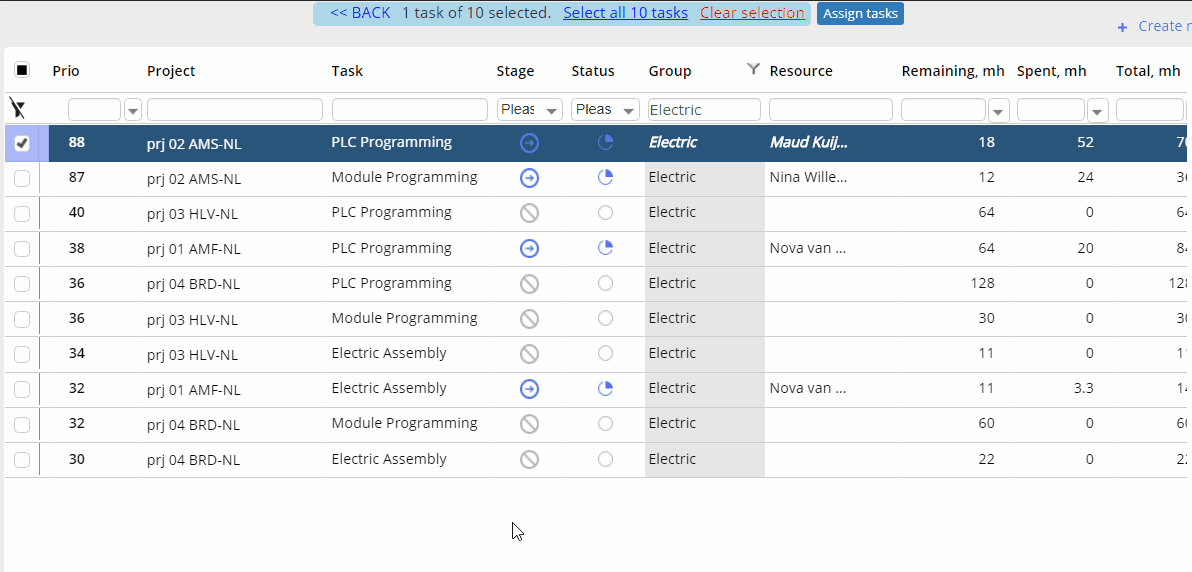
Assigning to Multiple Tasks
- To assign to multiple tasks press right mouse button at the page area and select “Assign to multiple tasks” element of context menu.
For identification of the selected for multiple assignment action assignee’s name will be highlighted on hovering. Also in “Assign to Multiple” mode, you’ll see template Assignment Group and Resource emphasized with bold and cursive(italic) fonts.
Please note that
- If you “right click -> Assign to multiple” on assignment WITH Resource, then Group + Resource for this Assignment will be used in Multi-Assign mode.
- If you “right click -> Assign to multiple” on assignment WITHOUT Resource, then you’ll see Resource dropdown in corresponding line in Resource Column.
- If you “right click -> Assign to multiple” OUTSIDE of Resource/Group Assignments (even in other columns), then first Assignment will be used.

Screen #27 – Assign to Multiple tasks
In newly appeared window remove unnecessary filters and select those tasks for which multiple task assign must be performed
Screen #28 – Assign to Multiple tasks Scope Selection
Be ware that multiple assign works in accordance to next Rules:
- if any of task’s assignment of the selected task already has assigned The Resource (for any of the group) nothing will be changed in it.
- If all of task’s assignment contains no group that we’ve specified on multiple tasks assignment selection (first line, cell group) nothing will be changed.
- If any of task’s assignment contains a group that we’ve specified on multiple tasks assignment selection (first line, cell group) and task has empty assignee The Resource will be assigned to it
- If any of task’s assignment contains SEVERAL groups that we’ve specified on multiple tasks assignment selection (first line, cell group) and we have specified NO additional filter (for resource name) then The Resource will be assigned to the first empty task assignment of the corresponding group.
- If any of task’s assignment contains SEVERAL groups that we’ve specified on multiple tasks assignment selection (first line, cell group) and we have specified additional filter (Resource name), then The Resource will be replaced accordingly to set criteria.
Bulk Group Assignment
Bulk Group Assignment provides possibility to reassign a set of tasks from one group to another.
Please note that availability of this functionality for the scope of tasks is defined by granted permissions “Change Group assignments for all groups” and “Change Group assignments for your groups” accordingly.
- To apply Bulk Group Assignment press right mouse button at the page area and select “Bulk Group Assignment” element of context menu.
- As next step you would need to specify criteria of bulk group assignment in newly appeared frame.
Screen #29 – Bulk group Assignment
- Please note that such actions can be undone via selection “Undo last changes” option at the top of the screen.
Removing assignment
- To remove Resource for the task press right mouse button at the page area and select “Remove Resource” element of context menu.
Screen #30 – Remove Resource
Exporting tasks into CSV
- Press “Export tasks to CSV” button, located at the bottom of the Task List page, to export all tasks to the csv file.
Please note that scope of tasks for import is defined by applied filter settings.
You may also be interested in how to work with Budget Tasks. Please refer to this article for more information.