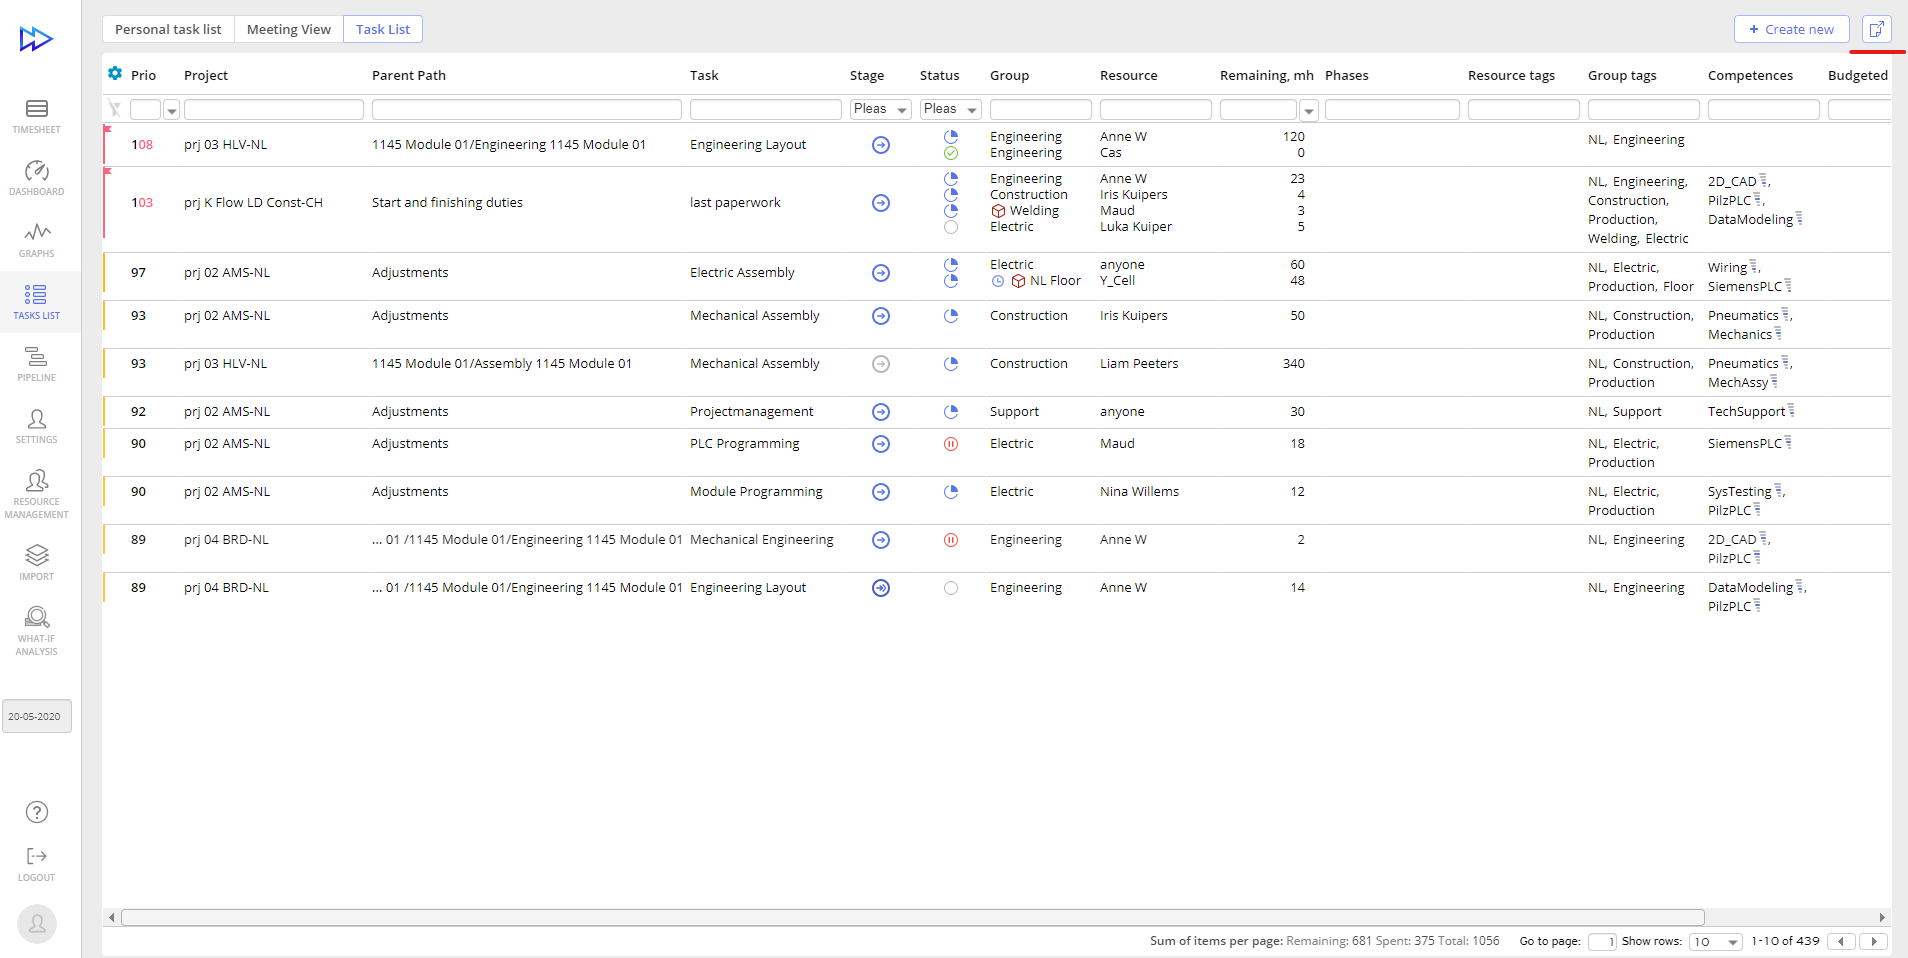
Task List is a feature of Epicflow that optimizes the work on multiple projects by prioritizing tasks across them.
It brings high priority tasks to the top showing if the deadlines are met or indicating the task’s delay by the number of days. Task List allows you to see if your team members can meet the deadline and what tasks require special attention.
- To open to the “Task List” page select the third menu item from the top – TASK LIST.
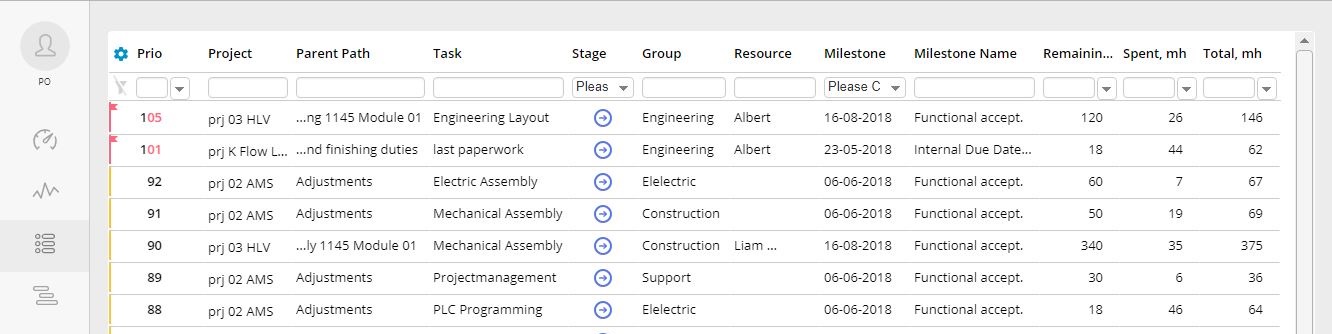
Screen #1 – Tasks List
Task Priority Essence
Task priority calculated based on the amount of Remaining work and the time left for task completion until the next milestone in accordance with the Top Critical Chain where this task belongs to.
The highest priority in the Task List tells you about the feasibility (delivery) of the task.
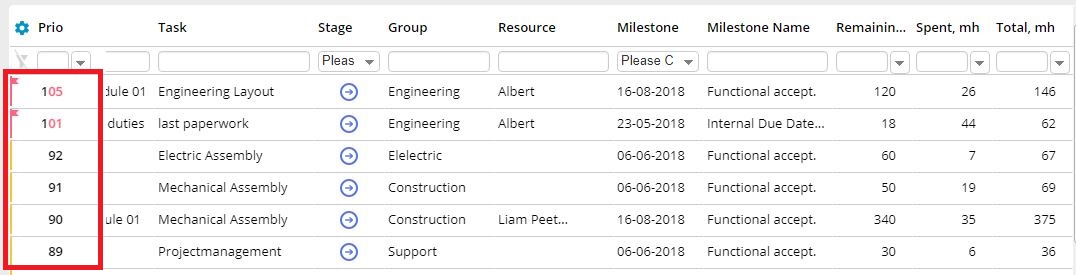
Screen #2 – Task Priorities
Priorities are with means of numbers from zero to one hundred and more. The following numbers will help you instantly get information about the projects that require closer attention.
0 – 50 indicate that you’ll most likely deliver the project on time according to your plan
80 implies that your project still has a 20% buffer, so you’ll most likely meet the deadline
100 shows that you will deliver the project on time, but you don’t have a buffer for it, so on-time delivery is possible only if you don’t depart from the plan
101 means there’s one day delay, so you won’t be able to deliver the project on time even if you follow the plan
> 100 shows how many days your project gets delayed. Each additional point indicates a day in the project delay.
By hovering over the Task whose Priority is over than 100 Epicflow will display how many days you are late for today. In addition, the chain of tasks contributed to priority is displayed as well in a pop-up message to the right from the cursor.
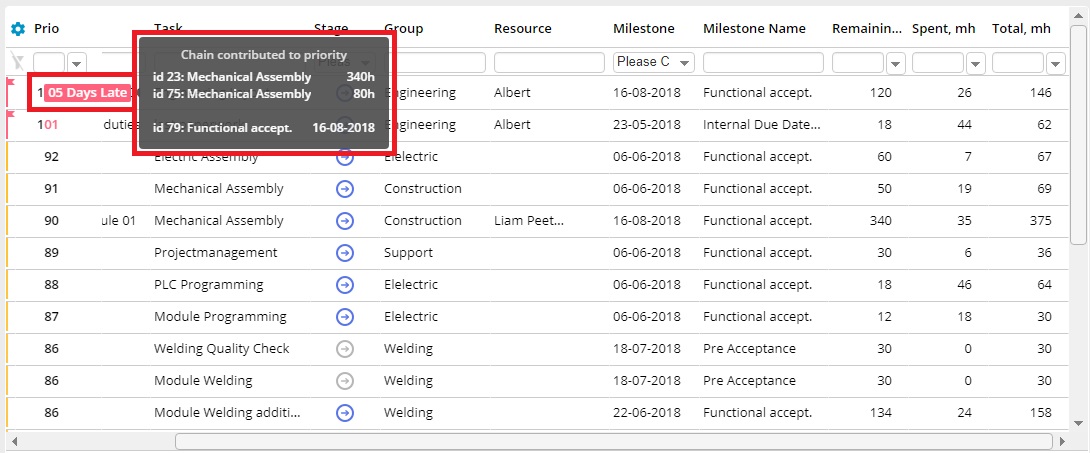
Screen #3 – Chain of Tasks Affecting the Priority
Task List Elements
This part contains a general description of elements and actions that can be performed at the Task List page. However, this list is incomplete, so refer to the corresponding Wiki article for details.
- To change a set of displayed columns and customize personal view, press the “gear” icon and select the items you would like to add to / remove from the page.
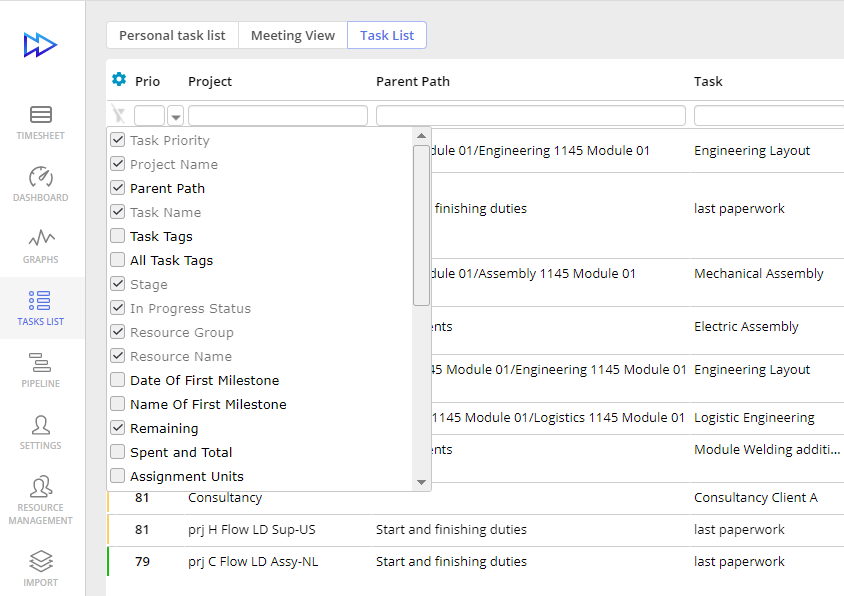
Screen #4 – Task List – Adding New Columns
The grey columns on the picture above (Task Priority, Project Name, Task Name, Stage etc.) are displayed by default, so you cannot hide them.
- Click on the Export icon located at the top right corner of the page to export all tasks to the CSV file.
Screen #5– Task List – Exporting Tasks to CSV
- To change the assigned Group for the task press the right mouse button at the page area and select the “Change Group for this task” element of the context menu. Type in Group’s name or select it from the drop-down list.
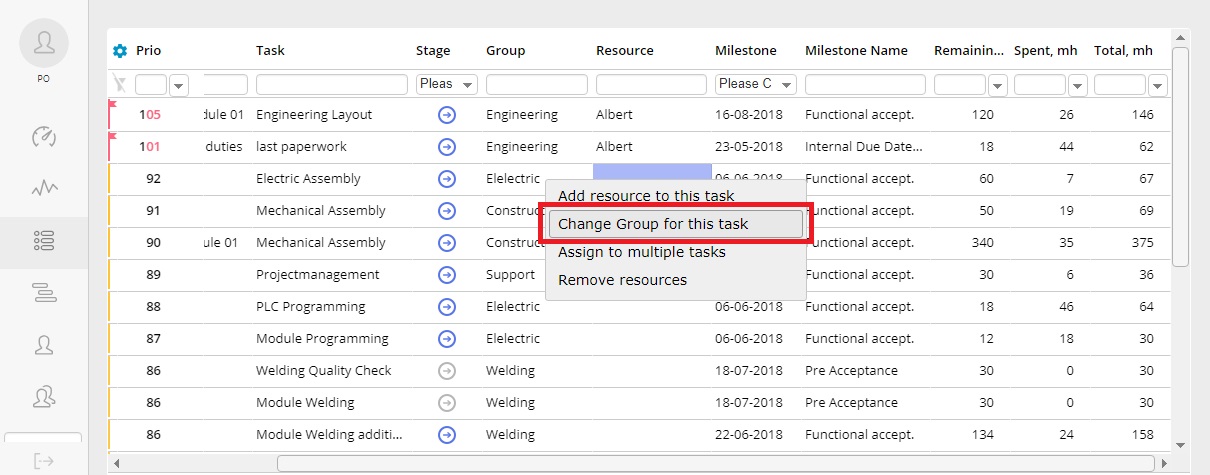
Screen #6 – Task List – Change Group for the Task
- To change the assigned Resource for the task press the right mouse button at the page area and select a “Change Resource for this task” element of the context menu. Type in Resource’s name or select it from the drop-down list.
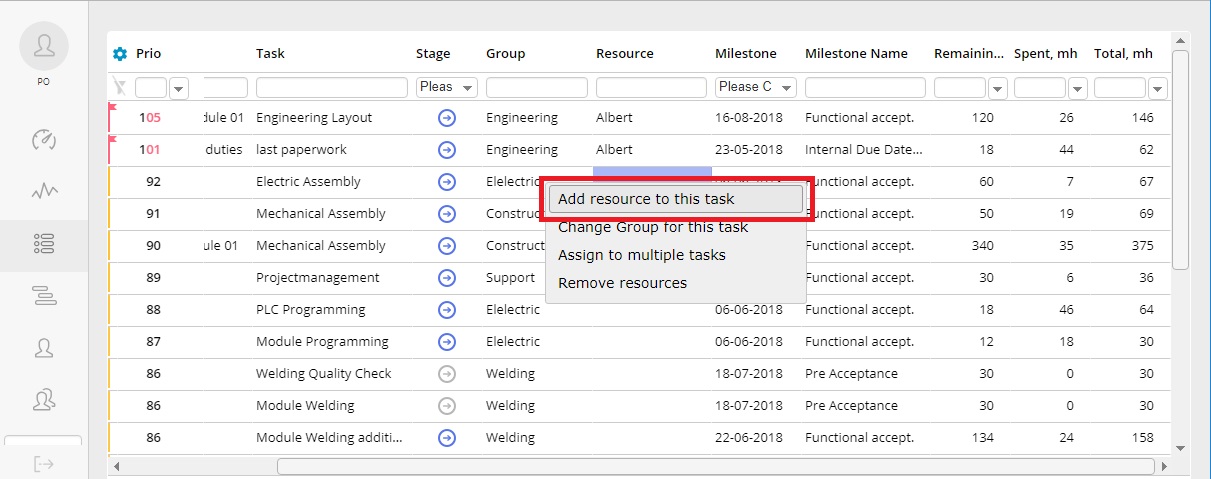
Screen #6 – Task List – Adding a Resource to the Task
- To assign a resource to multiple tasks
- click on the right mouse button at the page area and select the “Assign to multiple tasks” element of the context menu,
- Set criteria to filter out all tasks and shrink the scope of tasks to which multiple assignment action will be applied,
- Set checkbox for the tasks for which you want to apply multiple assignment and apply the changes.
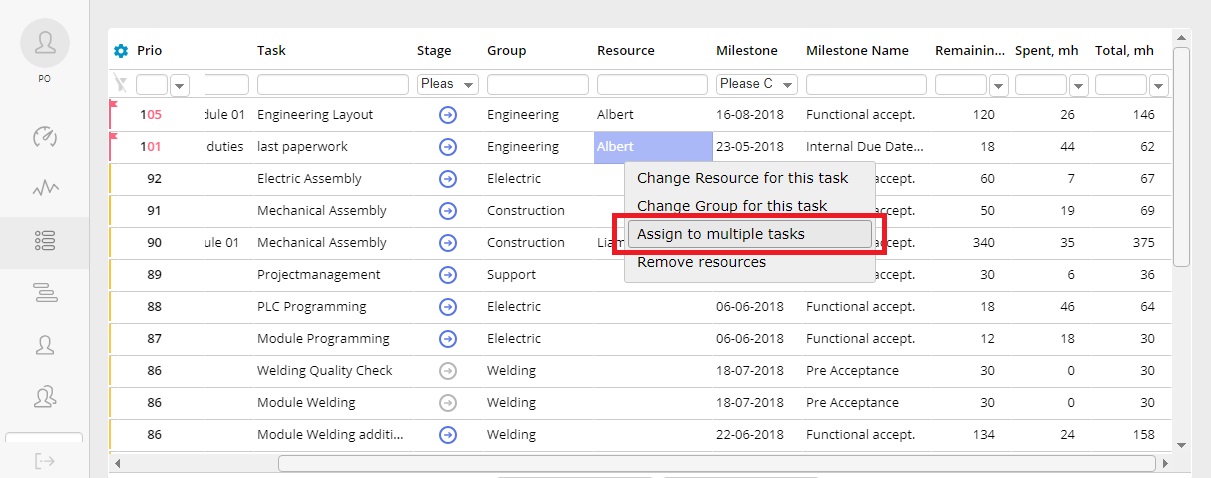
Screen #6 – Task List – Assigning to Multiple Tasks
- To remove a Resource for the task press the right mouse button at the page area and select the “Remove Resource” element of the context menu.
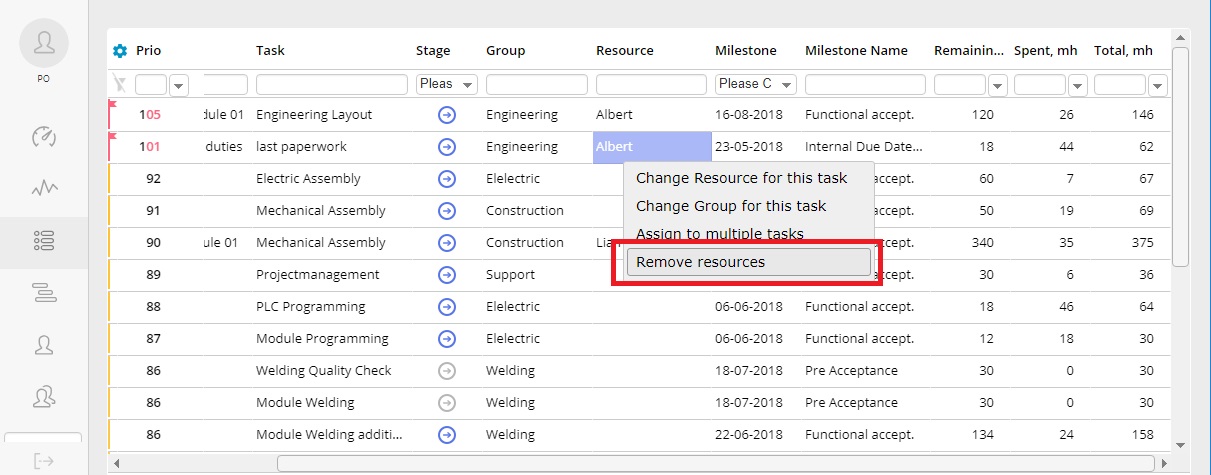
Screen #7 – Task List – Removing Resources
Columns
- Task Priority is the first column and it is visualized with the help of numbers. The value of the element starts with 0 and goes up to any positive value. Starting from 100, however, each additional point indicates days of project delay in the chain of tasks.
- The project Name column is the description of the project the task belongs to.
- Parent Path provides a summary description (if applicable). In the Task List Group View, you can choose left or right text alignment and sort the ‘parent path’ column in ascending or descending order.
- Task Name indicates the task name accordingly.
- Task Tags indicate only tags of the task.
- All Task Tags additionally to Task Tags also includes tags inherited from the Summaries above.
- Stage column identifies if the tasks are
- Completed
- Not estimated
- Ready to start
- Upcoming
- Not ready to start.
You can filter the task list accordingly using the Stage dropdown.
- Status
- Not in progress
- In progress
- On hold
- Completed
- Removed
- Non Completed
You can filter the task list accordingly using the Status dropdown.
- Resource Group column refers to the group of resources that should execute the task.
- Resource Name is a column that sorts the names of employees who worked or will work on the tasks. A right-click on the task will show you a drop-down list that provides you with an opportunity to:
- Change a resource for this task.
- Change a group for this task.
- Assign to multiple tasks.
- Date of the First Milestone and Name of the First Milestone columns indicate the following milestone for the task chain starting from the current task.
- Remaining is the number of work hours left to accomplish the task. You can modify this number, but please note that it will change the number of Spent work hours or Total.
- Spent is the number of work hours that a resource has already used for task execution.
- Total is the sum of the Remaining and Spent work hours. It can also be shown in relation to the currently applied filter.
- The budget Name column shows budget tasks.
- Project Id – Project Id in the external system
- Task Id – task’s ID in the external system.
- Project Manager – a manager of the project if it’s specified from the external system or in Epicflow
- Team Lead Engineer * (Custom field) – Team Lead Engineer field can be used with MS Project integration by using a custom field “Text 21”.
- Info Field 1 * (Custom field) – a field that can be used with MS Project integration by using the custom field “Text 22”.
- Info Field 2 * (Custom field) – a field that can be used with MS Project integration by using the custom field “Text 23”.
* You can name the Custom fields according to your needs at the system configuration side. Please communicate to Functional Application Manager with such a request.
- Phases – identify the phase to which the task belongs to.
- Description – contains a description of the task.
- Comment – comments can be added by engineers in the Epicflow system.
- Resource Tags – contains tags assigned to the assignee
- Resource Group Tags – contains tags of the assignee’s group
- Required Skills With Level – list of required skills for the task accomplishment
Epicflow also provides an opportunity to customize the Task List page by replacing and resizing the columns.
To this end, select or hide different columns to have them represented or placed in a certain order or resizing them accordingly.
Screen #8 – Task List – Adjusting the View