Milestones (ML) a major progress points which helps to keep focus over specific periods along a project timeline and they are crucial one for the project success as result. Nevertheless, such significant tool has its own limitation from the prospective of JIRA’s implementation.
JIRA doesn’t have a ML as a separate entity. Still, at conceptual level, it can be defined either as a property of Sprint, Releases, Project (Start/End date) or as a part of the task itself (Due date). Such approach doesn’t support idea of transparent planning building up and maintenance.
As result in Epicflow any Milestone, in connection to JIRA, is representation of the next concepts:
- Start/End Milestones of the Project
- Milestones of the Sprint\Releases
- Milestones as a separately defined progress point in time. Lets call it Progress Point Milestone.
Start/End Milestones of the Project
Defining
In JIRA you are able to define the Start and End date of the current Sprint and Releases but there is no simple direct approach to set Start\End date of the Project. To overcome such limitation Epicflow calculates Project Start and End milestones basing on the plan of created Sprints\Releases and Backlog.
Project’s Start/End milestones information is always kept at Epicflow side and do not sync to JIRA.
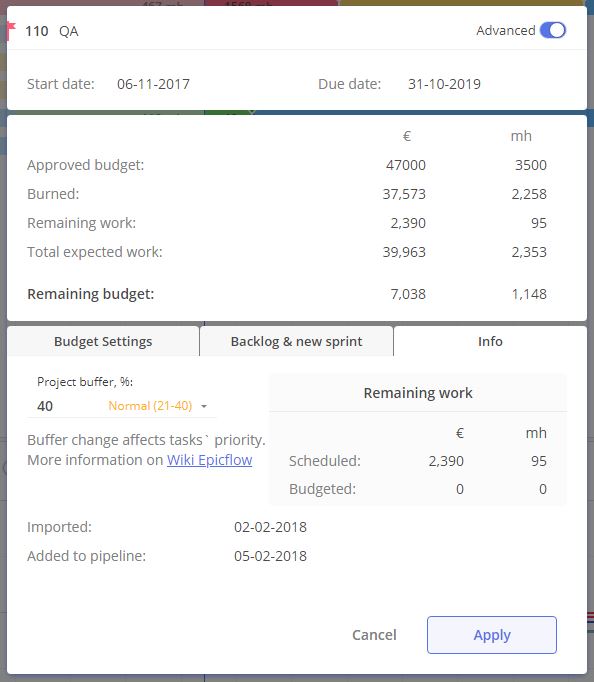
Screen #1– Project’s card
Editing
Editing of the corresponding date can be performed via:
- Project Card with Calendar item usage
- directly at Pipeline, by dragging Milestone or setting up new date for it from the context menu of such.
or
- via Milestone Card at Gantt chart
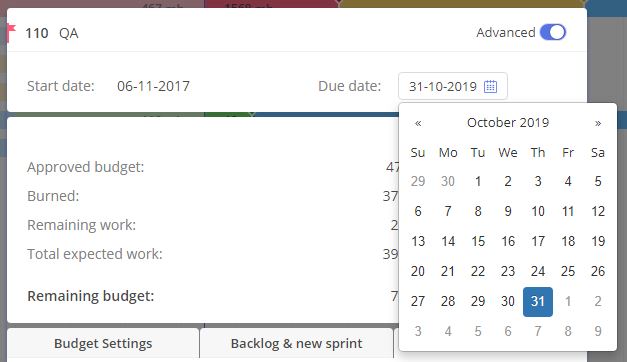
Screen #2– Project’s card – Start/End date adjustment
Screen #3– Project’s card – Start/End date adjustment at Pipeline
For editing via Milestone Card you need to
- open Gantt chart for the required project
- locate Project Start\End Milestone and select its name by left mouse click to have Milestone Card appearing at the right corner of the screen
- change accordingly any required information such as:
- Milestone name
- Deadline
- Phases
- Tags
- Description
- Relations and Comments
Screen #4– Project’s card – Start/End date adjustment via Milestone Card
Removing
In next releases will be added functionality to clear End Project date. At this option selection Epicflow automatically recalculates Project End date accordingly to the plan.
Screen #5– Project’s card – Start/End date Removing
Milestones of the Sprint\Releases
Defining
Sprint or Release can be created either in Epicflow or in JIRA directly.
In Epicflow
To create Sprint or Release in Epicflow:
- select “Create Phase” option from the Project’s menu
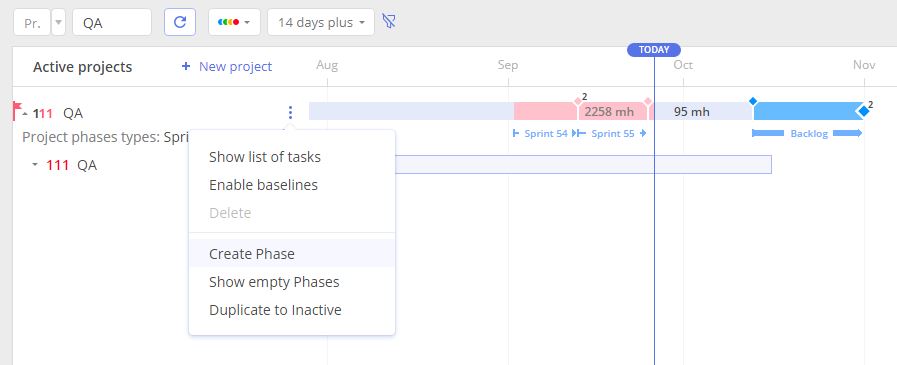
Screen #6 a.– Sprint/Release creation
- define in newly appeared window
- Phase type (Sprint or Release)
- Start End dates
- Phase name
Please note, that in case if Start\End date remains undefined such will be defined as Project’s Start and Project’s End MLs. In result it will lead to phase creation with duration of whole project length.
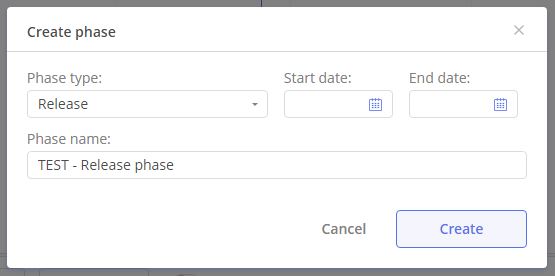
Screen #6 b.– Sprint/Release creation
Keep in mind, that created in such way Sprint, by default is in the Status “Not in progress”. Which does mean that it’s defined in JIRa as a Future sprint, without any dates specification. Due to such JIRA limitation, dates synchronization is supported only for the active or closed Sprints – with Status “In progress” or “Completed” at Epicflow side. In opposite case all dates are stored at Epicflow side only.
In JIRA
This tutorial does not cover questions related to JIRA Software in full scope. So, in case of necessity, do not hesitate refer to official documentation to learn how to use Sprints in JIRA or Releases.
When Sprint is created at JIRA side and tasks are added to such, for the Active sprint Epicflow performs read out of all required information. From another side, for the Future Sprints, Epicflow predicts dates accordingly to configuration at Project Card -> “Backlog and new Sprint” tab.
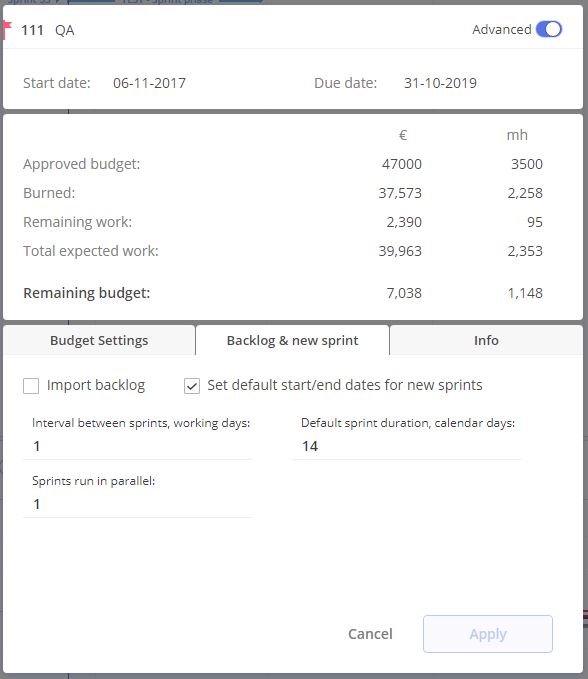
Screen #7– Project Card – Backlog & new sprint
This settings defines default parameters for newly appearing sprints. However, Project Manager can reconfigure any particular Sprint accordingly to the needs.
Epicflow provides next configuration options:
- Import Backlog – defines either would you like to have all tasks from backlog imported to the project and placed under the separate phase “Backlog”
- Set default start/end dates for new sprints – turning on\off automatic Start\End dates recalculation for newly appearing Sprints
- Interval between sprints, working days – in accordance to Agile methodology you may want to define a period for some planning or organisational activities which is not usually required to be planned or be a part of the project itself. This parameter defines pause interval between Sprints if such is required.
- Sprints run in parallel – At some conditions you can have several active sprints defined simultaneously at JIRA side, so this parameter can help you to configure it out.
- Default sprint duration, calendar days – default duration for the future Sprints defined at JIRA side.
Editing
Editing of the corresponding date can be performed either at:
- JIRA side
or
- directly at Pipeline
- from the Phase’s configuration window
- by dragging Milestone itself or setting up new date from its context menu
This tutorial does not cover questions related to JIRA Software in full scope. So, in case of necessity, do not hesitate refer to official documentation to learn how to use Sprints in JIRA or Releases on questions related to Sprints and Releases editing.
Phase configuration
For Sprint release editing from the Epicflow side
- navigate to the Pipeline page
- expand Gantt chart for the particular project and locate required Sprint\Release
- hover over the phase you mouse cursor and in appeared menu select “Edit” option
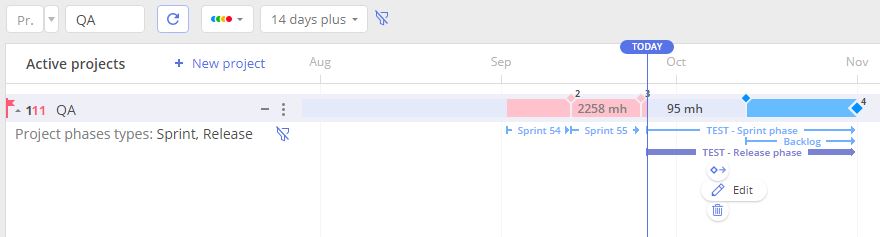
Screen #8– Sprint/Release editing
- in newly appeared window you can adjust
- Start/End date
- Phase name
- Phase status:
- Not in progress – status indicates future Sprints which are not started yet at JIRA side
- In progress – starts the Sprint at JIRA side setting up it as active one
- Completed – closing up the Sprint
Phase type is unchangeable and cannot be adjusted after phase creation.
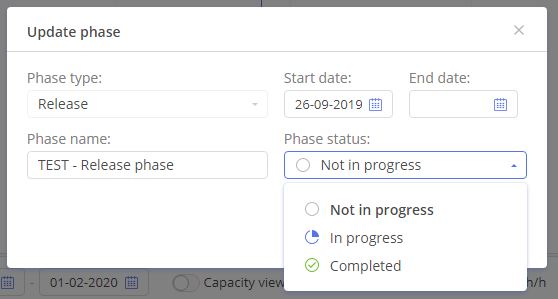
Screen #9– Sprint/Release editing
Phase positioning
In additional to previously described highly detailed configuration you also can swiftly change positioning of the Start\End Phase date by dragging it.
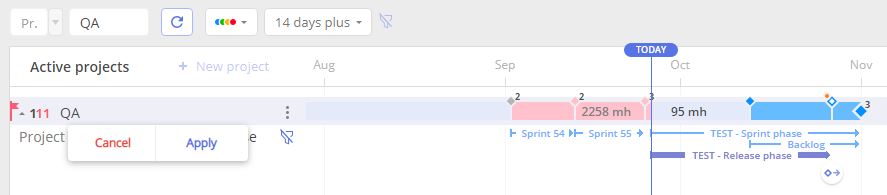
Screen #10– Sprint/Release Start/End date editing
The same dragging action can be performed to Release or Sprint itself by using phase arrow element itself instead of Start/End milestones.
Removing
As any previously described action Removing(Deletion) of the corresponding Phases can be performed either at:
- JIRA side
or
- directly at Pipeline page of Epicflow system
This tutorial does not cover questions related to JIRA Software in full scope. So, in case of necessity, do not hesitate refer to official documentation how to Delete Sprint or Remove Release.
From prospective of Epicflow to delete any phase you need to
- navigate to the Pipeline page
- expand Gantt chart for the particular project and locate required Sprint\Release
- hover over the phase you mouse cursor and in appeared menu select “Delete” option
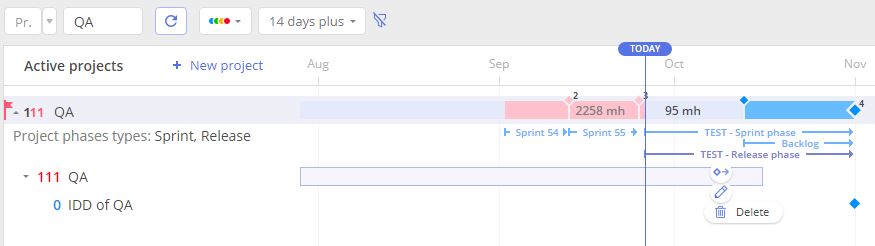
Screen #11– Sprint/Release deletion
Please note that on your confirmation phase with all tasks in such is going to be deleted.
Progress Point Milestone
Defining
At first part of this document we have distinguished MLs by three types and agreed that Milestone as a separately defined progress point in time will be called as Progress Point Milestone.
Also we have highlighted limitation from JIRA side that it doesn’t have MLs as a separate entity,and that is the reason why Progress Point MLs can be created and stored only at Epicflow side, without backward synchronization to the JIRA environment.
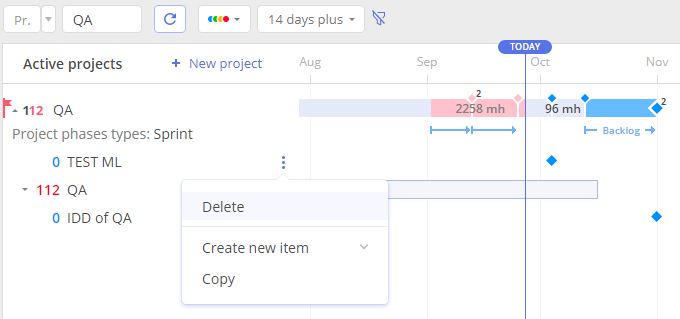
So to create stand alone ML
- navigate to the Pipeline page
- expand Gantt chart for the particular project
- call for the menu by left mouse button click over “three dots” icon at the right side from required Summary or Task connection to which will be set
- and select “Create new item” -> “Milestone”
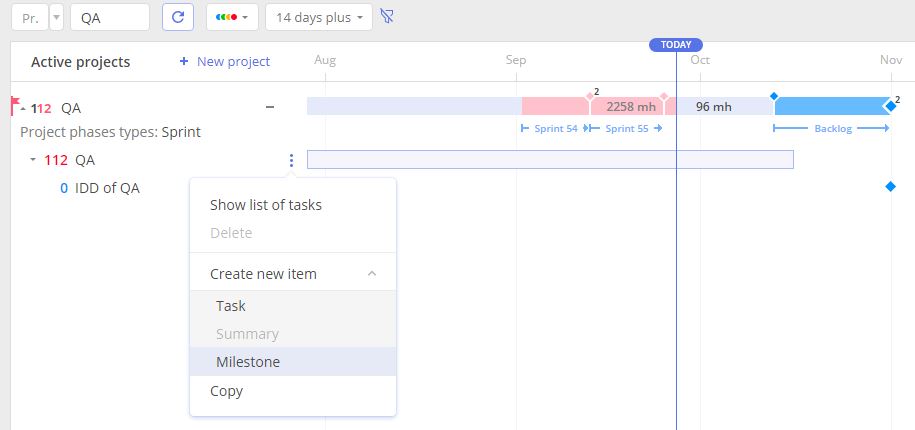
Screen #12 a.– Milestone Creation
- In newly appeared window please specify next fields:
- Milestone name
- Date at which ML will be set
- Project name – by default is the current one but can be changed in case of need
- Predecessor – identifies a link from before coming item (task, summary or another milestone)
- Successor – link to upcoming item
- Phase of which Ml is the part of
- After all required changes input finish the Ml creation by “Create” button selection.
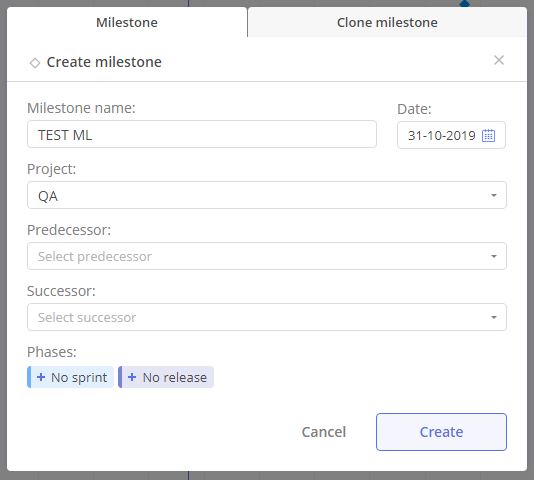
Screen #12 b.– Milestone Creation
Please note that you also can specify Inter-project relation. Still it’s not a part of the current topic, but do not hesitate refer to corresponding part of the wiki on this mater of question.
Editing
Editing of the corresponding date can be performed at Pipeline either:
- by dragging Milestone itself
- setting up new date from its context menu
or
- at Milestone Card’s fields
Speaking of dragging it can be used as for the Project’s pipeline or at Gantt itself. Jsut hold left mouse button over the milestone and set a new position for it after what release the button and confirm the action by Applying it.
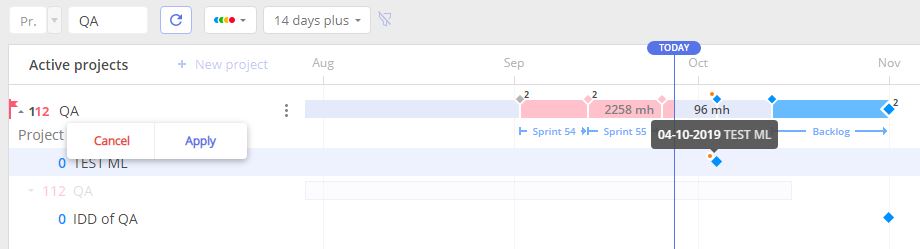
Screen #13 – Editing Milestone positioning by drag-&-drop
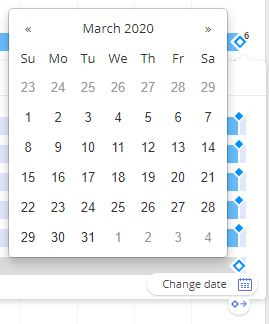
Additional approach with the context menu is for the case when you need to specify date precisely. For that
- hover over your mouse cursor over the milestone and on appearing options under select “Change date”
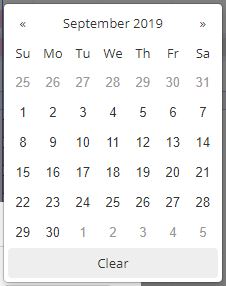
- specify new date in the calendar and confirm action by Applying it.

Screen #14 – Editing Milestone positioning via Calendar
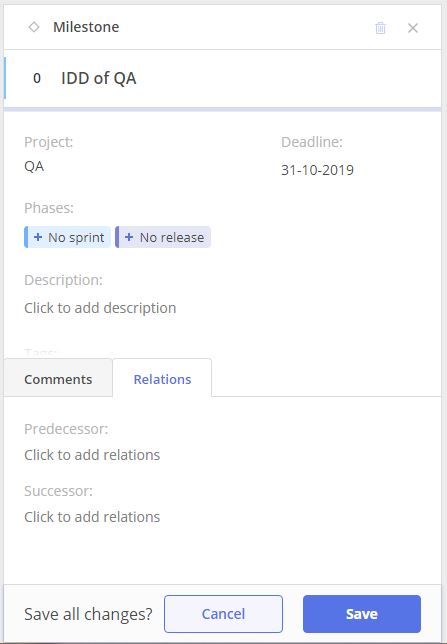
Last but not least is editing from Milestone Card. For that you need to
- open Gantt chart for the required project
- locate Milestone and select it by left mouse click to have Milestone Card appearing at the right corner of the screen
- change accordingly any required information such as:
- Milestone name
- Deadline
- Phases
- Tags
- Description
- Relations and Comments
and Apply changes.
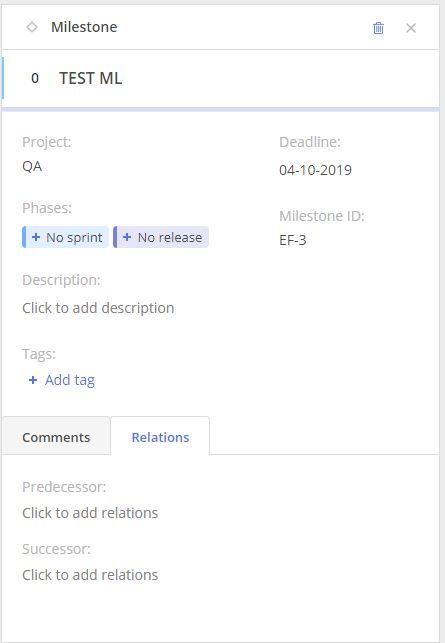
Screen #15 – Editing Milestone positioning via Milestone Card
Removing
Removing of the Milestone can be performed from Gantt chart:
- at Milestone Card by selecting delete icon at the top right corner
or
- by selecting “Delete” option from item’s menu
Screen #16 a.– Removing Milestone
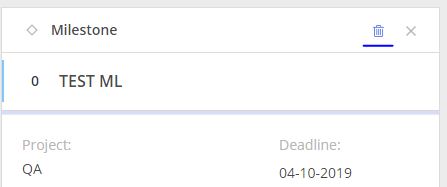
Screen #16 b.– Removing Milestone